


Why Read This Article?
Finish Nailer Repair - Replacing the Driver Guide (Ridgid Part # 79004001022)
Article Breakdown
Finish Nailer Repair - Replacing the Driver Guide (Ridgid Part # 79004001022)
Video
Tools & Materials
- Pick
- Small flat-head screwdriver
You can use our DeWalt parts finder to find chuck parts for your driver.
Replacing the Chuck
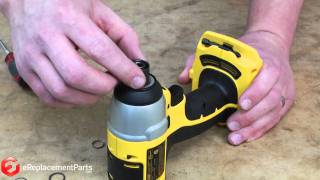
1. Remove the retaining ring
Use a pick and a small screwdriver to pry up one end of the retaining ring. Then pry it away from the drill.
2. Remove the chuck assembly
Remove the flat washer, spring, and chuck collar. There is a ball bearing in the driver's anvil. You do not have to remove this bearing, but be careful not to lose it.
With the tension removed from the bearing, you can tap the driver on your work bench to remove a broken driver bit if that's why you removed the chuck.
3. Install the chuck assembly
Slide the collar into place and add the spring and flat washer.
4. Install the retaining ring
Use a screwdriver to snap one end of the retaining ring into place. Then use another screwdriver or your finger to finish seating the retaining ring.
 [Back to Top]
Conclusion
And that's how you can remove or replace the chuck on your impact driver. This repair takes about 10 minutes and can be a life-saver if you get a bit stuck in your drill.
Remember to use our power tool parts finder to find replacement parts for your impact drivers and other power tools.
[Back to Top]
What We're About
