


eReplacementParts is proud to be the Preferred Partner of dozens of leading equipment brands that build the gear you love. That means our inventory and availability are unmatched, and in some cases, we are the exclusive parts providers for these brands for their OEM parts programs.
Ego Parts

We sell only genuine Ego ® parts.
Trusted Partner
?
OR
Popular Ego Parts

- Manufacturer Part Number:
- 3660582001
This is a single compression spring for a string trimmer. This spring is made of metal and can lose tension over time, in which case it will need to be replaced. To access this part, you will need to remove the head of the trimmer, which will expose a bolt, which will need to be removed so the compression spring can be slid off the shaft using your fingers. This is an OEM part sourced directly from the manufacturer.

- Manufacturer Part Number:
- 3705442002
This is a black metal lawn mower bag frame for EGO 20-inch and 21-inch plastic deck models. It cannot be used on the 20-Inch brushless steel deck model. The bag frame holds the grass catcher securely in place. This is the frame only; the bag is sold separately. This is an easy installation process that you can do yourself in just a few minutes. It is an OEM part, ensuring a perfect fit.

- Manufacturer Part Number:
- 2828646002

- Manufacturer Part Number:
- 2825267001
This is a single OEM rear wheel assembly for a lawnmower. It is a black wheel with a green stripe along the rim. This wheel features a single gear and an outer white ring gear. Be sure to remove the battery pack before servicing your lawnmower. To replace the wheel, start by turning the mower on the side. Use a flat-blade screwdriver to remove the dust cover from the wheel. Next, use an adjustable...

- Manufacturer Part Number:
- 2825469002

- Manufacturer Part Number:
- 3800109002
This is a grass catcher, also commonly known as a grass bag. Much like its name indicates, it collects the grass clippings produced when mowing the lawn. If yours has become ripped or damaged, this is the OEM replacement part you will need. It is mostly black in color with the EGO branding on the side. The grass bag volume is 2.0 Bushel (70L). Keep in mind that the bag frame is sold separately, th...

- Manufacturer Part Number:
- 3129653001

- Manufacturer Part Number:
- 2826636001

- Manufacturer Part Number:
- 3660614001

- Manufacturer Part Number:
- 2825302001

- Manufacturer Part Number:
- 3127924001
This is a single OEM mulch plug assembly for your lawnmower. It is black in color and fits all 21-inch EGO Power+ 56V lawn mowers. The mulching plug forces the cut grass to stay in the cutting chamber to get finely chopped. For this replacement, the mulching plug simply slides into the opening behind the rear discharge door (spring loaded), push into place and make sure the door closes securely before mowing.

- Manufacturer Part Number:
- 3127911001
This is a side discharge chute assembly for a lawnmower. It is black in color and is a reliable OEM replacement part approved by the manufacturer. The side chute attachment directs the grass out of the chute and back onto the lawn. This allows you to cut taller grass because the mower deck will not get clogged, as it might if you chose to mulch. Before beginning this repair make sure the battery h...
Popular Ego Models
-
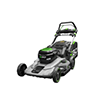
Ego ST1620T (A)

-
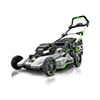
Ego LM2110SP (A)
-
Ego LB7650 (A)
-
Ego LM2120SP (A)
-
Ego SNT2120AP (A)
-
Ego LM2110 (A)
-
Ego SSA1200 (A)
-
Ego LM2200SP (A)
-
Ego FN1800 (A)
-
Ego LM2100SP (B)
-
Ego LM2100SP
-
Ego LM2100SP (A)
-
Ego LT1000 (A)
-
Ego CS1610 (A)
-
Ego ABK5200 (A)
-
Ego LM2130SP (B)
All Ego Product Types
-
Ego Chainsaw Parts
-
Ego Edger Parts
-
Ego Hedge Trimmer Parts
-
Ego Lawn Mower Parts
-
Ego Lawn Tractor Accessories Parts
-
Ego Leaf Blower / Vacuum Parts
-
Ego Snow Blower Parts
-
Ego Trimmer Parts
✖