


Why Read This Article?
Finish Nailer Repair - Replacing the Driver Guide (Ridgid Part # 79004001022)
Article Breakdown
Finish Nailer Repair - Replacing the Driver Guide (Ridgid Part # 79004001022)
Video

Tools & Materials
- Phillips-head screwdriver or power drill
- Pick (optional)
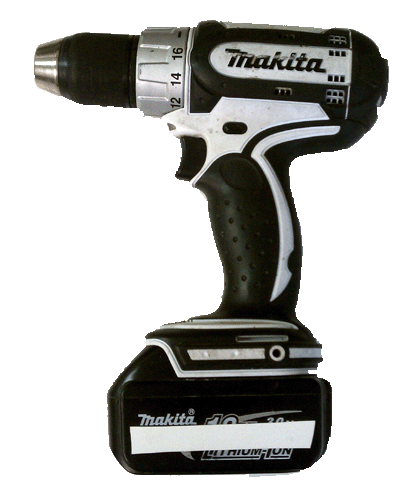 This article will help you troubleshoot this common problem and will also help explain the proper way to break down and reassemble your Makita power drill.
If you need a new leaf spring or other power parts for your Makita power tools, remember to use eReplacementParts.com's convenient Makita parts search feature to get the right parts for all your do-it-yourself repairs.
Breaking Down the Power Drill
This article will help you troubleshoot this common problem and will also help explain the proper way to break down and reassemble your Makita power drill.
If you need a new leaf spring or other power parts for your Makita power tools, remember to use eReplacementParts.com's convenient Makita parts search feature to get the right parts for all your do-it-yourself repairs.
Breaking Down the Power Drill
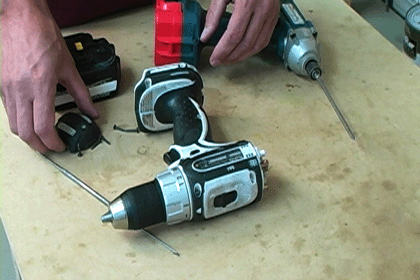
1. Remove the battery and screws
Remove your drill's battery.
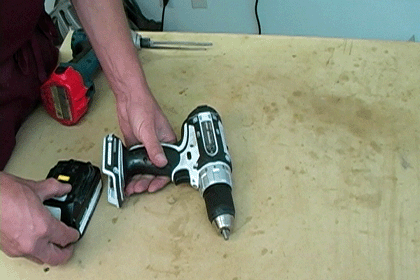
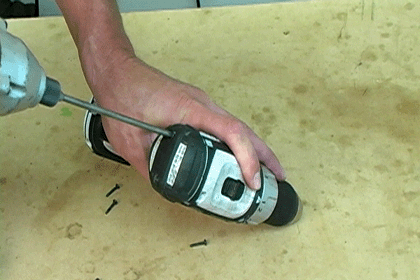
Remove the screws from the drill housing.
You will also have to remove two screws from the back cover.
Remove the last screw that holds the drill's housing together.
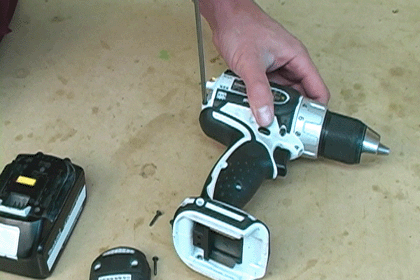
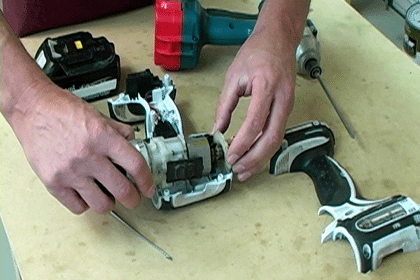
2. Separate the drill housing
Separate the two halves of the drill housing to gain access to the internal components.

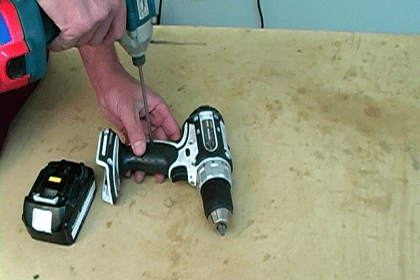
3. Take tension off the brushes
This is a good time to take the tension off the brushes in the rear of your drill. Just remove the wire contacts from the spring.
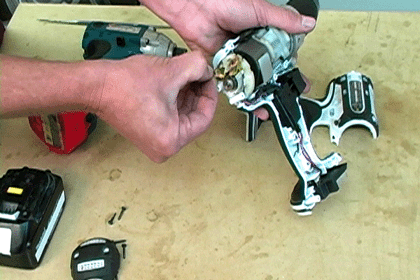
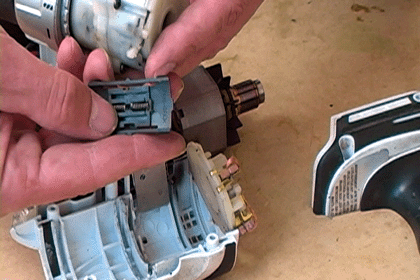
4. Remove the gear housing field and armature
Remove the gear housing field and armature from the drill body to gain access to the leaf spring mount.

5. Replace the leaf spring
Now you can replace the leaf spring. In many cases the spring falls out when you disassemble the drill and finding where it goes can be difficult.
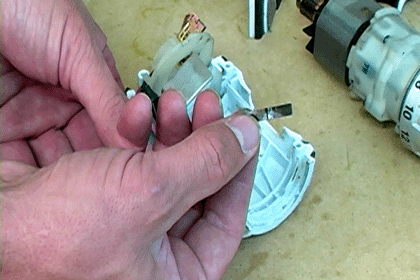
The leaf spring rests in a small slot in the drill housing. Once you set it in place, you can begin reassembling the drill.

[Back to Top]
Reassembling the Power Drill
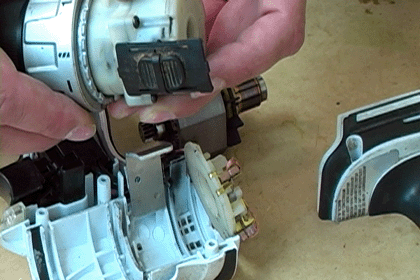
1. Locate the notch on the gear housing field
Before you reassemble your drill, locate the notch on the gear housing field.
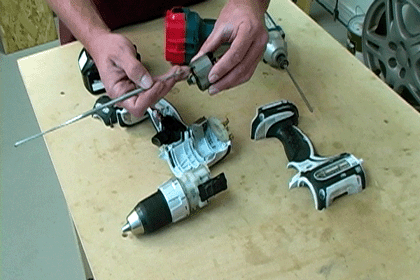
This notch will align with the notch in the drill housing when you reassemble your drill.

2. Check the springs on the high-low switch
Double-check the switch that mounts on top of the gear housing field.
The switch has two springs that can pop out and get lost. Make sure the springs are there, then set the switch in position on the gear housing.
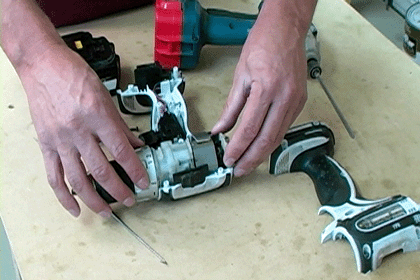
3. Install the gear housing and armature
Slide the gear housing field and armature through the brush holder and set it into place in the drill housing.
Make sure the notch on the gear housing field aligns with the notch in the drill housing. Check to make sure the brush holder is properly aligned.
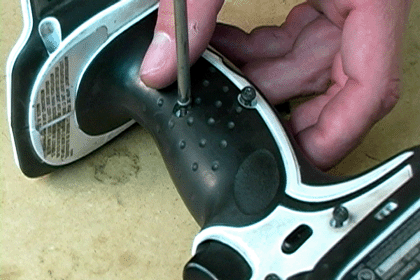
4. Replace the drill cover
Now you can replace the drill cover. It should go into place without having to be forced.
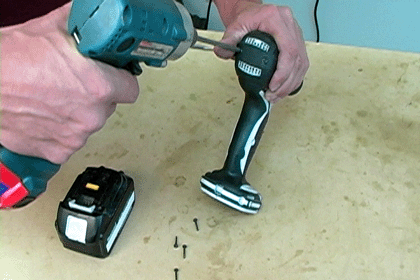
5. Fasten the brushes
Use a pick to snap the brushes back into place.

6. Reinstall the screws and battery
Install the screw that holds the two sides of the drill housing together.

Reinstall the back cover.
Now you can tighten the screws that fasten the housing. Use a Phillips-head screwdriver to slowly back each screw out until you feel it catch on the old threads. This will prevent you from accidentally stripping the plastic housing.
Now all you have to do is tighten the housing screws and reinstall the battery.
 [Back to Top]
Conclusion
Breaking down your Makita drill is a simple repair that only requires a screwdriver (or second power drill) and about 20 minutes of your time. You can use the information in this article to easily replace the leaf spring or conduct another internal repair on your drill.
Remember that eReplacementParts.com has detailed breakdowns for Makita power drills, and finding the parts you need is as simple as typing your tool model number into our convenient model number search feature.
[Back to Top]
What We're About
