


Why Read This Article?
Finish Nailer Repair - Replacing the Driver Guide (Ridgid Part # 79004001022)
Article Breakdown
Finish Nailer Repair - Replacing the Driver Guide (Ridgid Part # 79004001022)
Video
Tools & Materials
- Phillips-head screwdriver
- Needle-nose pliers
- Wire cutter/crimper
- Knife/box cutter
Safety Guidelines
- Make sure the unit is unplugged before starting the repair.
Swing by our DeWalt parts page to find the replacement parts for your on-going and future projects.
Removing the old cord
1. Remove the strain relief
Use a pair of needle-nose pliers to pull the strain relief out of the saw body.
2. Remove the cord clip
Unscrew the cord clip from the saw body with a phillips-head screwdriver and set it aside.
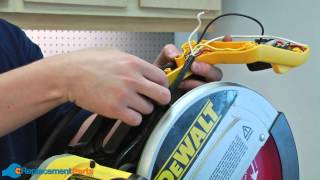
3. Detach the upper handle cover
The cord is routed under the handle on the upper portion of the saw.
You'll need to remove the handle cover from the handle by unfastening the three screws that secure it to the handle body.

4. Remove the top half of the front handle
Remove the top half handle by unscrewing the seven screws that fasten it down.
5. Remove the switch
With the top half of the removed, you'll now have access to the switch and wires.
The switch can be removed with a phillips-head screwdriver.
Remove the black wire from the switch with a small phillips-head screwdriver.
Turn the wire nut counter clockwise to remove and set it aside.
6. Pull the cord out of the saw
With all of the components removed you can pull the old cord out of the saw.
[Back to Top]
Installing the new cord
1. Thread the cord back into the saw
Simply push the new cord through the saw and up to the handle where the switch is located.
2. Insert the new cord into the handle
The insulation on the new cord may need to be stripped down so the black wire can reach the switch.
Insert the new cord into the lower part of the handle then route the cord through the upper handle so it fits snug within the handle body.
3. Wire the new cord to the switch
Cut the white wire on the new cord to match the length of the existing white wire inside the handle.
Now use the wire nut to screw the two white wires together and tuck neatly into the handle.
You'll need to put a terminal on the black wire from the new cord. To do this you will need to strip back some of the insulation on the black wire and crimp the terminal onto the exposed wire.
With the terminal in place, you're ready to fasten the black wire back onto the switch using the small phillips screw.

4. Secure the switch to the handle
Secure the switch to the handle using the black phillips screw and neatly tuck the wires back into the handle.
5. Reinstall the upper-half of the handle and handle cover
Secure the upper handle half and the handle cover in their original locations with the screws that were removed earlier.
6. Reattach the cord clip and strain relief
After all of the slack is removed from the cord, install the cord clip and strain relief back onto the body.
[Back to Top]
Conclusion:
And that's how you can replace the power cord on your DeWalt DW708 miter saw. Doing repairs yourself can save you money and extend the life of your tools.
Find parts for all of tools in your shop by visiting our power tools part finder.
[Back to Top]
What We're About
