


Why Read This Article?
Finish Nailer Repair - Replacing the Driver Guide (Ridgid Part # 79004001022)
Article Breakdown
Finish Nailer Repair - Replacing the Driver Guide (Ridgid Part # 79004001022)
Video
Tools & Materials
- Screwdriver
- Blowtorch, lighter or matches
- Needle-nose pliers
- Wire cutters or scissors
Safety Guidelines
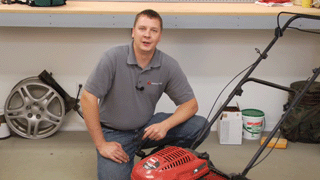 For this repair we used a Toro lawnmower, but the steps will be similar for most lawnmower brands. Remember to use our Toro parts finder to find the replacement parts specific to your Toro lawn equipment.
Repairing the Starter Cord
If your lawnmower cord broke near the end, you can re-use it for the repair. If it broke in the middle, you will need a replacement cord before beginning this repair. It is also possible that a problem such as a broken starter spring caused your cord to break. If this is the case, take a look at our article on repairing a starter spring.
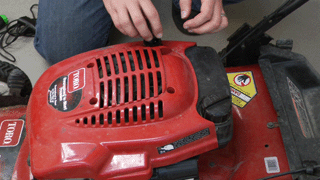
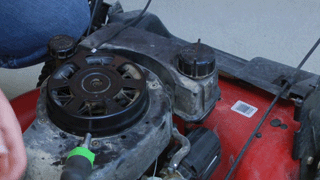
1. Remove the lawnmower cover
Remove the four screws that secure the cover to the lawnmower.

You will need to remove the dipstick to get the cover off the mower. We recommend replacing the dipstick immediately to ensure you don't accidentally get debris into your oil.
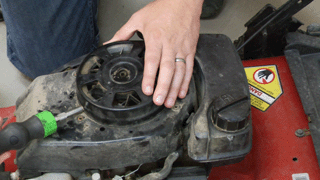
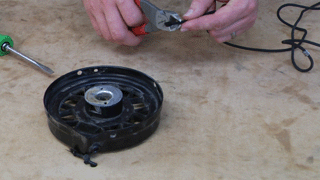
2. Remove the starter
Remove the two screws that secure the starter to the mower. Now you can remove the starter.
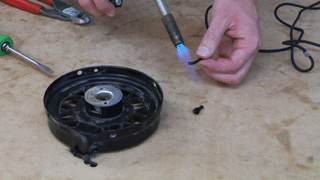
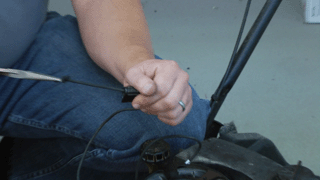
3. Prepare the cord
If you plan on re-using your starter cord, you will need to prep it before you install it. First, cut off the frayed end of the cord as close to the end as possible.
Then use a lighter, match or blowtorch to melt the end of the rope. You can roll the tip around on your work surface to create a point in the end of the cord, which will make it much easier to install in the starter.
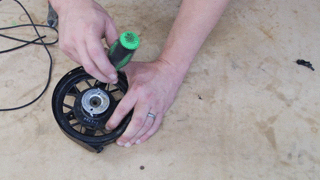
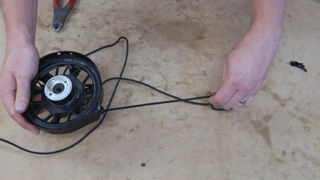
4. Wind the starter
Now you can wind the starter. When you do this, think about the way you need the rope to coil back into the starter and wind it the opposite direction. Use caution when winding the starter as it has parts that can cut you if you accidentally release the tension on the spring. Keep winding the starter until you can't wind it any more, then use a screwdriver to prevent it from unwinding.
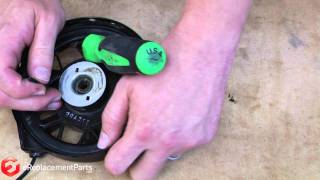
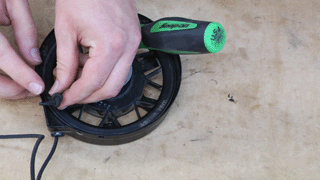
5. Install the rope
Align the holes on the starter assembly then thread the rope through them both. Tie an overhand knot in the rope. Some people like to add a thin layer of super glue to strengthen the knot.
Now hold the rope securely with one hand and remove the screwdriver. Then slowly guide the rope back into the starter assembly.
6. Reinstall the starter
Now you can mount the starter back onto the engine block.
7. Reinstall the cover
At this point you will need to remove the starter cord from the handle so you can thread it through the cover. You can use needle-nose pliers to get the rope out of the handle, then untie the knot and thread the cord through the cover.

Remove the dipstick and set the cover into place. Now all you have to do is tie the cord back into the handle and fasten the cover's screws.
 [Back to Top]
Conclusion
Repairing a damaged starter cord is a quick repair that you can complete yourself in about 20 minutes. In many instances, you can complete the repair using the parts you already have--which means if your cord breaks while you're in the middle of mowing, there's a good chance you can get back to work the same day.
Remember to use our simple lawn equipment part search feature to ensure you always have the right parts for your lawn and garden repair needs.
[Back to Top]
What we're about.
