Why Read This Article?
Finish Nailer Repair - Replacing the Driver Guide (Ridgid Part # 79004001022)
Article Breakdown
Finish Nailer Repair - Replacing the Driver Guide (Ridgid Part # 79004001022)
Tools & Materials
- a small container
- some 2-cycle engine fuel
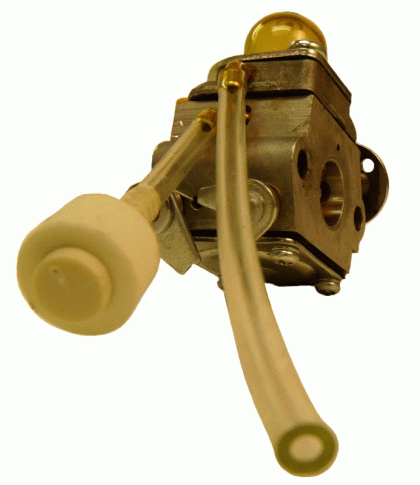 For 2-cycle engines, there are two major carburetor designs worth discussing, each with a different fuel routing orientation:
- carburetors with the primer bulb built on top of the carburetor ("local primer" carburetors)
- carburetors that have primer assemblies built separately from the carburetor ("remote primer" carburetors)
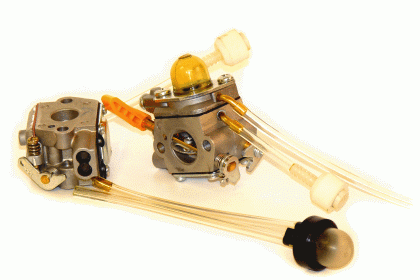 We explain the steps to determine the correct fuel line routing below for both types of 2-cycle engine carburetors.
To get started with your repair, find replacement fuel lines for your engine by typing its model number in the model number search field at the top of this page.
Fuel Line Routing for "Local Primer" 2-Cycle Engine Carburetors
It is a common problem to forget the orientation of fuel lines after removing them, especially since manufacturers generally do not mark which is the incoming and outgoing fuel ports on their carburetors.
"Local primer" carburetor designs look like the carburetor pictured below.
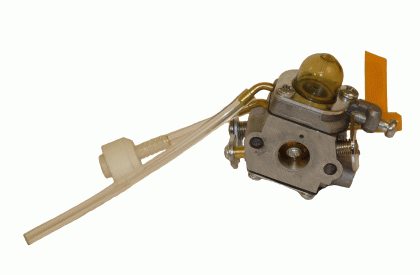 For this 2-stroke engine carburetor design, the primer bulb is built on top of the assembly.
The bulb pulls fuel through the filtered fuel line and into the carburetor and then it also pushes it out of the carburetor and out the unfiltered return line.
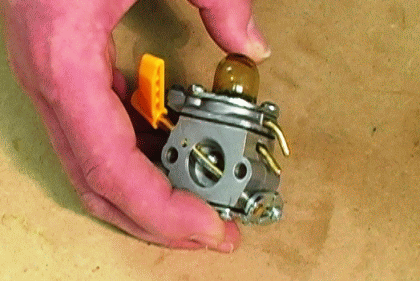 With correct fuel line installation, fuel is pulled in through the line with the fuel filter and pushed out out the unfiltered return line.
After mixing up the fuel line orientation, performing a test is the only way to make sure that the lines are installed correctly.
[Back to top]
1. Install the lines and test the orientation.
Make a guess and install the lines on the carburetor.
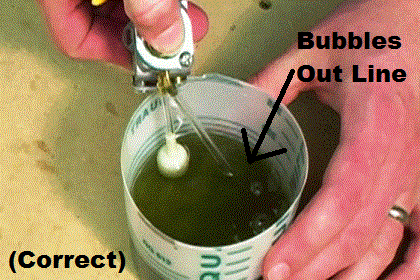
Test the orientation of the fuel lines by placing the ends of both lines in 2-cycle fuel (never water) and then prime the bulb.
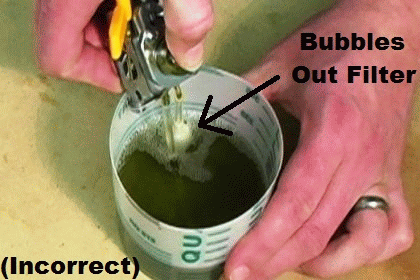
- If fuel is pushed out of the unfiltered line, then the orientation was guessed correctly and the test is complete.
- If bubbles emerge from the line with the fuel filter (pictured above), then the lines were installed incorrectly, must be switched, and then tested again.
2. Reverse the lines and perform the test again (if needed).
In the event that bubbles emerge from the fuel filter during the test, reverse the lines and perform the test again.
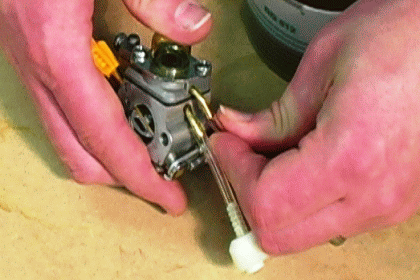
Bubbles out the unfiltered return line verify that the new fuel line placement is correct.
Fuel Line Routing for "Remote Primer" 2-Cycle Engine Carburetors In the carburetor design pictured below, the primer assembly is separate from the body of the carburetor.
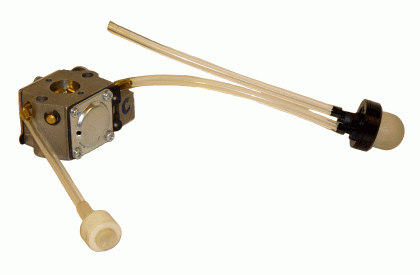 The fuel line routing for these "remote primer"carburetors is just a little more complex than the routing of local primer carburetors because of the addition of a third line.
The important thing to remember with remote primer carburetors is that the primer assembly needs to pull fuel through the carburetor, not push the fuel into the carburetor.
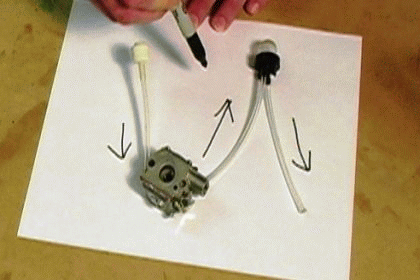 The diagram above represents the correct flow of fuel through a remote primer carburetor.
To determine the correct fuel line routing for remote primer carburetors, follow the steps below.
[Back to top]
1. Test the primer assembly.
Fuel only flows one way through primer assemblies.
So, the first step in determining the overall fuel line routing in this type of carburetor is to determine which are the input and output sides of the primer.
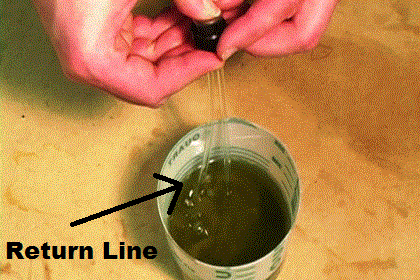
Attach fuel lines to the primer assembly, submerge both lines in some 2-cycle fuel, and prime the bulb.
Bubbles will emerge from the fuel line attached to the outgoing side of the primer--the return line--meaning that fuel is being pulled through the line that is not producing bubbles.
The line not producing bubbles is the one that must be attached to the carburetor, since fuel must be pulled through the carburetor and into the primer bulb.
[Back to top]
2. Test the fuel line routing with the carburetor.
Attach the incoming line on the primer assembly to one of the ports on the carburetor and attach a third fuel line to the other carburetor fuel line port.
Submerge the ends of both fuel lines in some 2-cycle fuel and test the line configuration by depressing the primer bulb.
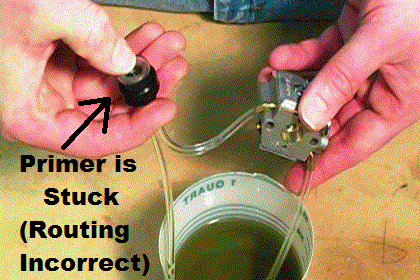
- If bubbles and/or fuel emerge out of the primer assembly return line, then the line configuration was guessed correctly and the test is complete.
- If the primer bulb becomes stuck or returns very slowly after being depressed (pictured above), then the line configuration was guessed incorrectly and the test must be conducted again.
If the primer bulb sticks or returns slowly in the first test, switch the positions of the fuel lines on the carburetor and perform the test again.

Bubbles will emerge from the primer assembly's return line when the line routing is correct. If the primer assembly return line is lifted out of the fuel while priming, fuel will be seen squirting from the line. [Back to top]
Conclusion
These fuel line replacement tips will make your next fuel system repair easy, and they also provide important lessons about how small engine fuel systems work.
Start your fuel line repair by viewing the parts page for your gas equipment product. Enter your product's model number in the search field at the top of this page, or visit use the part finder on our website's Home Page.
[Back to top]
What we're about.


