


Why Read This Article?
Finish Nailer Repair - Replacing the Driver Guide (Ridgid Part # 79004001022)
Article Breakdown
Finish Nailer Repair - Replacing the Driver Guide (Ridgid Part # 79004001022)
Video
Tools & Materials
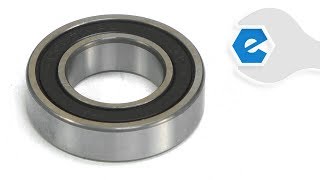
Power tools use many ball bearings to allow various components to rotate. Over time, a ball bearing will wear and begin to fail. A bearing that is failing will usually give warning; often with a squeaking or squealing sound.
Let's get started.
REMOVING THE BALL BEARING
1. Remove the lower guard: Be careful not to lose the spacer on the linkage. As you remove the guard, be careful to not lose the spring.
2. Remove the blade.
3. Remove the inner flange.
4. Remove the upper guard.
5. Remove the blade lock and the spring.
6. Remove the screw that secures the gearbox.
7. Remove the gearbox.
8. Place the gear case over the vise.
9. Use a rubber mallet to remove the arbor from the housing.
10. Use a bearing puller to remove the small bearing on the end of the arbor.
11. Remove the gear from the arbor shaft.
12. Place the gear over the vise jaws.
13. Use a socket that will fit over the smaller portion of the shaft and onto the shoulder. It is a good idea to use an older socket to do this, because you will be hitting it with a hammer to remove the arbor shaft.
14. Remove the key from the shaft.
15. Place the shaft and bearing back into the vise.
16. Position the outer race of the bearing on the vise jaws.
17. Use the socket and tap the shaft out of the bearing.
INSTALLING THE NEW BALL BEARING 18. Place the shaft into the bearing. 19. Adjust the vise jaws so that the inner race is resting on the jaw. 20. Place the socket on the flange on the arbor shaft. 21. Install the shaft into the bearing. 22. Reinstall the key and the gear. 23. Reinstall the second bearing. 24. Now this assembly can go back into the gear box.
REASSEMBLING THE UNIT 25. Align the large bearing with the opening in the gear box. 26. Use a socket to tap it into place. 27. Reinstall the gear box and secure it with the screw. 28. Reinstall the blade lock. First the spring, and then the blade lock lever. (At this point, just rest it in the housing.) 29. Reinstall the upper guard. 30. First, place the spacer onto the housing. 31. Line up the screws on the upper guard. 32. Install it to the saw. As you do this, you need to make sure that you insert the pin for the blade lock through the hole in the housing. 33. Reinstall the blade. First, the inner flange, and then the blade. 34. Reinstall the outer flange and the washer with the bolt. 35. Reinstall the guard. 36. Place the spring over the hook on the guard. 37. Place the guard around the blade. 38. As you bring it up, hook the spring to the tab on the housing. 39. With a guard in place on the saw, secure it with the hub and the screw. 40. Make sure that the bearing that's attached to the linkage sits on top of the block on the upper guard. 41. Place the spacer against the saw housing. 42. Place the link over the spacer and then secure it with the washer and the screw.
