


Why Read This Article?
Finish Nailer Repair - Replacing the Driver Guide (Ridgid Part # 79004001022)
Article Breakdown
Finish Nailer Repair - Replacing the Driver Guide (Ridgid Part # 79004001022)
Video
Tools & Materials

Battery terminal faulty? It's time to face the fix. Whether you are a master carpenter or an occasional drill-seeker, eReplacementParts.com provides the parts, procedures and facts you need to fearlessly fix what fails you.
The terminal is the attachment point for the battery on your cordless drill. It is a plastic block with metal spades, which engage the contacts on the battery. If there is a short within the battery, or if the drill is badly overheated, the terminal can be damaged. Look for signs of melted plastic around the metal spades. In some cases, the spades themselves will be melted or discolored from excessive heat.
The wire connections (between the terminal and the switch) are another issue involving the terminal. Make sure the connections are tight, and that there is no corrosion between the wires and the terminal.
This article provides step-by-step instructions for removing and installing the battery terminal on a Makita cordless hammer drill.
Let's get started.
 REMOVING THE TERMINAL [top]
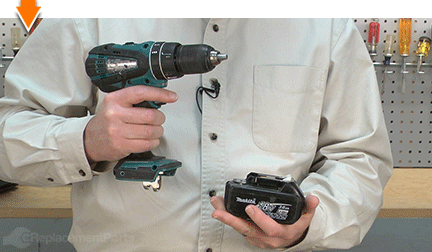
1. Remove the battery.
REMOVING THE TERMINAL [top]
1. Remove the battery.
Remove the battery from the drill.
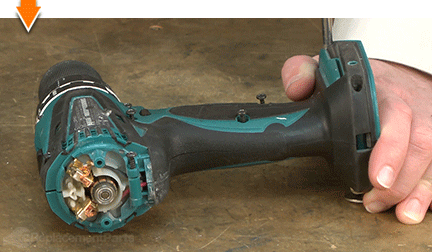
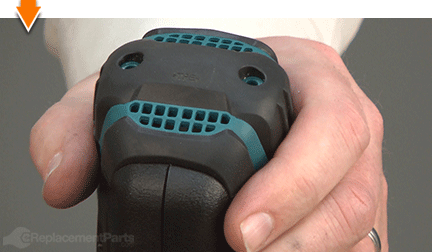
2. Remove the rear cover.
Remove the (2) screws.
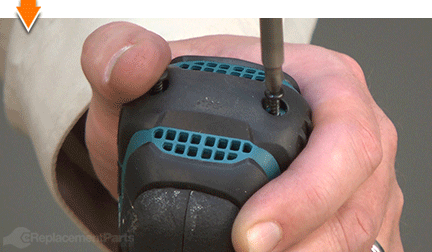
Remove the rear cover from the drill.
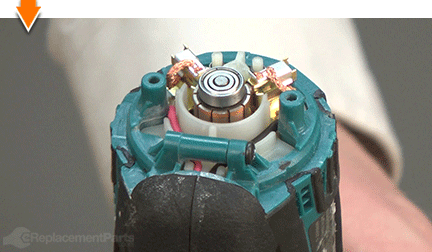
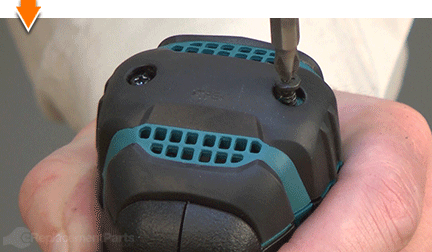
3. Split the housings.
Remove the screws from the top half of the housing.
Lift the top half of the housing away from the unit.
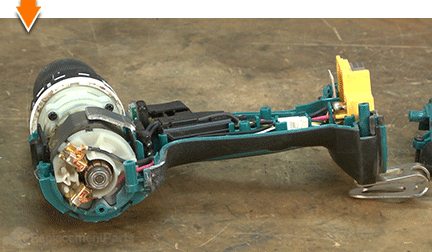
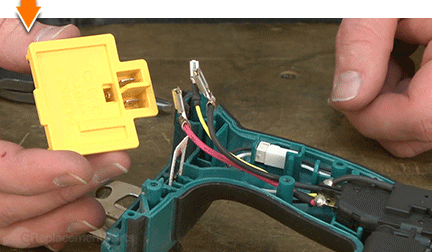
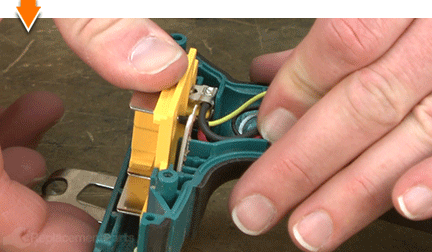
4. Remove the terminal.
Slide the terminal assembly out of the housing.
Note location of the wire connections (to facilitate reassembly).
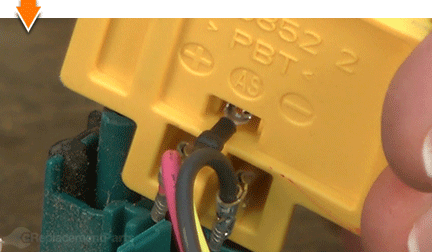
Disconnect the (3) wires from the terminal assembly.
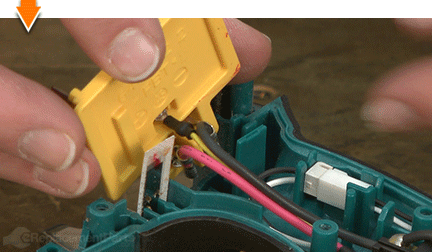
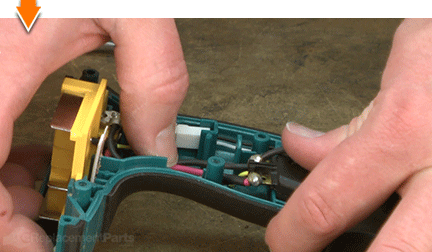
INSTALLING THE NEW TERMINAL [top] 5. Install the terminal.
Connect the (black) wire to the (negative) post on the new terminal.
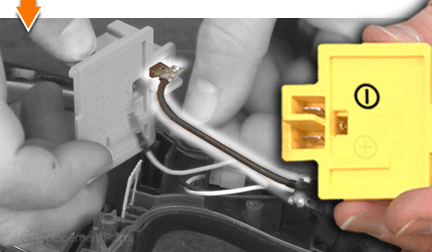
Connect the (red) wire to the (positive) post on the new terminal.

Connect the (yellow) wire to the (center) post on the new terminal.
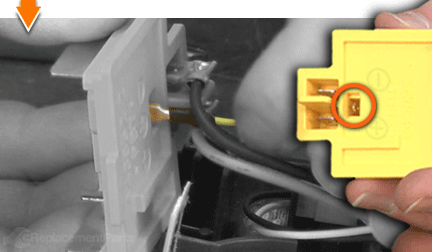
Install the new terminal assembly into the housing.
Tuck the wires (connecting the switch to the terminal) into the center channel of the housing.
REASSEMBLING THE UNIT [top] 6. Reinstall the top half of the housing.
Inspect all of the wires for potential pinch-points; make adjustments as necessary.

Install the top half of the housing.
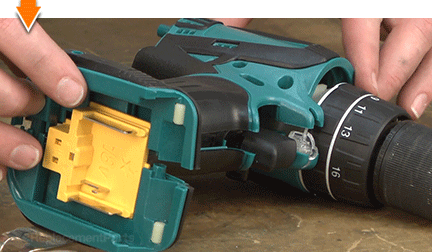
Secure the top half of the housing with the screws.
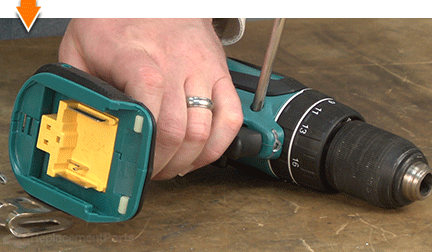 7. Reinstall the rear cover.
Install the rear cover.
Secure the rear cover with the (2) screws.
8. Reinstall the battery.
Install the battery.

As you just learned, fixing things yourself means more drilling with less billing. Hopefully, this article has restored your ability to drill holes without replacing your whole drill. And that's just the tip of the bit. Our online repair guides can help expand your skills far beyond drills; empowering you to face power tool problems whenever they arise; and to fearlessly fix whatever fails you.
