Why Read This Article?
Finish Nailer Repair - Replacing the Driver Guide (Ridgid Part # 79004001022)
Article Breakdown
Finish Nailer Repair - Replacing the Driver Guide (Ridgid Part # 79004001022)
Tools & Materials
- Screwdriver
- Needle-nose pliers
- Retaining ring pliers
- Hammer
- Socket wrench

Don't forget to shop for this part and more by viewing our Ryobi 132R parts page! Removing the bushing housing assembly
1. Remove the bump head knob assembly
This will simply unscrew from the trimmer.

2. Pull away the reel and line assembly
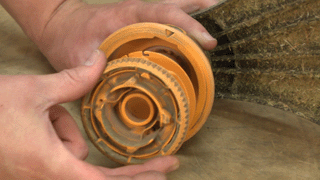
With the bump head knob removed, the reel and line assembly can be pulled away from the trimmer.

3. Remove the plunger spring
Remove the c-clip securing the plunger and pull away the plunger and plunger spring.

4. Remove the slider and springs
Use a pair of retaining ring pliers to remove the retaining ring securing the slider to the trimmer. Then pull the slider assembly off of the spindle.

5. Remove the thrust washer
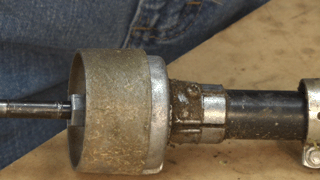
Use a hammer to tap the spindle while pulling on the spool -- this will loosen it from the trimmer. Then use a pair of pliers or wire cutters to remove the thrust washer.

6. Pull away the spool
With the trust washer removed, you're free to remove the spool from the trimmer. Use the hammer again if its still stuck.

7. Remove the guard assembly
Remove the four screws holding the guard to the trimmer, then set it aside.

8. Remove the bushing housing assembly clamp
Use a socket wrench to loosen the bushing assembly clamp.

9. Remove the bushing housing screw
Use a screwdriver to remove the bushing housing screw, then set it and the clamp, aside.

10. Pull the bushing housing away from the trimmer
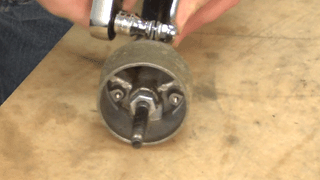
The bushing housing is now free to be pulled away from the trimmer.

[Back to Top] Installing the bushing housing assembly
1. Slide the bushing housing clamp onto trimmer shaft
Simply slide it back onto the bar about 3-4".

2. Reinstall the bushing housing assembly
Slide the bushing housing assembly back onto the trimmer bar.

3. Secure the bushing housing assembly
Secure the bushing housing assembly with the single screw that was previously removed, then slide the clamp over the housing and secure with a socket wrench.


4. Reinstall the trimmer guard
Snap the guard back into the place, rotate it so it aligns with the screw holes, and use a screwdriver to secure it back to the trimmer shaft.

5. Reinstall the spool
Line the spool up with the nut/notch on the shaft and pop it back into place. You may want to use a hammer to properly seat it.

6. Install the new retaining ring
Use a socket wrench and hammer to press the retaining ring over the spindle and seat it at the bottom of the spool.

7. Reinstall the slider assembly
Place the two slider springs back into their original locations, then replace the slider onto the spindle.


8. Reinstall the slider retaining ring
Use your retaining ring pliers to reinstall the slider retaining ring onto the spindle.

9. Reinstall plunger assembly
Slide the spring then the plunger back onto the spindle.

10. Secure the plunger with the clip
Use a pair of pliers to reinstall the retaining clip onto the spindle.

11. Reinstall the reel assembly
Place the reel assembly back into the spool.

12. Reinstall the bump head knob assembly
Finalize the repair by twisting the bump head knob assembly back onto the spindle.
 [Back to Top]
Conclusion
See, that wasn't too difficult! And now that you know the steps of removing the bushing housing, you'll be able to quickly repair your spool and other components in the future. Keep this article handy for the future to quickly and easily fix any other problems that could come up.
We've got all the parts you need to keep the rest of your lawn equipment in top shape, check them out today!
[Back to Top]
What We're About


