Why Read This Article?
Finish Nailer Repair - Replacing the Driver Guide (Ridgid Part # 79004001022)
Article Breakdown
Finish Nailer Repair - Replacing the Driver Guide (Ridgid Part # 79004001022)
Tools & Materials
- Screwdriver
- Needle-nose pliers (helpful but not required)
Safety Guidelines
 Remember that the best place to start any repair is with the right parts. You can find DeWalt and other drill parts on our drill parts page.
Removing the Switch
1. Open the drill casing
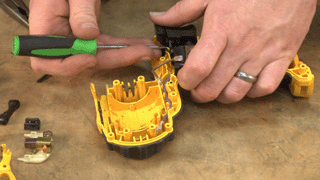
To access the switch, you will need to open the drill casing. Begin by removing the two transmission screws on the back of the drill (the side on which you can see the casing screws).

Then remove the body screws and separate the two drill halves. You may have to cut a sticker on the lower portion of your drill to separate the halves.

2. Remove the motor assembly to access brushes
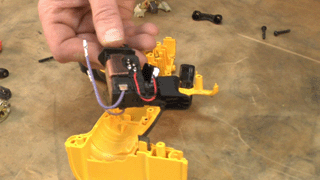
The switch is attached to the motor by two brush wires. To remove one of the brush wires, you will need to remove the motor assembly.
3. Remove the other transmission screws
Flip the drill over and remove the two remaining transmission screws to free up the motor and transmission.

4. Remove the armature blocks
You will see two plastic pieces that secure the armature in the back of the drill. Remove the four screws that secure the two armature blocks, to free up the motor and transmission.

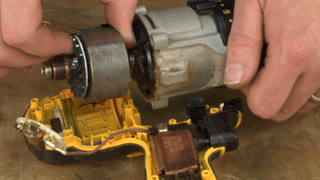
5. Remove the motor and transmission
Now you can remove the motor and transmission from the drill. Just set them aside as you will just pop them back into the drill later.

6. Remove the brush wires
Now you have access to the lower brush. Before you remove the wires, make a note of which one goes where. Then you can remove the wires from the brushes.

7. Remove the broken switch
Once you've removed the wires from their brushes, simply pull your broken switch away from the drill.
 [Back to Top]
Installing the New Switch
1. Position the switch
Nestle the new switch back into the body of the drill handle.

2. Re-install the lower brush wire
Connect the lower brush wire to the lead on the brush. Route the wire so it won't get pinched. Then set the brush into place in the drill body.


3. Re-install the motor and transmission
Now set the motor and transmission back into place. You may have to wiggle them a bit to get the right fit.

4. Replace the two transmission screws
Secure the transmission and motor by tightening the two transmission screws on the back of the drill.

5. Re-install the second brush wire
Now you can attach the second brush wire and install the brush in its place above the motor.

6. Replace the cover
If the small bit holder that fits into the lower part of your handle fell out earlier, place it between the two halves.

Set the cover back into place and fasten the screws that secure it.

7. Install the last two transmission screws
Now just tighten the remaining two transmission screws to finalize your repair.
 [Back to Top]
Conclusion
And that's how you can save a load of money compared to a repair shop. This simple repair should take less than 20 minutes and will have your drill running like new again. Remember to visit our power tool parts page to find the parts you need for all your power tool repairs.
[Back to Top]
What We're About
[Back to Top]
Conclusion
And that's how you can save a load of money compared to a repair shop. This simple repair should take less than 20 minutes and will have your drill running like new again. Remember to visit our power tool parts page to find the parts you need for all your power tool repairs.
[Back to Top]
What We're About


