Why Read This Article?
Finish Nailer Repair - Replacing the Driver Guide (Ridgid Part # 79004001022)
Article Breakdown
Finish Nailer Repair - Replacing the Driver Guide (Ridgid Part # 79004001022)
Tools & Materials

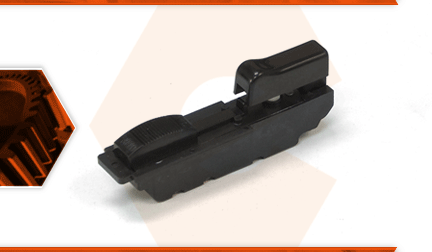
The switch allows you to turn your tool on and off, as well as change the direction of rotation. Over time, the switch will wear. Eventually, it might no longer turn the tool on and off, or it may only work sporadically. The reverse switch can also fail, preventing you from changing direction.
Let's get started.
REMOVING THE SWITCH 1. Remove the top half of the handle.
a. Remove the (5) screws securing the top half of the handle to the lower half.
b. Use a screwdriver to separate the two halves of the handle assembly.
c. Remove the top half of the handle.
2. Remove the switch.
a. Lift the switch assembly out of the lower handle.
b. Note the location of the wires (to simplify installation).
c. Use long-nosed pliers to disconnect the (6) wires from the switch assembly.
d. Remove the switch from the unit.
INSTALLING THE NEW SWITCH
3. Install the switch.
a. Connect the BLACK CORD wire to the #1 terminal on the new switch.
b. Connect the WHITE CORD wire to the #2 terminal on the new switch.
c. Connect the black FIELD wire to the #4 terminal on the new switch.
d. Connect the YELLOW FIELD wire to the #3 terminal on the new switch.
e. Connect the WHITE BRUSH wire to the #5 terminal on the new switch.
f. Connect the RED BRUSH wire to the #6 terminal on the new switch.
g. Install the new switch assembly into the handle.
REASSEMBLING THE UNIT
4. Reinstall the top of the handle.
a. Tuck all of the wires into the lower half of the handle.
b. Install the top half of the handle.
c. Secure the top half of the handle with the (5) screws.


