


Why Read This Article?
Finish Nailer Repair - Replacing the Driver Guide (Ridgid Part # 79004001022)
Article Breakdown
Finish Nailer Repair - Replacing the Driver Guide (Ridgid Part # 79004001022)
Video
Tools & Materials
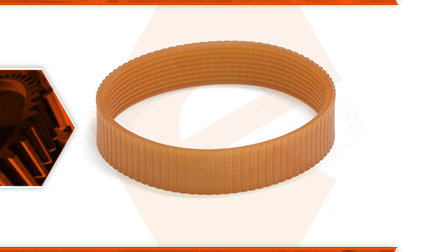
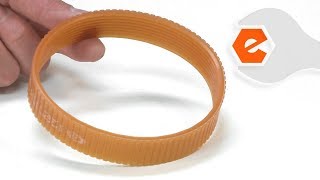
The drive belt links the motor to the cutter head on your planer. The belt is made of a reinforced neoprene material. Over time, the belt can wear or break. A worn belt might squeal or give off a burning smell. If the belt breaks, the motor will run, but the cutter head won't rotate.
Let's get started.
REMOVING THE DRIVE BELT 1. Remove the side covers.
a. Remove the two screws securing the left (side) cover to the planer.
b. Pivot the upper portion of the side cover toward the planer and lift the side cover until its bottom portion clears the rail on the frame.
c. Remove the left (side) cover from the planer.
d. Repeat this step to remove the right (side) cover from the planer.
2. Remove the drive belt.
a. Slice through the (old) drive belt with a utility knife.
b. Remove the drive belt from the planer.
INSTALLING THE NEW DRIVE BELT
3. Install the drive belt.
a. Loop the new drive belt around the upper pulley and position the belt so that only half of it sits on the pulley.
b. Twist and manipulate the other end of the drive belt until it passes through the gap (between the lower pulley and the adjustment rod).
c. Use a large screwdriver to carefully pry the new drive belt onto the lower pulley. Be very careful not to damage the threads (of the adjustment rod) or the belt itself.
d. With the new drive belt partially seated, rotate the pulleys and slowly work the belt fully onto each individual pulley.
REASSEMBLING THE UNIT
4. Reinstall the side covers.
a. Install the top portion of the left (side) cover.
b. Lift the side cover until the bottom portion clears the rail on the frame.
c. Press the side cover down until the bottom portion seats behind the frame rail.
d. Secure the left (side) cover with the two screws.
e. Repeat this step to install the right (side) cover.
