


Why Read This Article?
Finish Nailer Repair - Replacing the Driver Guide (Ridgid Part # 79004001022)
Article Breakdown
Finish Nailer Repair - Replacing the Driver Guide (Ridgid Part # 79004001022)
Video

Tools & Materials
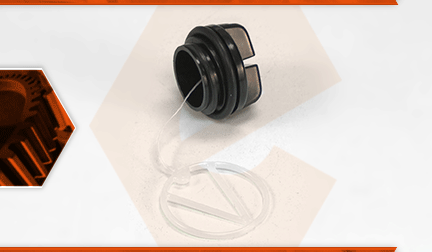
The oil cap assembly consists of the cap itself, an O-ring (to seal the cap), and a lanyard to prevent accidental loss of the cap. There are a few different problems that are common with the oil cap assembly. The O-ring will eventually wear out. This will cause oil to leak from the cap. If the cap is overtightened, the threads will be stressed and will often break off. The lanyard can also break after years of use.
Let's get started.
REMOVING THE OIL CAP ASSEMBLY 1. Remove the oil cap.
a. Tilt the saw on its side to prevent oil from leaking when the cap is removed.
b. Unscrew and remove the oil cap from the reservoir.
c. Squeeze or fold the sides of the lanyard while gently pulling the assembly out of the reservoir.
INSTALLING THE NEW OIL CAP ASSEMBLY
2. Install the oil cap.
a. Gently bend the sides of the new lanyard so that it will fit into the reservoir.
b. Insert the new lanyard into the oil reservoir.
c. Thread the new oil cap onto the reservoir.
d. Hand-tighten the oil cap assembly (do not overtighten).
