


Why Read This Article?
Finish Nailer Repair - Replacing the Driver Guide (Ridgid Part # 79004001022)
Article Breakdown
Finish Nailer Repair - Replacing the Driver Guide (Ridgid Part # 79004001022)
Video
Tools & Materials
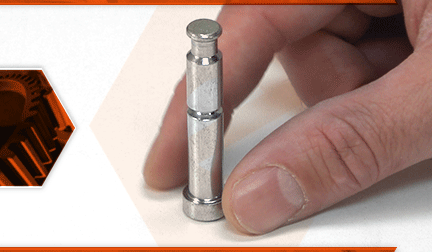
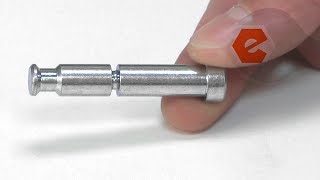
The locking pin is used to secure the saw head in the lowered position when transporting (or storing) the saw. The pin moves in and out of the pivot bracket, allowing you to lock (or unlock) the hinge. It's possible to shear the pin if something heavy is dropped on the saw (when the hinge is locked). If this occurs, the pin should be replaced.
Let's get started.
REMOVING THE LOCKING PIN 1. Unplug the saw.
a. Disconnect the saw from its power source.
2. Disconnect the guard link.
a. Remove the screw securing the REAR PORTION of the guard link to the saw.
b. Pivot the guard link away from the locking pin.
3. Pivot the saw head (open).
a. Remove the stop screw from pivot bracket.
b. Pivot the saw head to the wide open position (the handle should be pointing toward the ceiling).
4. Remove the locking pin.
a. Push the locking pin (from the outside) into the pivot bracket.
b. Remove the locking pin from the pivot bracket.
c. Remove the O-ring from the lock pin (the O-ring will be re-used).
INSTALLING THE NEW LOCKING PIN
5. Install the locking pin.
a. Install the O-ring onto the new locking pin.
b. Install the new locking pin (from inside to outside) into the pivot bracket.
REASSEMBLING THE UNIT
6. Pivot the saw head (closed).
a. Pivot the saw head to the closed position.
b. Install and tighten the stop screw.
7. Reinstall the guard link.
a. Align the rear portion of the guard link with the opening on the housing.
b. Install and tighten the screw (and bushing) to secure the guard link.
