


Why Read This Article?
Finish Nailer Repair - Replacing the Driver Guide (Ridgid Part # 79004001022)
Article Breakdown
Finish Nailer Repair - Replacing the Driver Guide (Ridgid Part # 79004001022)
Video

Tools & Materials

Chainsaw need a checkup? It's time to face the fix. Whether you are a legendary lumberjack or a weekend woodworker, eReplacementParts.com provides the parts, procedures and facts you need to fearlessly fix what fails you.
The carburetor is one of the key components when it comes to a smooth-running saw. The carburetor brings fuel and air together, and mixes them in the perfect ratio for combustion. The carburetor is full of tiny passages, jets, and needles that route the fuel, and meter the correct amount into the engine. These tiny openings can easily be clogged by any debris that make their way past the fuel or air filters.
Once these passages become clogged, the engine will run poorly (or not at all). Old fuel left sitting in the saw can cause the same problems as debris. As old fuel sits in the carburetor, it will begin to breakdown and separate, creating a thick gel-like blockage, and varnishing the metal surfaces. It will also harden the diaphragm and gaskets.
Today, many areas have ethanol added to their fuels. Ethanol creates even more problems. The ethanol attracts water, which then forms an acid. The acid will corrode the metal inside the carburetor, blocking passages, and often causing the metering needle to stick.
While most carburetors can be rebuilt, sometimes a new carburetor is priced low enough that buying a rebuild kit (and taking the time to install it) just doesn't make sense.
This article provides step-by-step instructions for replacing the carburetor on a Poulan chainsaw.
Let's get started.
 REMOVING THE CARBURETOR [top]
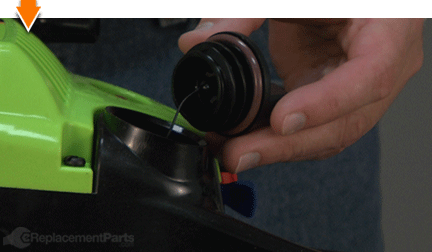
1. Drain the fuel.
REMOVING THE CARBURETOR [top]
1. Drain the fuel.
Drain any excess fuel from the tank.
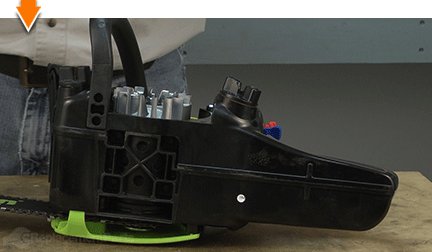
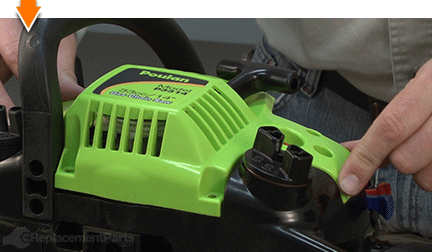
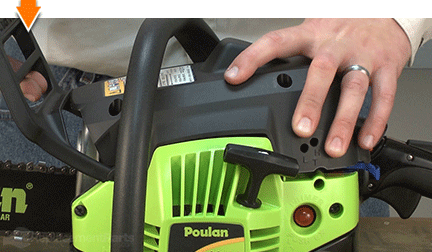
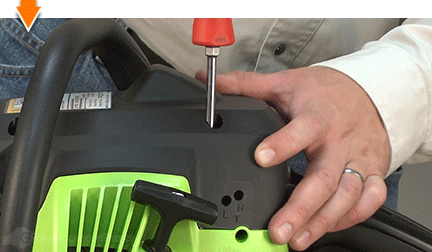
2. Remove the top cover.
Remove the (3) screws securing the top cover to the saw.
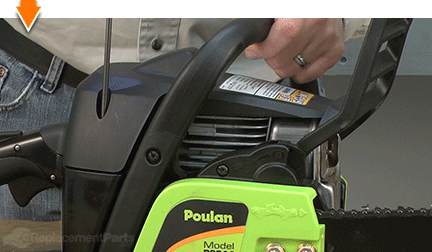
Lift the top cover away from the saw.
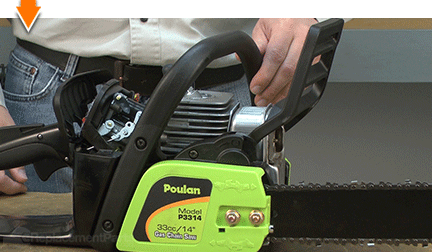
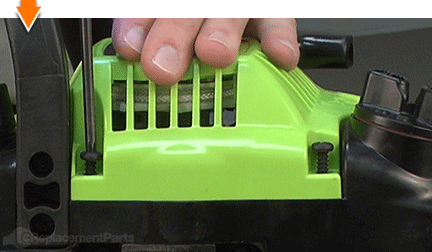
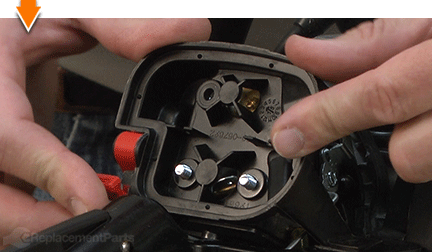
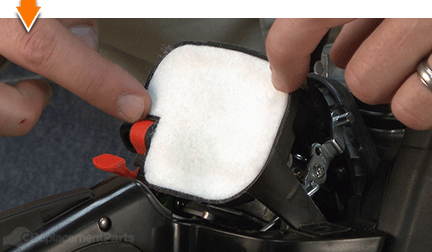
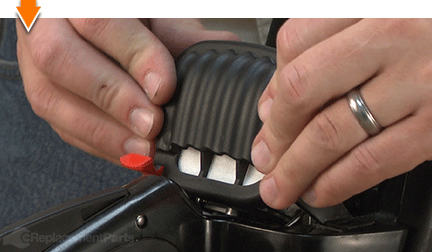
3. Remove the air filter housing.
Remove the air filter cover.
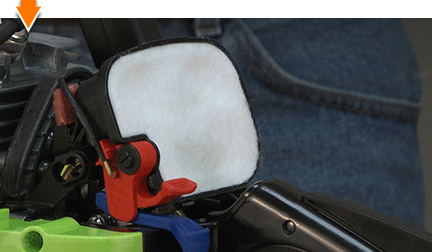
Remove the air filter from the housing.
Remove the (1) screw securing the air filter housing to the engine.

Remove the (2) nuts securing the air filter housing to the engine.
Lift the air filter housing away from the carburetor assembly.

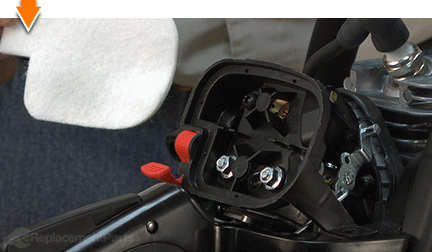
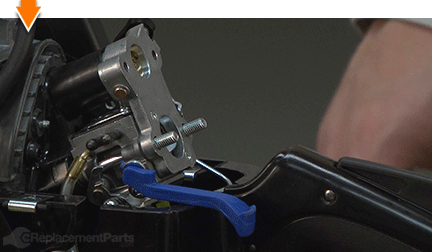
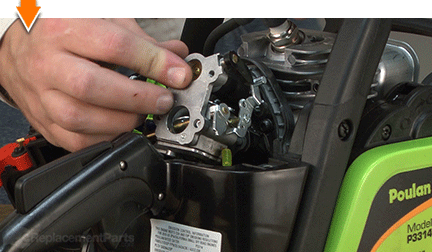
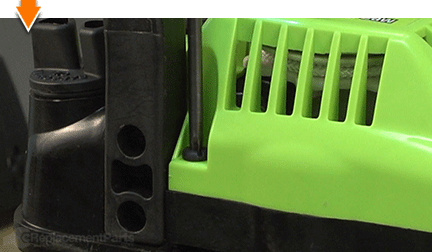
4. Remove the carburetor.
Pull and hold the throttle trigger to expose the throttle linkage attachment point (on the trigger).
Disconnect the linkage from the throttle trigger.
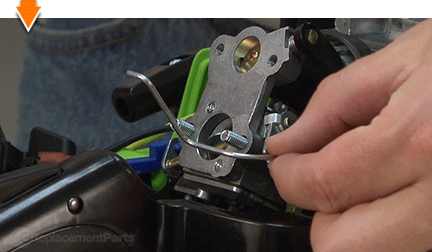
Disconnect and remove the throttle linkage from the carburetor.

Slide the carburetor assembly off the mounting bolts and away from the engine.

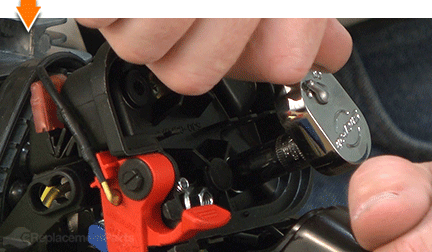
5. Remove the starter assembly.
Remove the (4) screws securing the starter assembly to the (side) of the saw.
Remove the starter assembly from the saw.
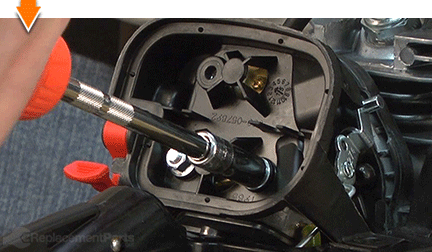
6. Disconnect the fuel lines.
Disconnect the incoming fuel line from the bottom of the carburetor.
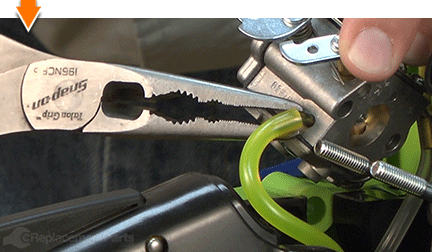
Disconnect the fuel return line from the primer assembly.
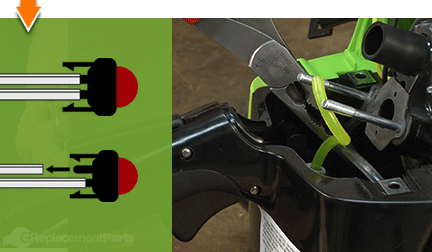
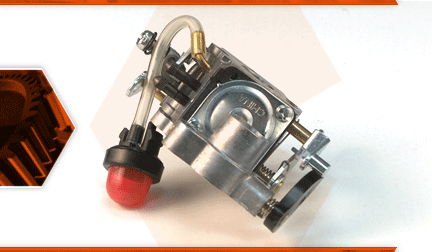
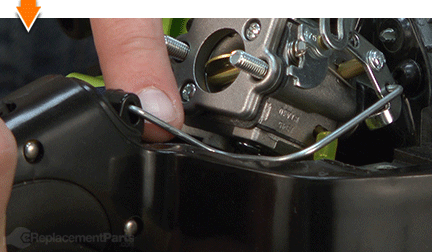
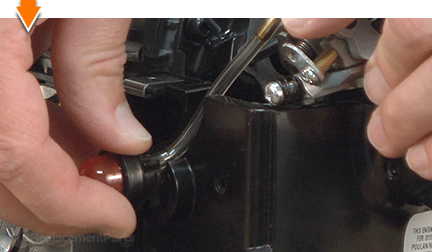
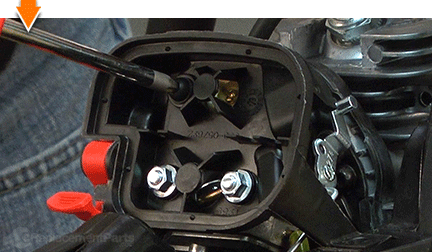
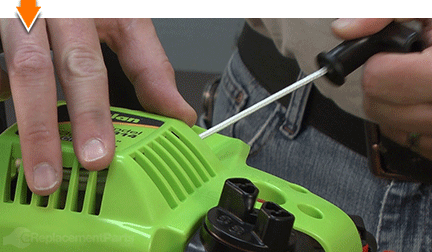
7. Remove the purge bulb.
Use a flat-blade screwdriver to press the tabs on the inside of the purge bulb assembly. This will release the purge bulb from the housing.
Slide the purge bulb assembly out of the engine housing.
8. Remove the choke lever.
Disconnect and remove the choke lever from the carburetor.
INSTALLING THE NEW CARBURETOR [top] 9. Install the choke lever.
Install the choke lever onto the new carburetor.
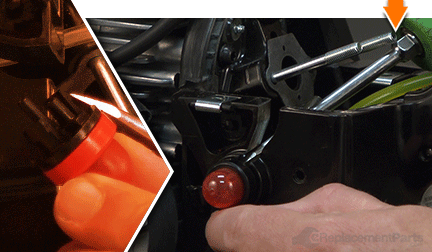
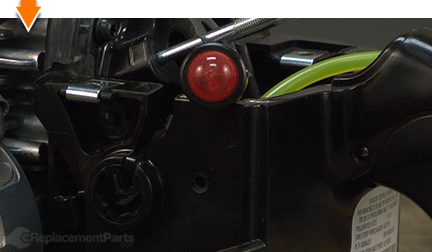
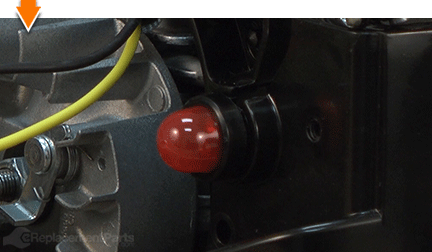
10. Install the purge bulb assembly.
Thread the fuel line (connected to the new purge bulb) into the slot on the engine housing.
Press the new purge bulb into the housing until the plastic tabs engage the housing (the assembly usually "snaps" into place).
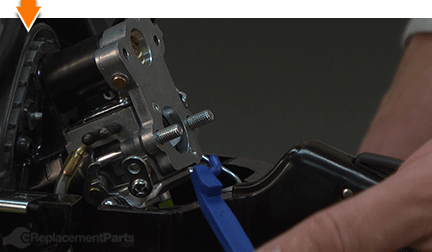
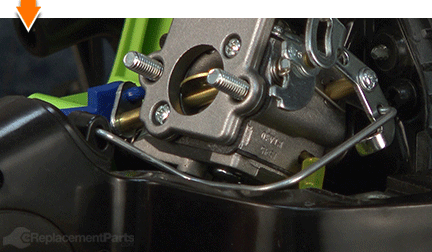
11. Install the carburetor.
Install the incoming fuel line (usually green) onto the new carburetor.
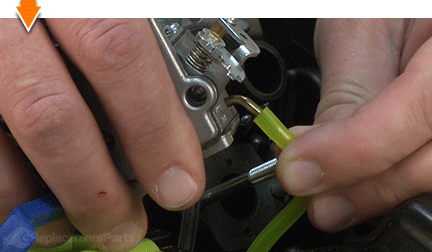
Install the fuel return line onto the new primer assembly.
Slide the carburetor onto the two mounting posts on the engine.
Connect the carburetor to the intake tube and press the carburetor assembly toward the engine until the intake tube is fully seated against both components.

Connect the throttle linkage to the carburetor linkage.
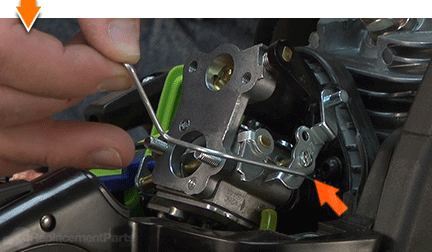
Pull and hold the throttle trigger to expose the attachment point for the trigger-portion of the throttle linkage.

Connect the throttle linkage to the throttle trigger.
REASSEMBLING THE UNIT [top] 12. Reinstall the air filter housing.
Slide the air filter housing over the carburetor mounting posts.
Secure the air filter housing to the engine with the (2) nuts.
Secure the air filter housing to the carburetor with the (1) screw.
Install the air filter.
Install the air filter cover.
13. Reinstall the starter assembly.
Install the starter assembly to the engine.
Pull the starter rope slowly until the flywheel engages the starter assembly.
Secure the starter assembly to the engine with the (4) screws.
14. Reinstall the top cover.
Install the top cover onto the saw.
Secure the top cover with the (3) screws.

Do-it-yourself repairs like these are easier than you might think: From lawn machines to cordless drills, kitchen mixers to outdoor grills. Our "how-to" articles walk you through each repair from start to finish.
So, doing-it-yourself means never having to do it alone.
