


Why Read This Article?
Finish Nailer Repair - Replacing the Driver Guide (Ridgid Part # 79004001022)
Article Breakdown
Finish Nailer Repair - Replacing the Driver Guide (Ridgid Part # 79004001022)
Video

Tools & Materials

Saw chopping into your budget? It's time to face the fix. Whether you are a commercial contractor or a weekend welder, eReplacementParts.com provides the parts, procedures and facts you need to fearlessly fix what fails you.
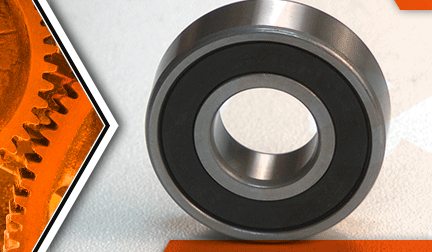
The armature is the central part of your chop saw's motor. It contains two bearings (one on each end), which allow the armature to rotate. Over time, these bearings will deteriorate and will need to be replaced.
When you start to notice the warning signs of a bearing going bad (a squealing sound, often accompanied with extreme vibration) it is important to stop using the tool and replace the bearing. If you continue to use the tool, the bearing will eventually seize, which will lead to more significant damage (such as melted housings or damage to the armature shaft).
This article provides step-by-step instructions for removing and installing the fan-side armature bearing on a DeWALT chop saw (model D28715).
Let's talk chop.
 REMOVING THE ARMATURE BEARING [top]
1. Unplug the saw.
REMOVING THE ARMATURE BEARING [top]
1. Unplug the saw.
Disconnect power to the saw.
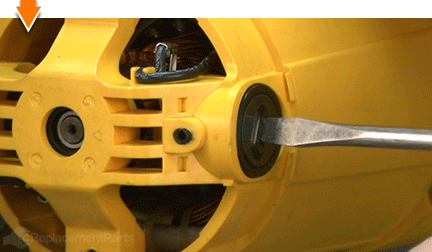
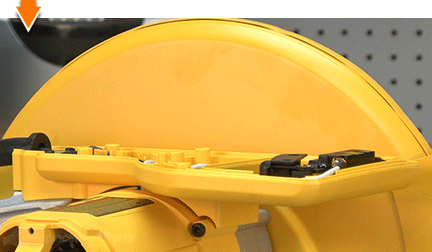
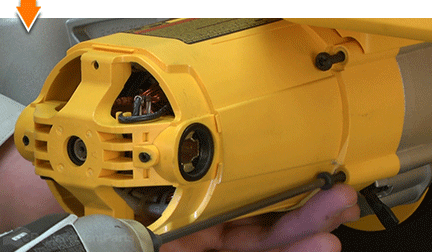
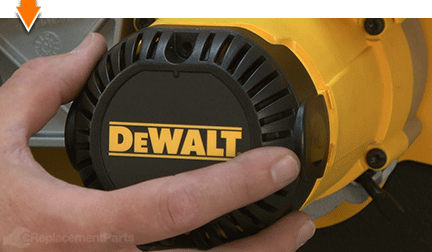
2. Remove the motor end cap.
Remove the (2) screws securing the end cap to the field case.
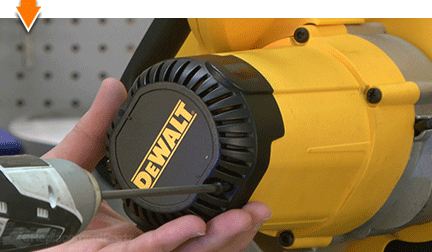
Remove the end cap.
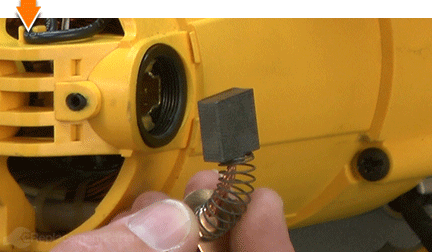
3. Remove the motor brushes.
Use a flat-blade screwdriver to unscrew the motor brush caps (on each side of the motor).
Remove the motor brush caps.
Remove the motor brushes.
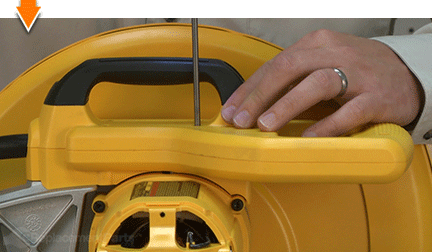
4. Remove the handle.
Remove the screws securing the top half of the handle.
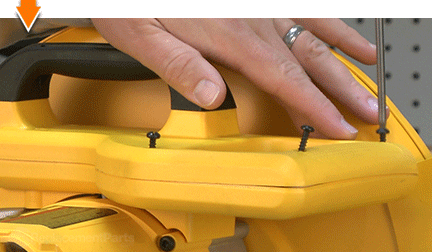
Lift the top half of the handle away from the lower half.
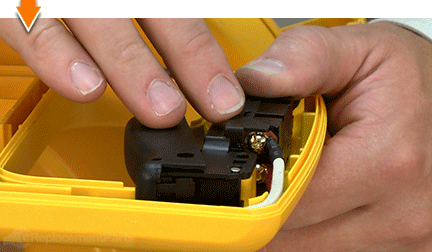
5. Reposition the switch.
Remove the screw securing the switch to the lower handle.
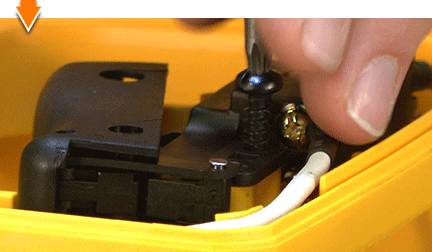
Lift the switch assembly (and wires) away from the lower handle.
Reposition the switch so that the wires are able to slide freely through the lower handle assembly.
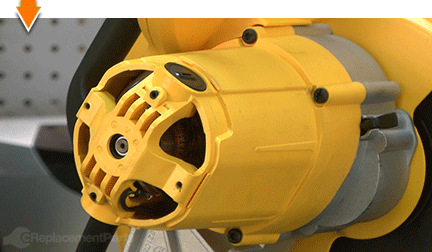
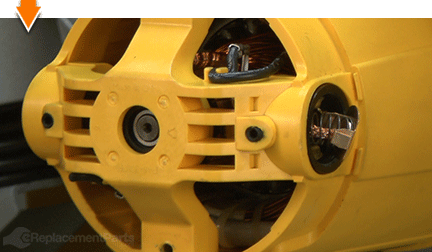
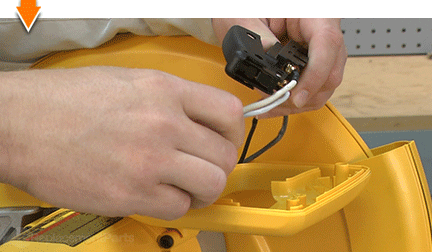
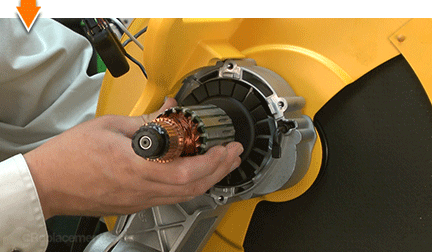
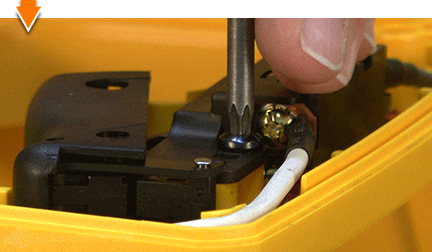
6. Remove the armature assembly.
Remove the (4) screws securing the field case (motor) to the saw.
Slowly pull the field case (and the armature) away from the saw.

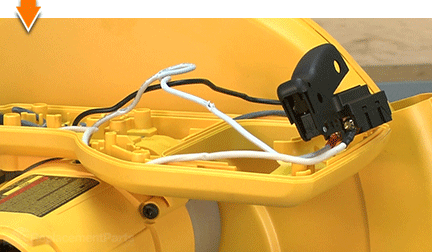
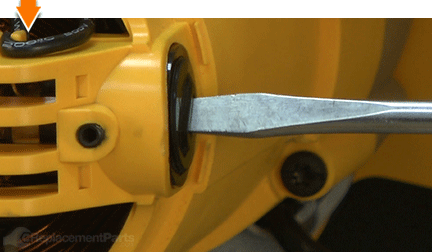
If the armature assembly is still attached to the arm of the saw (and not inside the field case); pull (or gently rock) the armature to free it from the saw arm.

If the armature assembly is still inside the field case; use a screwdriver to push on the rear of the armature shaft (through the field case) and disconnect it from the case.
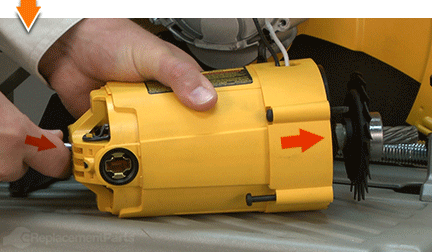
Slide the armature assembly away from the field case.

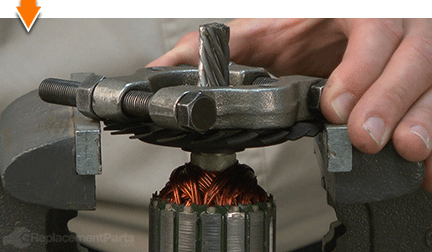
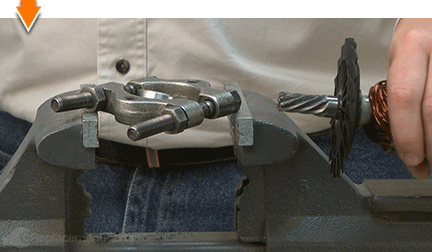
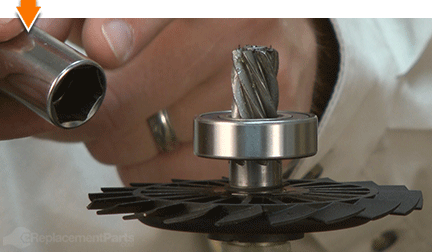
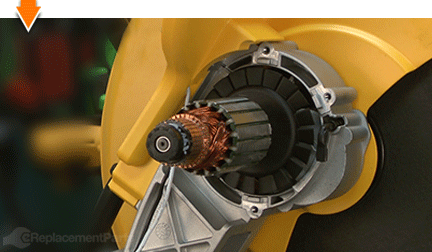
7. Remove the armature bearing.
Position the bearing separator beneath the armature bearing (above the fan).
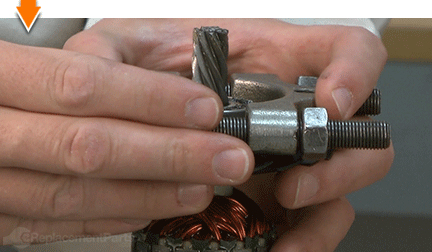
Tighten the bolts on the bearing separator.
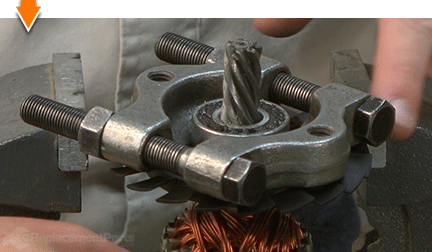
Place the bearing separator (and the armature assembly) in the vise. The jaws of the vise should be opened wide enough to accommodate the armature fan (without touching it).
Use a rubber mallet to tap the end of the armature shaft until the bearing breaks free from the shaft.
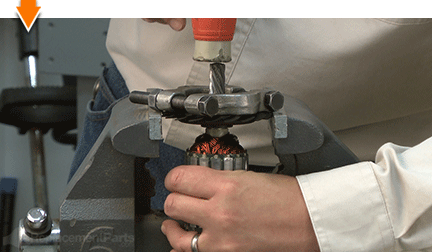
Remove the bearing from the armature (or from the separator).
INSTALLING THE NEW ARMATURE BEARING [top] 8. Install the armature bearing.
Slide the new armature bearing onto the armature shaft.
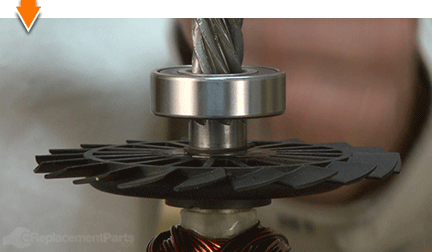
Locate a socket that has the same outer diameter as the inner race of the new bearing (and an inner diameter sufficient to accommodate the armature shaft).
Position the socket squarely against the bearing.
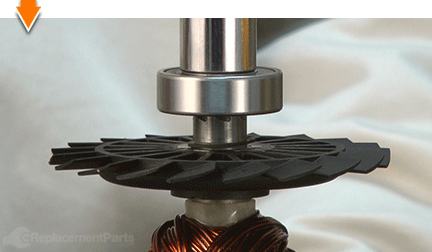
Carefully tap the socket with a rubber mallet to press the bearing onto the armature shaft.
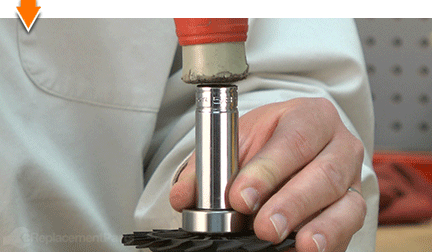
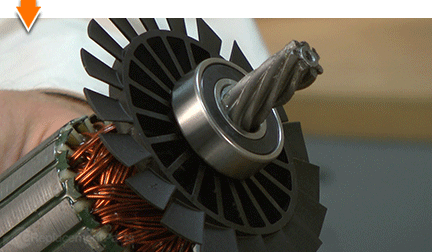
Continue tapping the socket until the bearing is seated against the retaining ring on the armature.
REASSEMBLING THE UNIT [top] 9. Reinstall the armature.
Align the splines of the armature shaft with the gears inside the arm of the saw.
Press and rotate the armature assembly until the armature bearing is fully seated in the recess on housing.
10. Reinstall the field case.
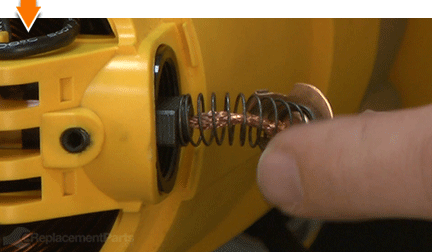
Verify that the rubber bearing cup is seated on the rear armature bearing. The cup may be wedged inside the plastic field case. If so, remove the bearing cup from the field case and install it on the armature bearing (as pictured).

Slide the field case over the armature assembly while gently pulling the excess slack from the wires (on the handle).
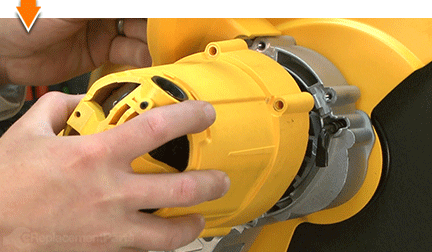
Press (or tap) the field case until the rubber bearing cup is fully seated within housing.

Secure the field case with the (4) screws.
11. Reinstall the switch.
Install the switch assembly into the lower handle.
Secure the switch to the lower handle with the screw (using the hole closest to the body of the switch).
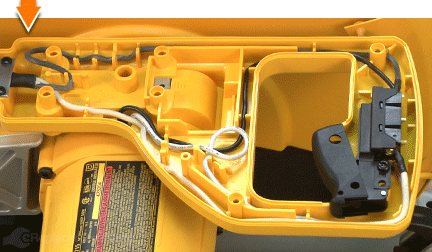
Tuck the switch wires and the motor wires into the holders on the lower housing.
12. Reinstall the top half of the handle.
Install the top half of the handle.
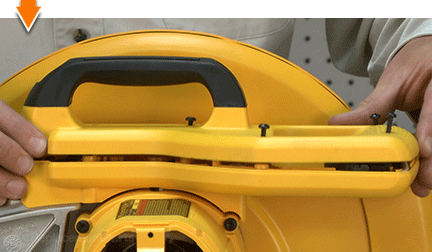
Secure the handle with the screws.
13. Reinstall the motor brushes.
Install the motor brushes into the brush holders.
Secure the motor brushes with the brush caps.
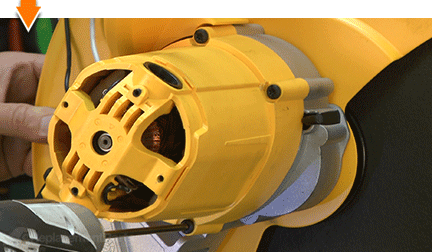
14. Reinstall the motor end cap.
Install the end cap.
Secure the end cap with the (2) screws.


Do-it-yourself repairs like these are easier than you might think: From lawn machines to cordless drills, kitchen mixers to outdoor grills. Our "how-to" articles walk you through each repair from start to finish.
So, doing-it-yourself means never having to do it alone.
