


Why Read This Article?
Finish Nailer Repair - Replacing the Driver Guide (Ridgid Part # 79004001022)
Article Breakdown
Finish Nailer Repair - Replacing the Driver Guide (Ridgid Part # 79004001022)
Video

Tools & Materials

Gears Hammered? It's time to face the fix. Whether you are a master carpenter or an occasional drill-seeker, eReplacementParts.com provides the parts, procedures and facts you need to fearlessly fix what fails you.
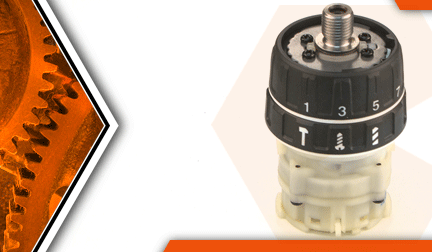
The gear assembly is a critical component of your cordless drill. It consists of the transmission, the clutch, and the hammer-drill mechanism.
There are several symptoms that would indicate your gear assembly is failing. The most common is that the motor spins, but the chuck does not. This is usually accompanied by a grinding noise from the transmission. It can occur in either the high or low gears (or both at the same time). Be careful with this symptom, though, because if the gear selector is accidently moved between the high and low gears; your drill will display the same symptoms.
Another symptom is a clutch that is weak (or slips too easily). This is caused by wear to the clutch portion of the gear assembly. Replacing the gear assembly will solve this problem.
The hammer-drill function is also part of the gear assembly. So, if your drill no longer hammers when you attempt to drill masonry or concrete, you will need to replace the gear assembly. This article provides step-by-step instructions for removing and installing the gear assembly on a Makita cordless hammer drill.
Let's get started.
 REMOVING THE GEAR ASSEMBLY [top]
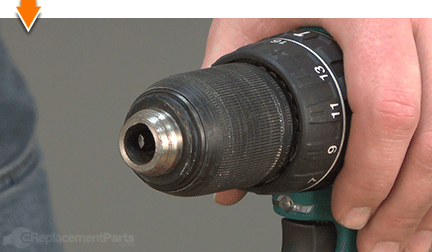
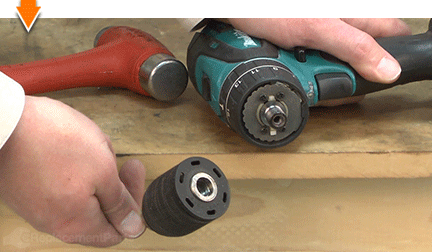
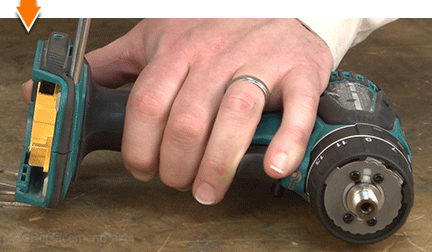
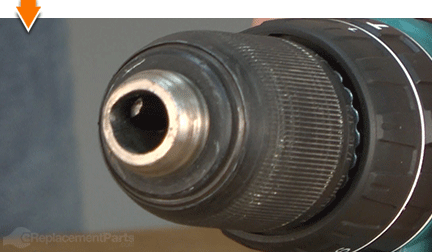
1. Remove the chuck.
REMOVING THE GEAR ASSEMBLY [top]
1. Remove the chuck.
Open the chuck to the widest position.
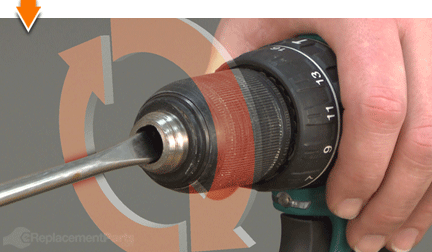
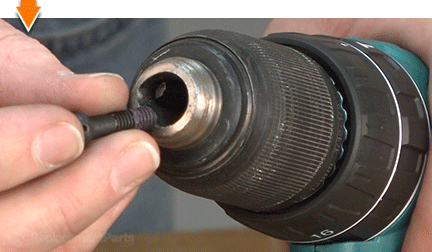
Use a large screwdriver driver (size/type may vary) to loosen the retaining screw. This screw is REVERSE-THREADED (requiring CLOCKWISE rotation to loosen).
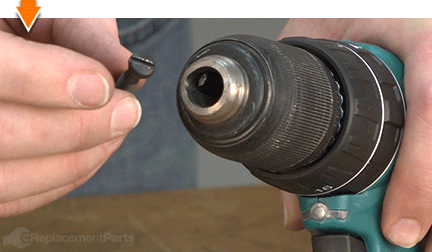
Remove the retaining screw from the chuck assembly.
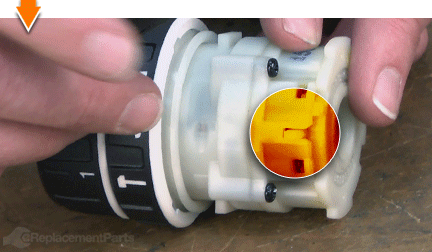
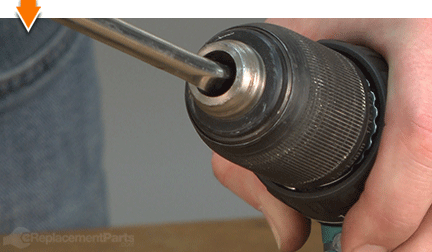
Secure the short end of a large Allen wrench (as large as the chuck will accommodate) into the chuck assembly.
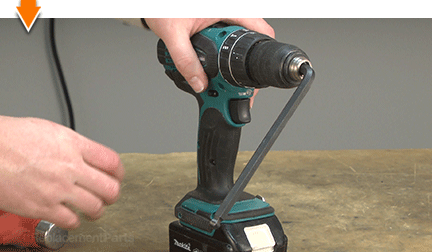
Position the drill on a surface that allows the chuck (and Allen wrench) to overhang the edge.
While securely holding the drill against the work surface, strike the exposed end of the Allen wrench with a hammer. This will (eventually) loosen the chuck assembly. (It may require several attempts).
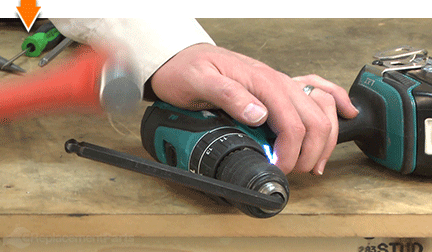
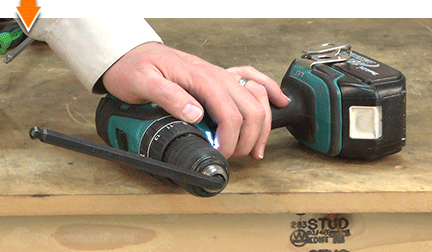
Continue to rotate (unscrew) the chuck assembly (by hand) until it disengages the spindle.
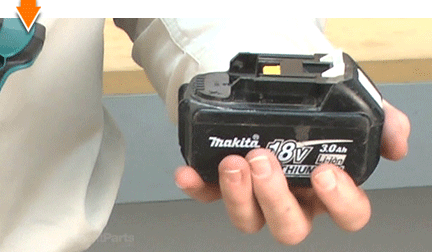
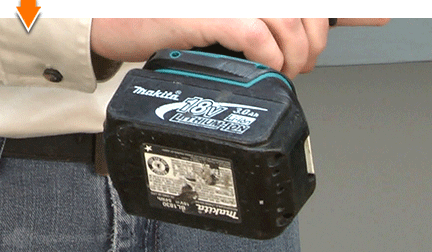
2. Remove the battery.
Remove the battery from the drill.
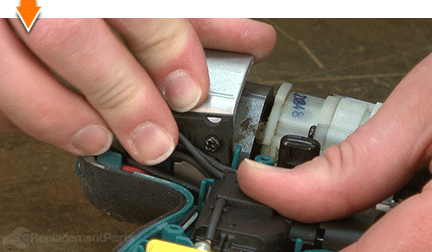
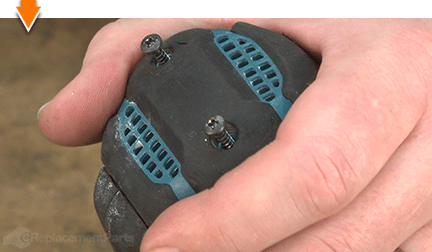
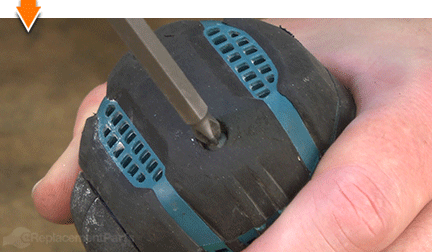
3. Remove the rear cover.
Remove the (2) screws.
Remove the rear cover from the drill.
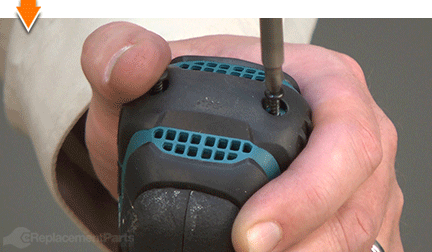
4. Split the housings.
Remove the screws from the top half of the housing.
Lift the top half of the housing away from the unit.

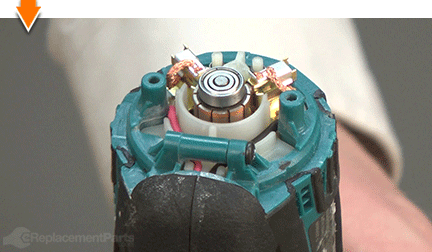
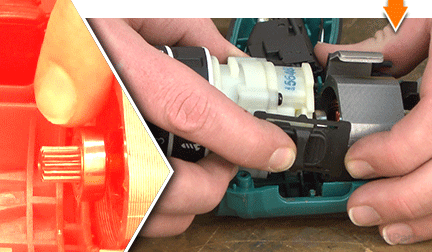
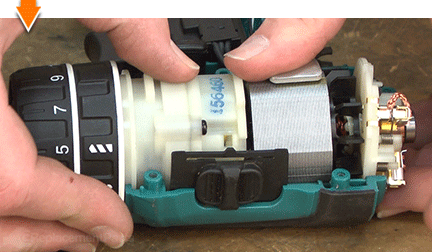
5. Remove the gear assembly.
Lift the heat sink away from the motor.
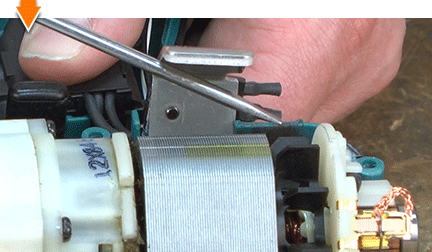
Carefully lift the gear assembly away from the motor (and out of the housing).
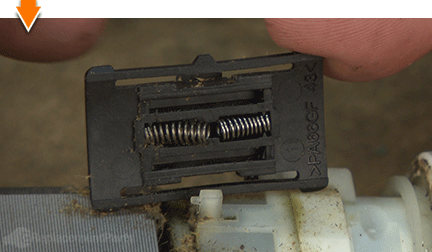
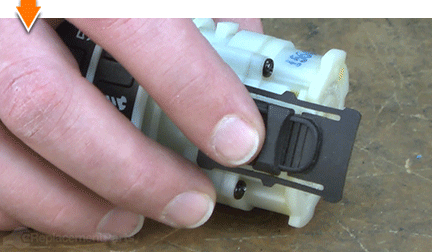
Remove the speed selector lever from the gear assembly. Be careful not to lose the two springs that are located within the (bottom portion of the) speed selector.
INSTALLING THE NEW GEAR ASSEMBLY [top] 6. Install the speed selector lever.
Verify that the two springs are properly positioned within speed-selector lever.
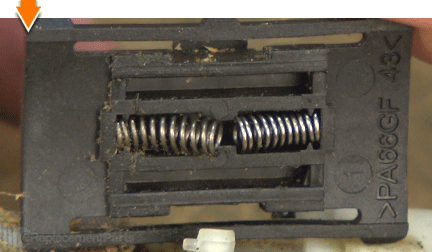
Align the post on the gear assembly with the opening (between the two springs) on the speed-selector lever.
Install the speed-selector lever.
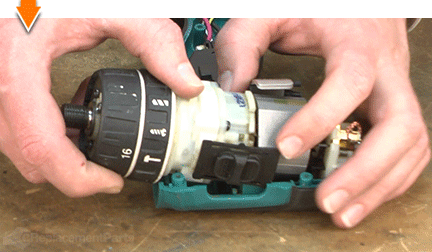
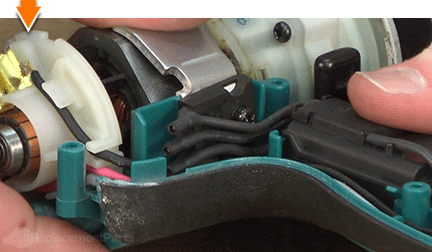
7. Install the gear assembly.
Align the gear on the motor with the gears inside the new assembly.
Install the new gear assembly into the lower half of the housing.
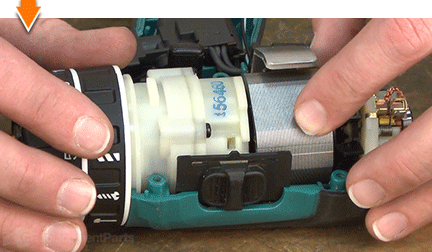
Manipulate the components (the gear assembly and the motor) until: 1) the notch on the yoke unit engages the tab on the housing; 2) the speed-selector switch is properly seated within the channels on the housing; and 3) the brush card is properly seated in the lower half of the housing.
REASSEMBLING THE UNIT [top] 8. Reinstall the heat-sink.
Install the heat-sink into the lower half of the housing.
Verify that the wires (extending from the heat-sink) are positioned on the switch-side of the plastic post (not on the motor-side).
9. Reinstall the top half of the housing.
Inspect all of the wires for potential pinch-points; make adjustments as necessary.

Reinstall the top half of the housing.
Secure the housing with the screws.
10. Reinstall the rear cover.
Install the rear cover.
Secure the rear cover with the (2) screws.
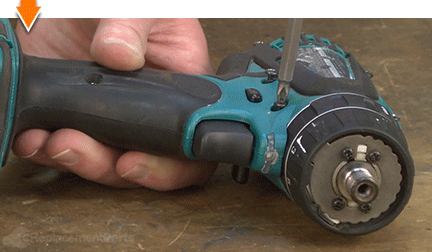
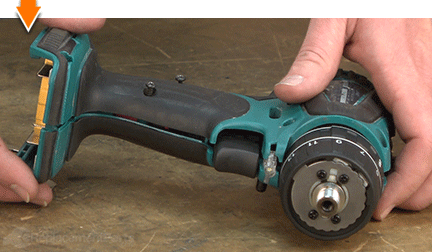
11. Reinstall the chuck.
Thread the chuck assembly onto the spindle until it is hand-tight.
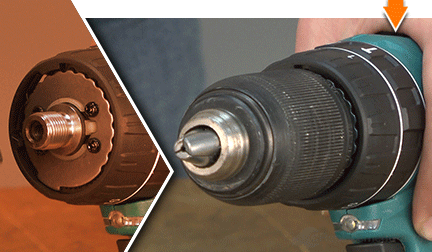
Open the chuck to the widest position.
Install the retaining screw.
Secure the retaining screw with a screwdriver. The screw is REVERSE-THREADED (requiring COUNTERCLOCKWISE rotation to secure).
12. Reinstall the battery.
Install the battery.

As you just learned, fixing things yourself means more drilling with less billing. Hopefully, this article has restored your ability to drill holes without replacing your whole drill. And that's just the tip of the bit. Our online repair guides can help expand your skills far beyond drills; empowering you to face power tool problems whenever they arise; and to fearlessly fix whatever fails you.
