


Why Read This Article?
Finish Nailer Repair - Replacing the Driver Guide (Ridgid Part # 79004001022)
Article Breakdown
Finish Nailer Repair - Replacing the Driver Guide (Ridgid Part # 79004001022)
Video

Tools & Materials
Glitch in your router switch? It's time to face the fix. Whether you are a master carpenter or a weekend woodworker, eReplacementParts.com provides the parts, procedures and facts you need to fearlessly fix what fails you.
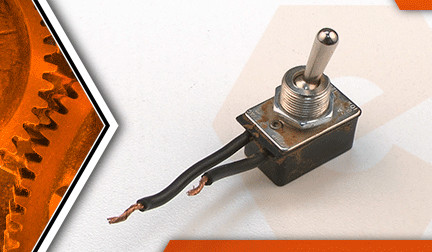
Few things will stop a router as quickly as a glitch in the switch. After years of use and repeated cycling between the "ON" and "OFF" positions, the toggle switch will eventually fail. Common symptoms include intermittent (electrical) power loss, sudden power loss, or the complete inability to activate (or deactivate) the router.
This article provides step-by-step instructions for removing and installing the toggle switch on a Porter Cable 690 series router.
Let's get started.
![]() REMOVING THE SWITCH [top]
1. Remove the motor housing cap.
REMOVING THE SWITCH [top]
1. Remove the motor housing cap.
Remove the (2) screws from the motor housing cap.
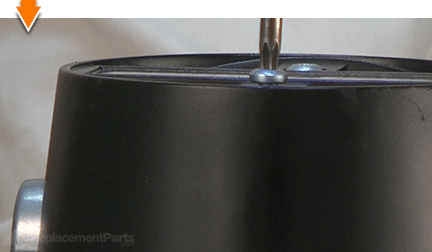
Remove the motor housing cap from the motor unit.
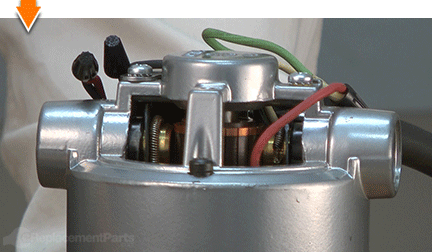
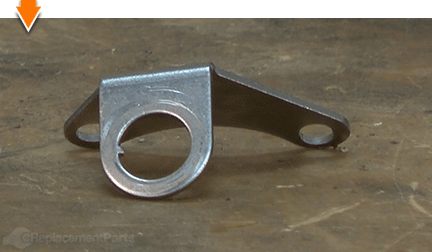
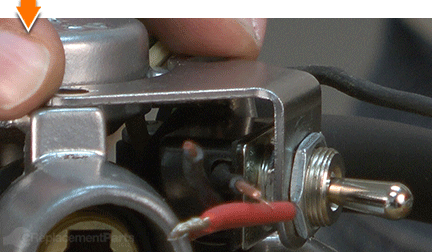
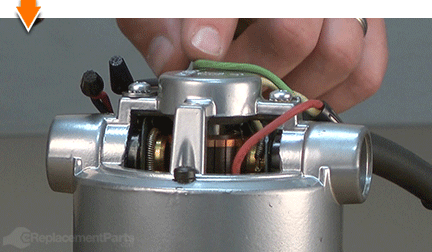
2. Remove the bracket (and switch) from the unit.
Remove the screw from the top of the switch bracket.
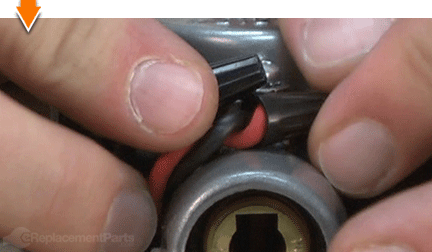
Remove the wire connectors.
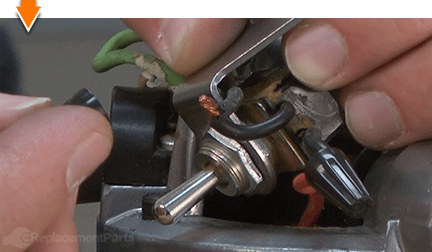
Separate the wires.
Remove the switch (and bracket) from the unit.
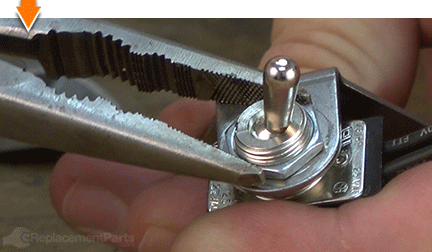
3. Remove the switch from the bracket.
Remove the retaining nut from the switch.
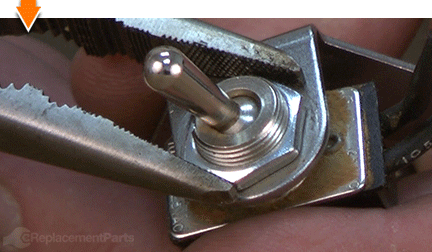
Remove switch from the bracket.
INSTALLING THE NEW SWITCH [top] 4. Compare/Prepare the new switch.
The following steps outline a simple procedure for modifying the switch to match the original switch in our router. YOUR SWITCH MAY BE DIFFERENT; IT MAY NOT REQUIRE THIS MODIFICATION.
Porter Cable has made many changes to their routers and switches in the past 90 years. Some switch configurations remain identical to the originals; others may no longer exist at all (such as the configuration shown on the switch in this article). Therefore, it is important to CAREFULLY COMPARE THE SWITCH YOU PURCHASING AND/OR INSTALLING with the switch found in your specific router.
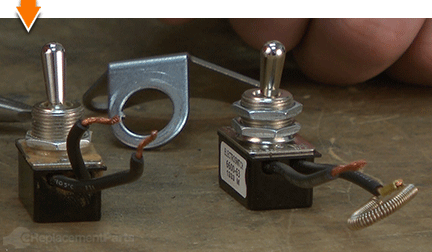
Place the new switch beside the original switch.
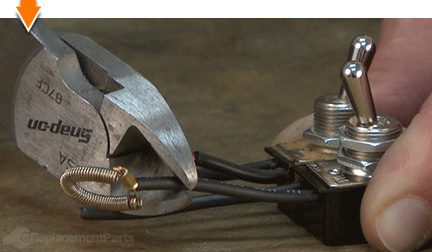
Use wire cutters to cut the wires of the new switch to match the length of the original wires.
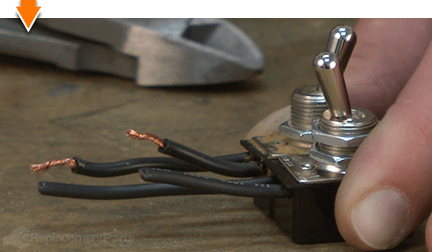
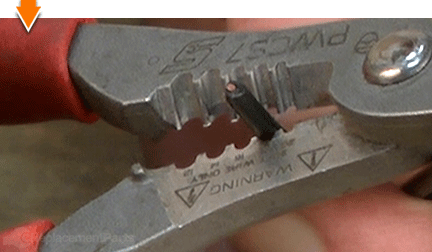
Use wire strippers to strip approximately ¼ of insulation from each of the new switch wires.
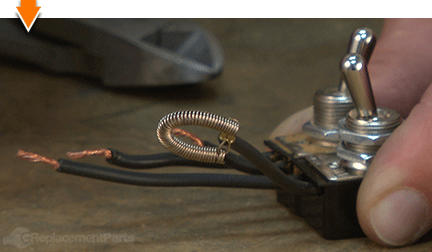
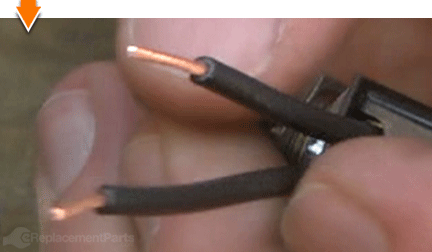
Twist the ends of each set of wires to prepare them for installation.
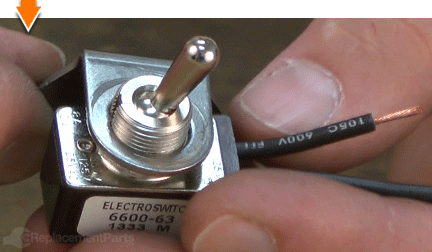
5. Install the switch onto the bracket.
Install the new switch onto the switch bracket.
Secure the switch to the bracket with the nut.
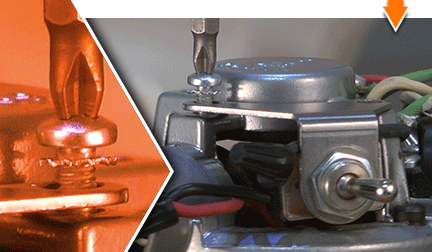
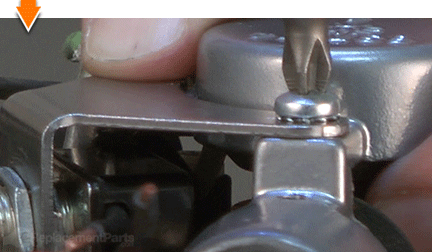
6. Install the bracket (and switch) onto the router.
Install the switch bracket (and switch) onto the router.
Secure the switch assembly with the screw.
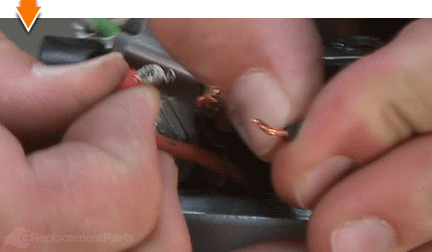
7. Connect the wires.
Connect (twist together) each set of wires to the motor wires.

Secure the wire connections with the (2) wire nuts.
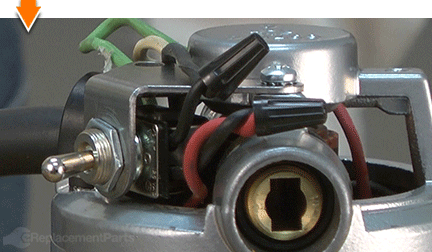
Tuck the wire connections neatly alongside the motor housing.
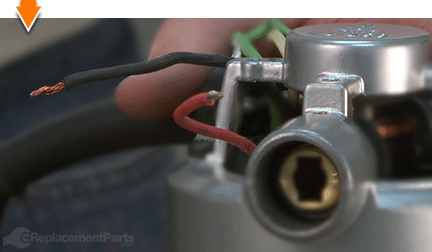
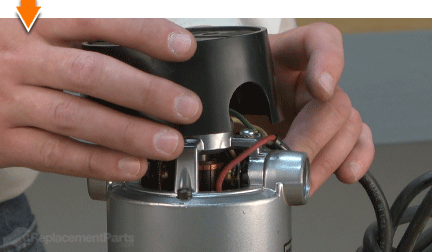
REASSEMBLING THE UNIT [top] 8. Reinstall the motor housing cap.
Inspect all of the wires around the power unit for potential pinch points. Adjust the wires and connectors as necessary.
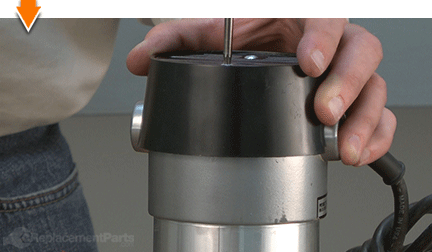
Install the motor housing cap onto the power unit.
Secure the motor housing cap with the (2) screws.
![]()
Dovetails. Rabbets. Dados. Grooves: The possibilities are as priceless as machines that create them. But you don't have to be a carpenter to cut out the middle-man. Repairing your own powered equipment is easy and economical when you follow our step-by-step guides. Not only did you restore your router at a fraction of the cost of replacement; you built on your ability to face the next fix, whatever it may be.
