Why Read This Article?
Finish Nailer Repair - Replacing the Driver Guide (Ridgid Part # 79004001022)
Article Breakdown
Finish Nailer Repair - Replacing the Driver Guide (Ridgid Part # 79004001022)
Tools & Materials

String trimmer out of whack? It's time to face the fix. Whether you are a legendary landscaper or a weekend weed whacker, eReplacementParts.com provides the parts, procedures and facts you need to fearlessly fix what fails you.
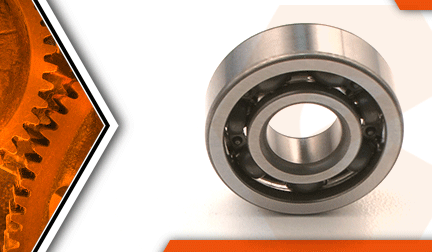
Crankshaft bearings provide the bearing surface between the crankshaft and the crankcase. These bearings are typically very durable, but with extreme use, it is possible to destroy them. More common causes of bearing failure include running the engine without oil mixed into the fuel (which can quickly lead to bearing seizure), or operating an engine that has suffered from dirt ingestion (the dirt will wear away the bearing surface).
Replacing the crankshaft bearings can be a moderately difficult (yet highly rewarding) project. Because the bearings are situated in the center of the engine, you will be removing (and re-assembling) nearly every major component on your trimmer. However, if you follow our step-by-step instructions, you should be able to complete this repair on your own, while learning just about everything else there is to know about the parts within your Echo SRM-225 trimmer.
Let's get started.
 REMOVING THE BEARINGS [top]
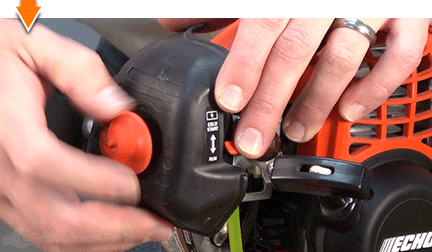
1. Remove the air cleaner assembly.
Loosen the thumb screw.
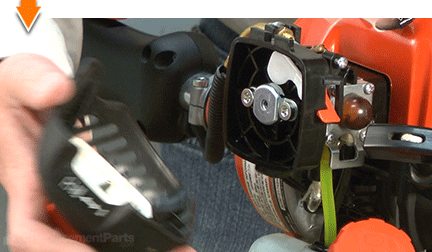
Remove the air cleaner lid.
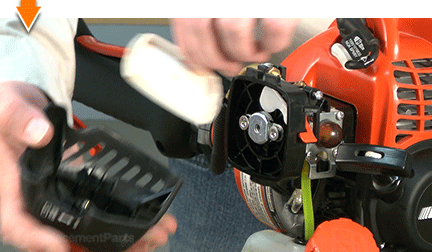
Remove the air filter.
2. Drain the fuel.
Drain the fuel before servicing the unit.
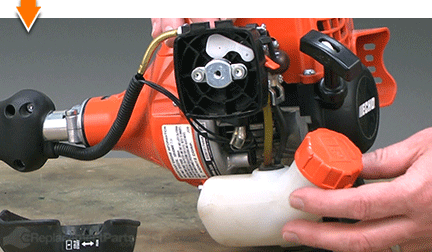
3. Remove the air cleaner case.
Loosen the (2) bracket retaining screws.
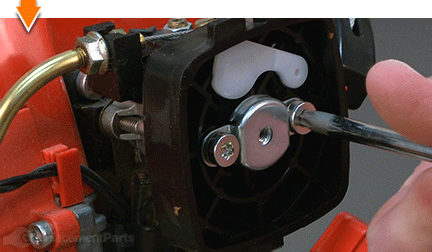
Remove the air cleaner case (along with the bracket and the screws) from the engine.
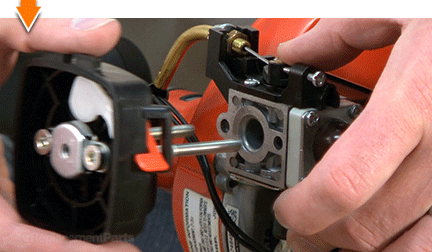
4. Remove the carburetor.
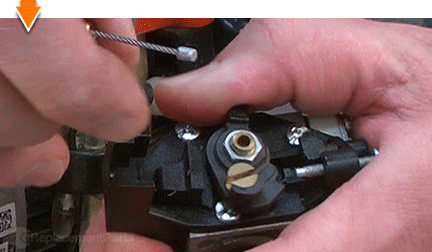
Use a wrench to loosen the throttle cable adjusting nut.
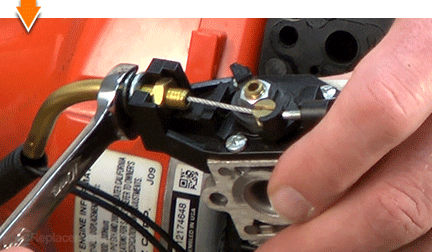
Disconnect the throttle cable from the throttle body.
Disconnect the (2) fuel lines from the carburetor.
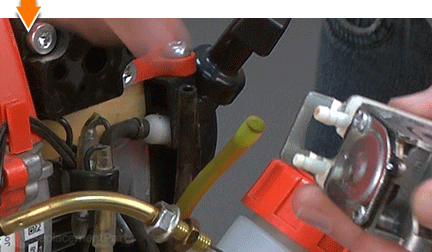
Remove the carburetor from the engine.
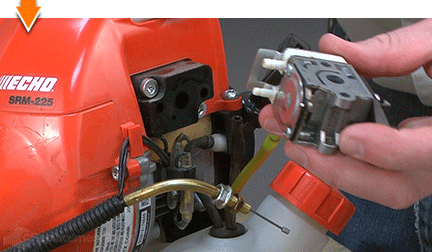
Locate and remove the intake insulator gasket. (This gasket is situated between the carburetor and the intake insulator block. Typically, the gasket will fall away from the two components as they are separated. Sometimes, the gasket will remain affixed to either the carburetor or the intake insulator block.)
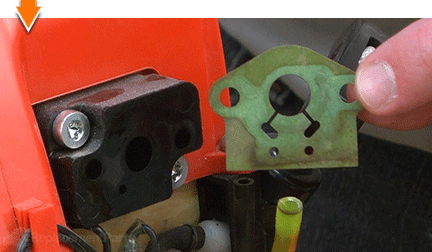
5. Remove the intake insulator block.
Remove the (2) retaining screws.
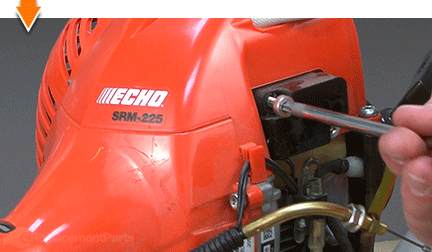
Remove the intake insulator block from the engine.
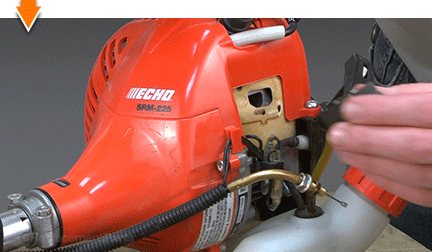
6. Remove the spark plug from the engine.
Disconnect the spark plug boot from the spark plug.
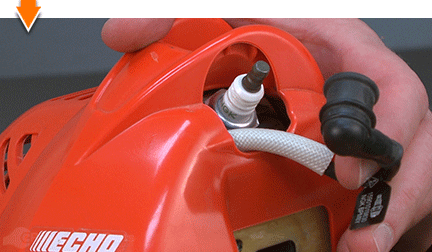
Use a spark plug wrench (or socket) to loosen the spark plug.
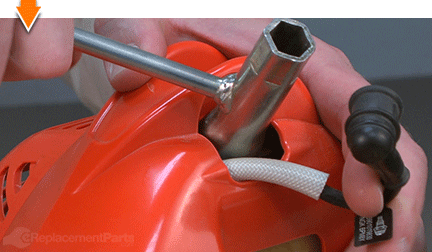
Remove the spark plug from the engine.
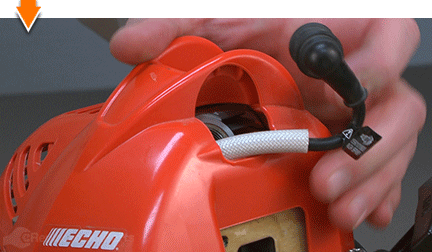
7. Remove the engine cover.
Remove the (2) retaining screws from the engine cover.
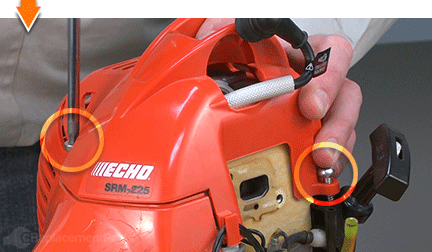
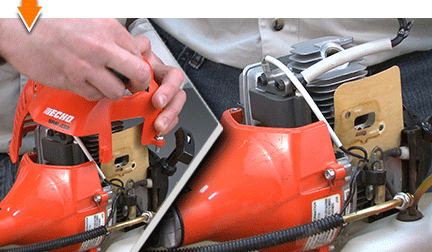
Lift and remove the engine cover from the engine.
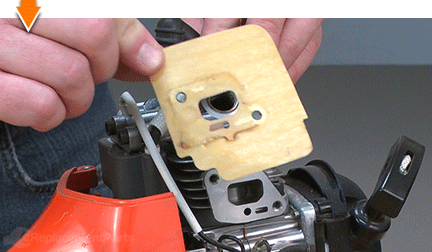
8. Remove the intake insulator gasket.
Remove the intake insulator gasket from the engine.
9. Remove the starter assembly from the engine.
Remove the (4) screws from the FACE of the starter assembly.
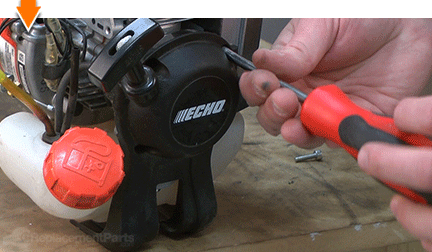
Remove the (1) screw from the SIDE of the starter assembly.
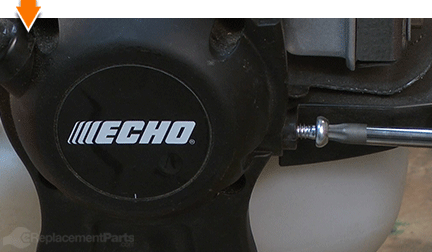
Remove the (1) screw from the BOTTOM of the starter assembly (this screw passes through the fuel tank).
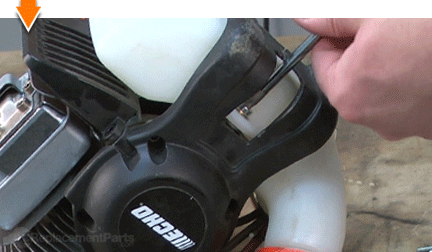
Pull the starter assembly away from the engine.
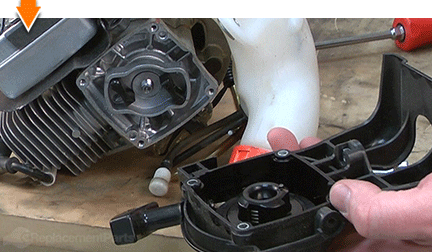
10. Remove the fuel tank from the unit.
Remove the (2) remaining screws from the fuel tank.
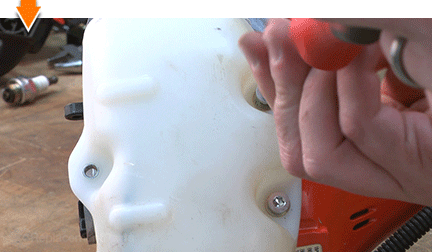
Remove the fuel tank from the unit.
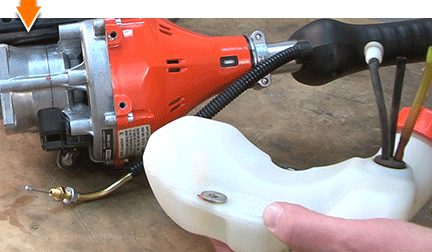
11. Remove the air duct from the engine.
Remove the (1) screw from the air duct.
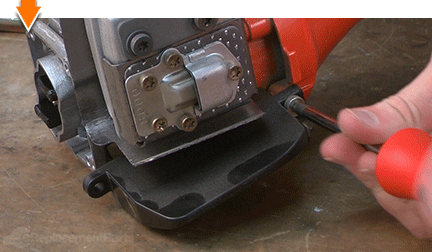
Remove the air duct from the engine.
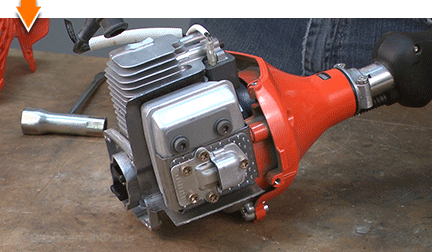
12. Separate the engine from the clutch/shaft assembly.
Disconnect the ignition wires (at the connectors).
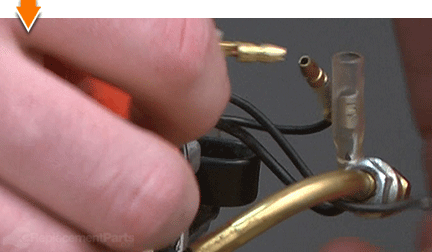
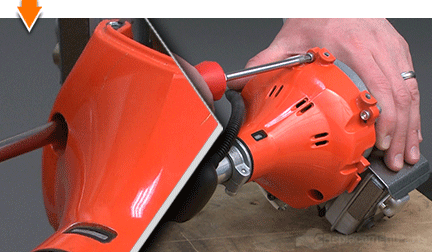
Remove the (4) screws from the clutch/shaft assembly (two from the top half; two from the bottom half).
Use a rubber mallet to tap the engine away from the clutch/shaft assembly.
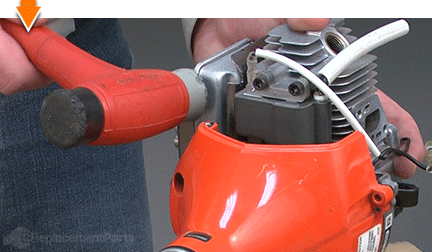
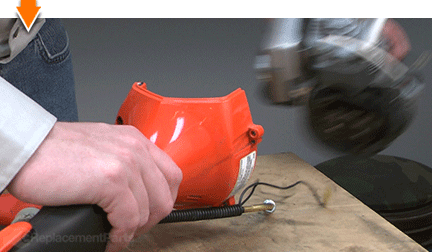
Separate the engine from the clutch/shaft assembly.
13. Bind the engine.
This step effectively binds the engine, which facilitates the removal of key components (described in subsequent steps). Begin by inserting either end of an old starter rope (or similar rope) into the engine cylinder (through the spark plug hole). Continue feeding the rope into the cylinder until the piston is unable to move.
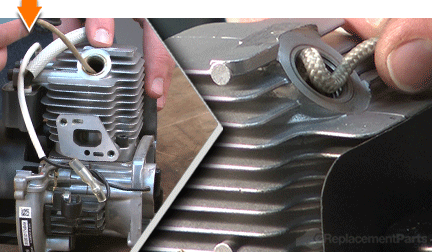
14. Remove the clutch from the engine.
With the engine bound; use adjustable pliers to rotate (loosen) the clutch.
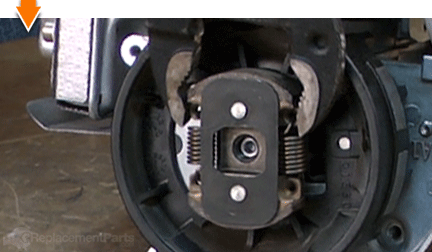
Unthread and remove the clutch from the spindle.
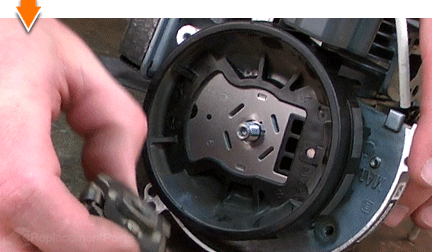
15. Remove the flywheel from the engine.
Securely grasp the flywheel in one hand.
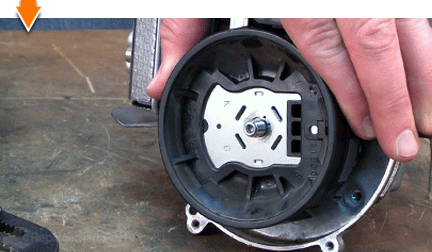
Use a RUBBER mallet to tap on the center of the spindle while pulling the flywheel in the opposite direction (away from the engine). Do not use a metal hammer; doing so will damage the spindle.
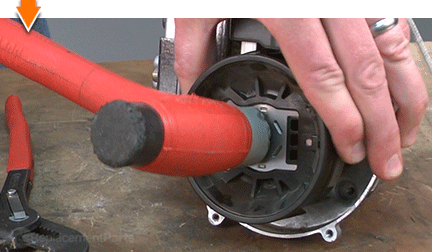
Remove the flywheel from the engine.
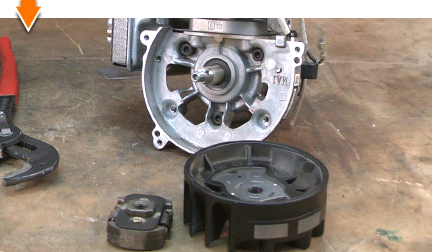
16. Remove the starter pulley from the engine.
With the engine bound; use adjustable pliers to rotate (loosen) the starter pulley.
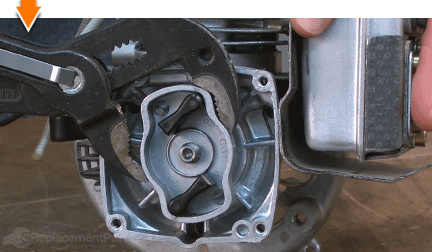
Unthread and remove the starter pulley from the spindle.
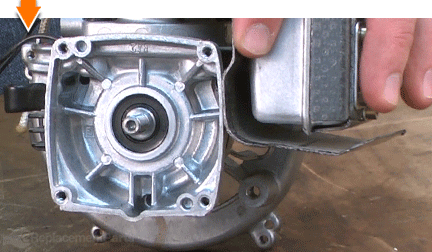
17. Unbind the engine.
Remove the starter rope from the engine cylinder.
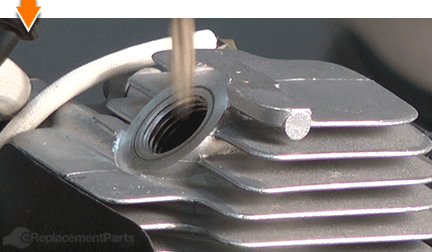
18. Remove the muffler from the engine.
Remove the (2) retaining screws from the muffler assembly.
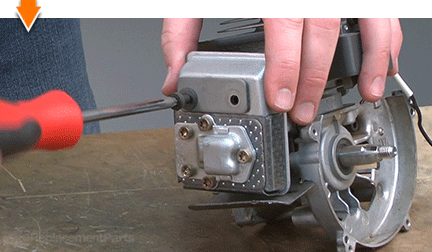
Remove the muffler assembly from the engine.
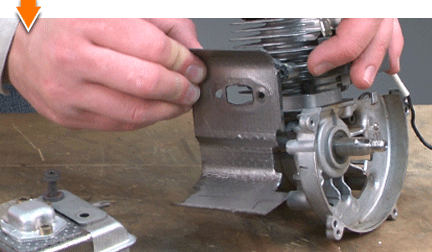
19. Separate the cylinder from the crankcase.
Remove the (2) retaining screws from the cylinder. The first screw can be accessed from the side of the cylinder.
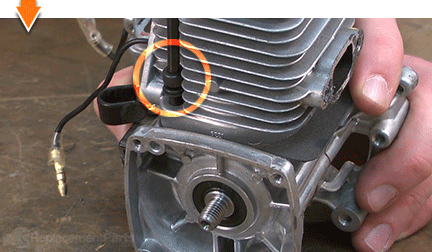
The second screw must be accessed through the hole in top of the cylinder head.
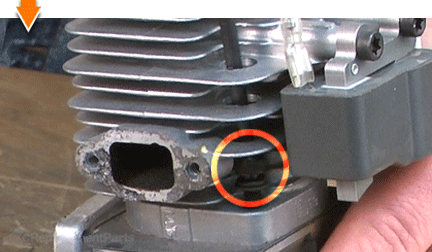
Separate the cylinder from the crankcase.
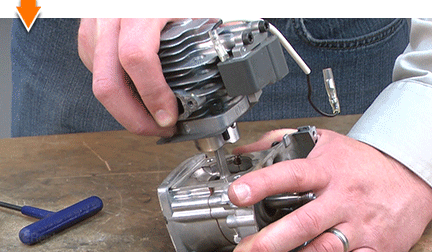
20. Separate the two halves of the crankcase from the crankshaft.
The crankshaft passes through the crankshaft bearings on both sides of the crankcase. To separate the two halves of the case, the crankshaft must be pressed (in our case, tapped with a rubber mallet) out of the bearings (one at a time). The following steps describe the process.
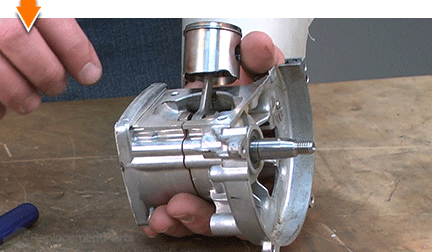
Remove the (3) retaining screws from the side of the crankcase.
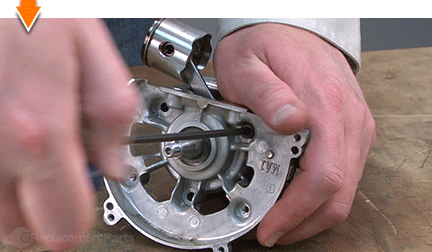
Position the crankcase so that the longer side of the crankshaft is facing up.
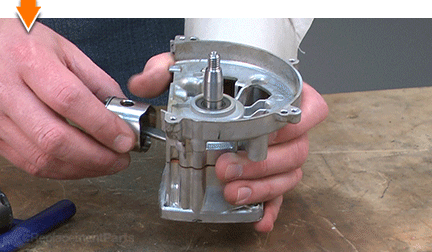
With one hand; grasp and hold the entire assembly slightly above the work surface.
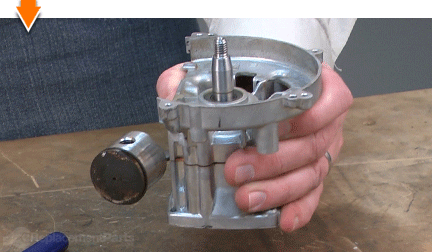
Use a rubber mallet to strike the top of the crankshaft spindle. Continue striking the spindle, as necessary, until the crankshaft breaks free from the bearing.
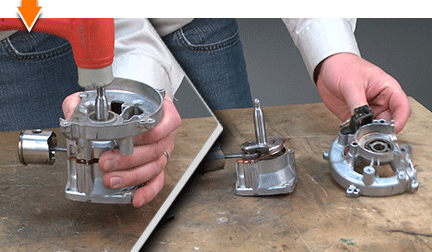
Repeat this step to remove the crankshaft from the second half of the crankcase.
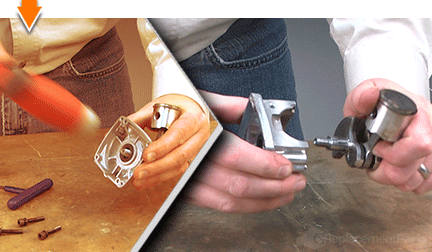
21. Remove the oil seals from the crankcase halves.
Position one side of the crankcase flatly upon the work surface, with the oil seal facing down (the bearing should be visible from the top).
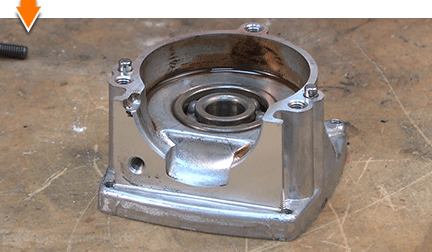
Pass a screwdriver through the center of the bearing until the blade of the screwdriver engages the edge of the oil seal.
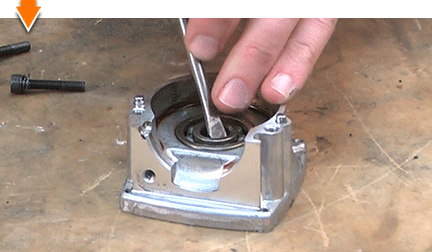
Tap the end of the screwdriver with a mallet a few times to loosen the oil seal.
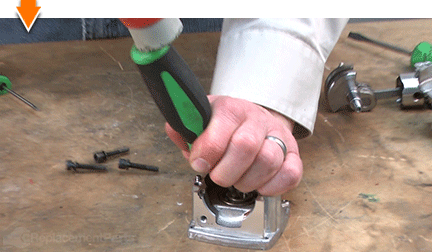
Raise and realign the blade of the screwdriver to the opposite side of the oil seal.
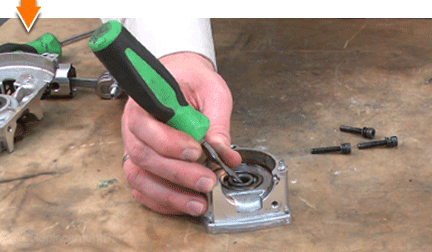
Again, tap the end of the screwdriver with a mallet.
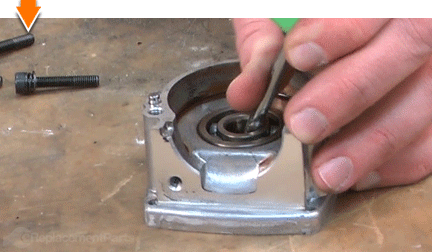
Work your way around the edges of the oil seal (as necessary) until the seal breaks free of the assembly.
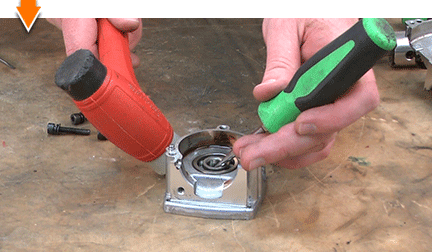
Remove the oil seal from the crankcase half.
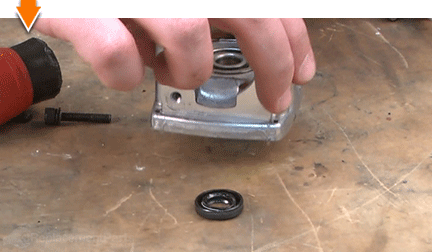
Repeat this step to remove the second oil seal from the other half of the crankcase.
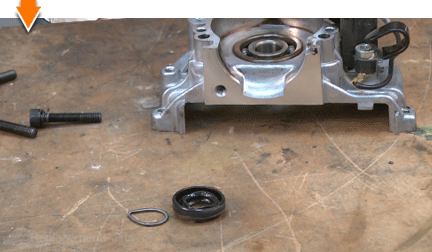
22. Remove the crankshaft bearings from the two halves of the crankcase.
Position one side of the crankcase flatly upon the work surface, with the bearing facing down.
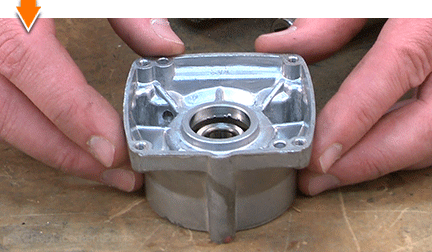
Locate a socket that is approximately the same size as the inner race of the crankshaft bearing.
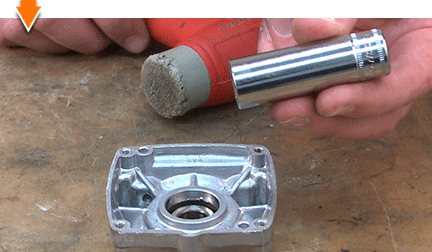
Position the socket squarely against the inner race of the bearing.
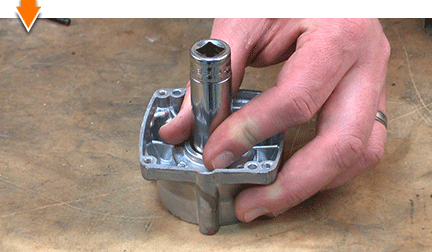
Tap the top of the socket with a mallet. Continue tapping the socket until the bearing breaks free of the crankcase half.
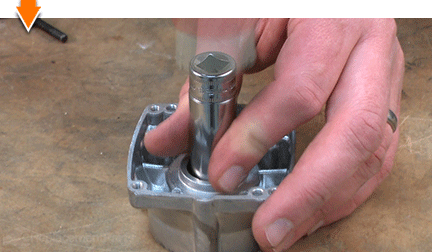
Remove the crankshaft bearing from the crankcase half.
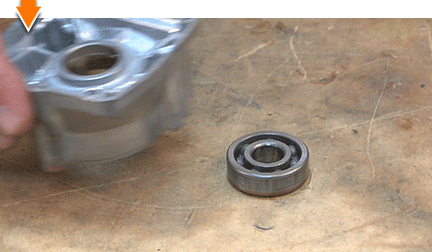
Repeat this step to remove the second crankshaft bearing from the other half of the crankcase.
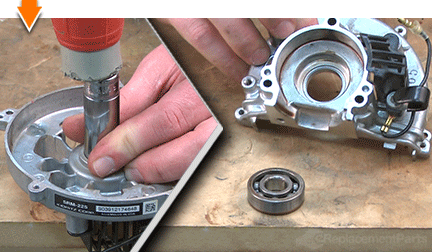
INSTALLING THE NEW BEARINGS [top] 23. Install the crankshaft bearings.
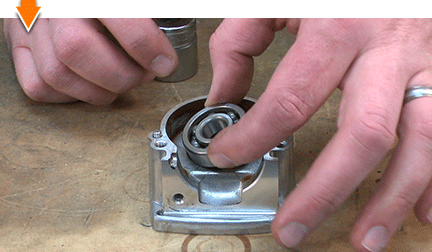
Position one half of the crankcase flatly upon the work surface; the bearing seat facing up.
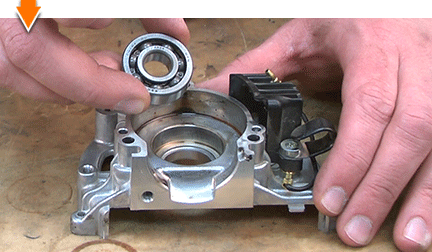
Place the new crankshaft bearing into its approximate position within the crankcase.
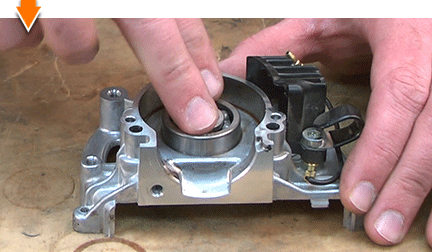
Locate a socket that is approximately the same size as the OUTER race of the crankshaft bearing (this socket should be larger than the one used earlier; it is important not to hammer on the inside race of a new bearing).
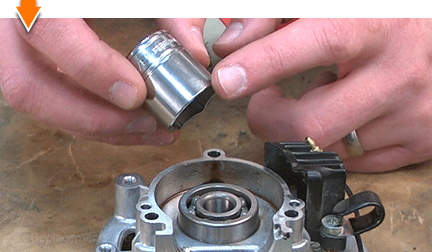
Position the socket squarely against the OUTER race of the new bearing.
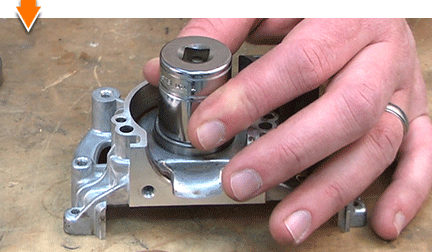
Tap the top of the socket with a mallet.
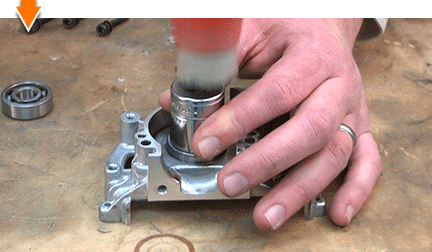
Continue tapping the socket until the bearing is pressed all the way into its seat in the crankcase half.
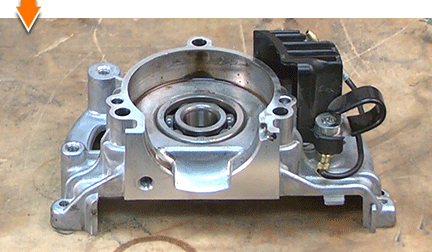
Repeat this step to install the second (new) crankshaft bearing into the other half of the crankcase.
REASSEMBLING THE UNIT [top] 24. Reinstall the crankshaft oil seals.
Position one half of the crankcase flatly upon the work surface; the bearing should be facing down.
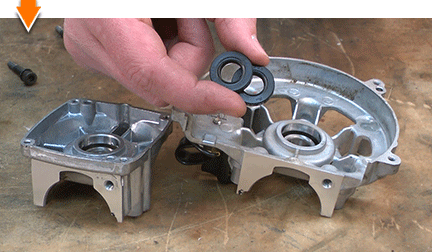
Lubricate the outer edge of the oil seal with 2-cycle engine oil.
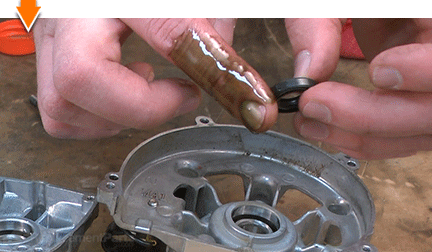
Locate a socket that is slightly smaller than the oil seal.
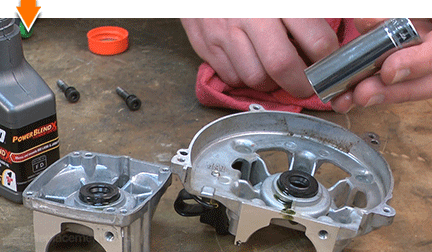
Place the oil seal into its approximate position within the crankcase; the spring within the seal should be facing the new bearing.
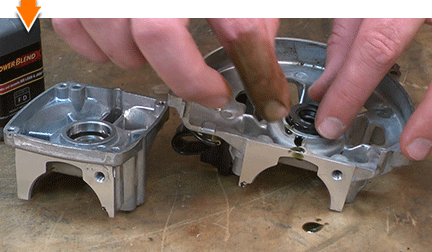
Position the socket squarely against the oil seal.
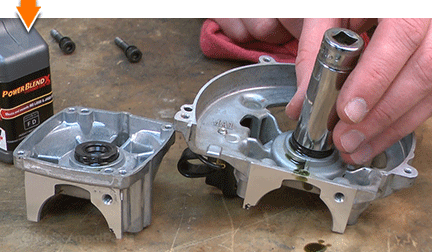
Tap the top of the socket with a mallet. Continue tapping the socket until the oil seal is seated completely within the crankcase half.
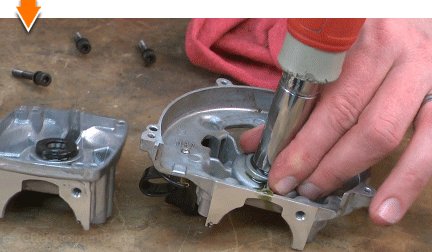
Repeat this step to install the second oil seal into the other half of the crankcase.
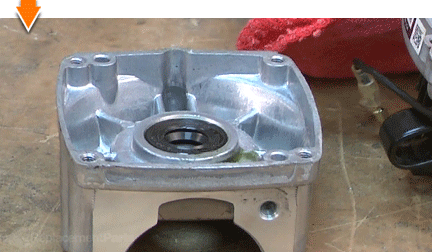
25. Reinstall the crankshaft/piston assembly.
Lubricate the crankshaft, bearings and oil seals with 2-cycle engine oil.
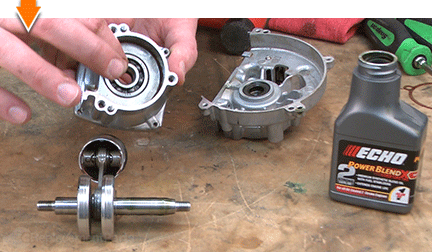
Slide the LONG end of the crankshaft into the LARGE half of the crankcase. The shaft should pass through the bearing (on the inside) and the oil seal should remain visible (on the outside).
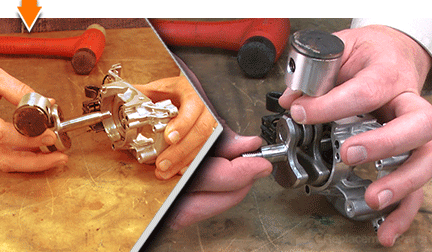
Use a rubber mallet to tap (press) the crankshaft/piston assembly into the bearing (it is not necessary to tap the assembly all the way into the bearing at this point; just enough to stabilize it until the screws can be installed).
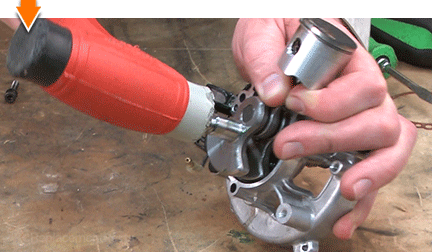
Align the crankcase gasket with the holes on the crankcase.
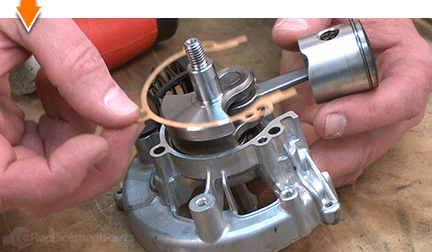
Slide the remaining (smaller) half of the crankcase over the crankshaft/piston assembly. The shaft should pass through the bearing (on the inside) and the oil seal should remain visible (on the outside).
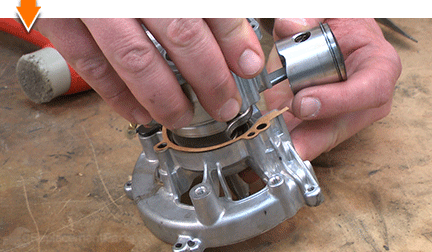
Use a rubber mallet to tap the crankcase (bearing) onto the crankshaft/piston assembly.
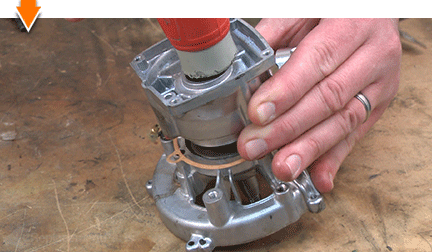
Position the entire assembly flatly upon the work surface; the smaller half of the crankcase should be on the bottom.
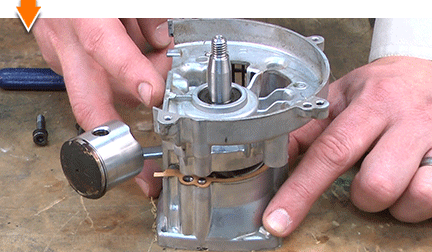
Realign the crankcase gasket with the posts and holes on the crankcase assembly.
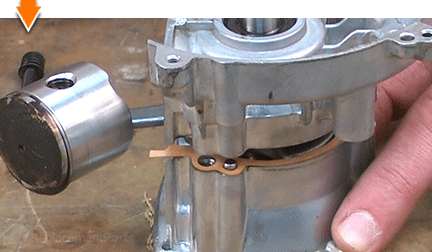
Pass each of the (3) screws through the holes in the top half of the crankcase and verify that they are able to smoothly engage the threads in the bottom half. (If the screws do not reach the threads; use a mallet to tap the crankcase further onto the shaft.)
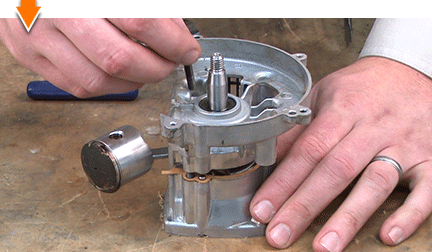
Secure the two halves of the crankcase with the screws (work your way around as you tighten the screws to ensure that they are evenly tightened).
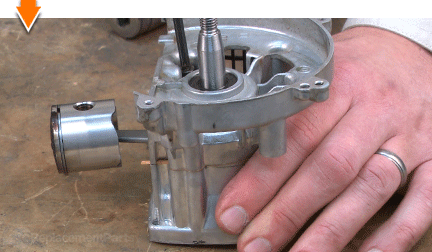
26. Reinstall the cylinder.
Use a razor blade to scrape/remove any gasket fragments or debris from the surfaces of the cylinder and the crankcase.
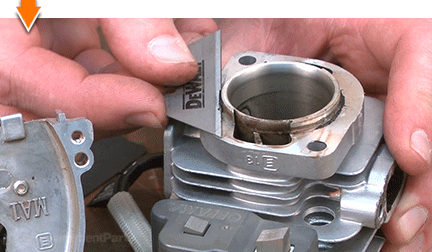
Lubricate the inside of the cylinder and the outside of the piston assembly with 2-cycle engine oil.
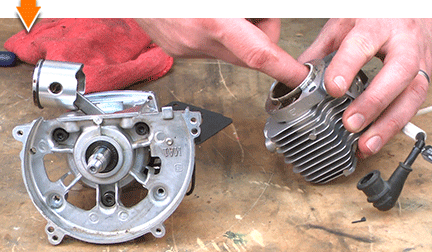
Reinstall the gasket onto the cylinder. (A new gasket is recommended).
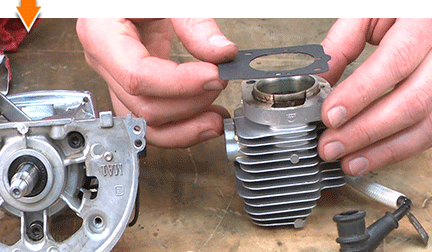
Align the two components: The cylinder assembly contains the ignition coil; this coil needs to face the same direction as the LONGER portion of the crankshaft (in order to engage the flywheel).
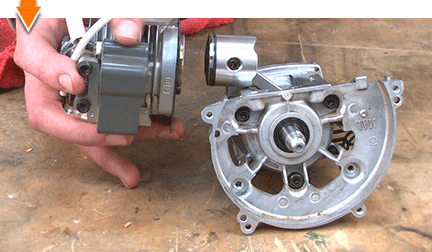
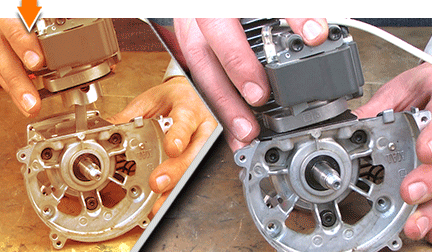
Carefully slide the cylinder over the piston assembly; ensure that the piston ring slides smoothly into the cylinder. (Do not force the piston into the cylinder.)
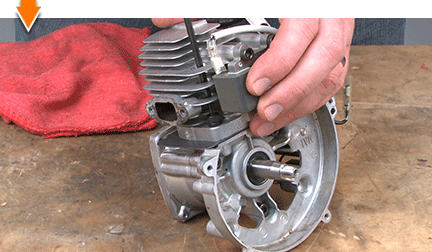
Secure the cylinder to the crankcase with the (2) screws.
27. Bind the engine. (Again.)
Insert either end of an old starter rope (or similar rope) into the engine cylinder (through the spark plug hole). Continue feeding the rope into the cylinder until the piston is unable to move.
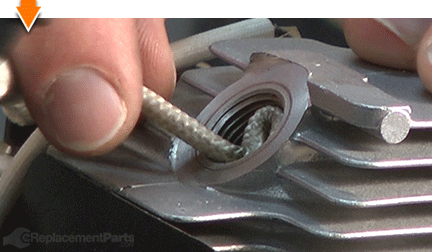
28. Reinstall the starter pulley.
Thread the pulley onto the crankshaft spindle.
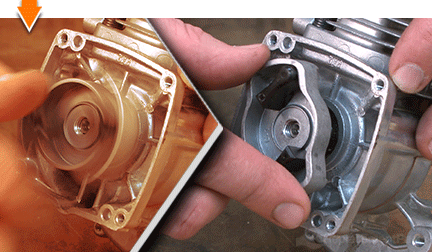
Use adjustable pliers to secure the starter pulley.
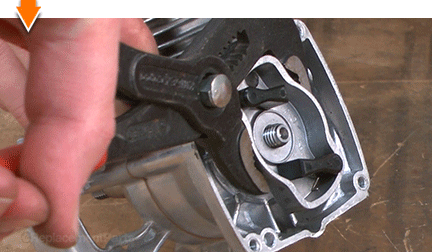
29. Reinstall the flywheel.
Note that the flywheel contains a pre-molded key which is designed to align seamlessly with the keyway on the crankshaft.
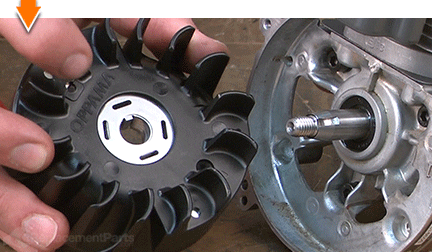
Install the flywheel onto the crankshaft spindle, ensuring alignment of the keyway. The cooling fins should be facing the engine.
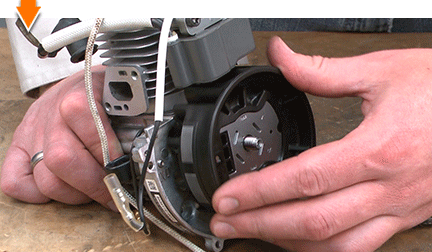
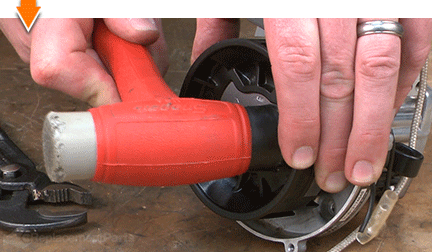
Using a rubber mallet, tap around the inside surface of the flywheel (not the spindle). It is not necessary to completely secure the flywheel with the mallet; just tap it enough to ensure that the internal components engage and seat properly. Installation of the clutch (next) will secure the flywheel to the crankshaft.
30. Reinstall the clutch.
Thread the clutch onto the crankshaft spindle.
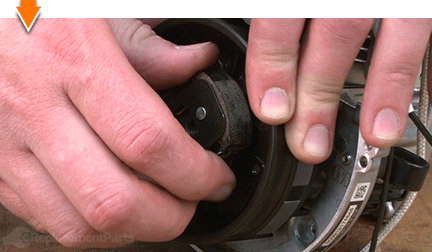
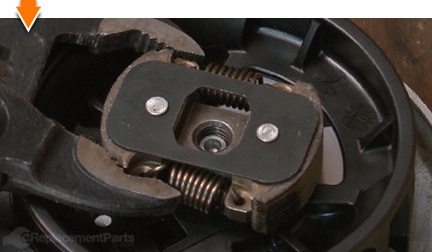
Use adjustable pliers to secure the clutch.
31. Unbind the engine. (Again.)
Remove the starter rope from the engine cylinder.
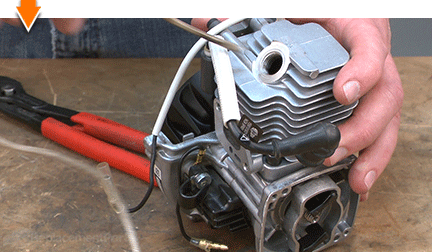
32. Set the ignition air gap.
An ignition gapping gauge is recommended to accurately complete this step. However, if you do not have an ignition gapping gauge (measuring #.014 or .35mm) it is usually acceptable to use one thick business card or two thin business cards as substitutes.
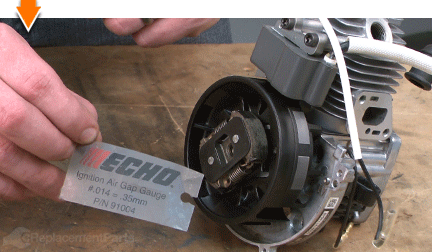
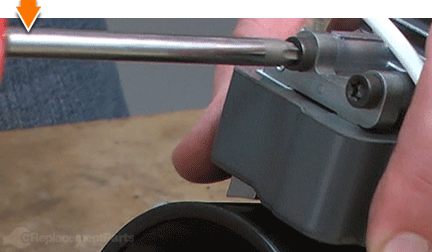
Loosen the two screws on the ignition coil (enough to allow the coil to move freely).
There are two magnets on the outside of the flywheel. Rotate the flywheel until these magnets align with the contacts on the ignition coil.
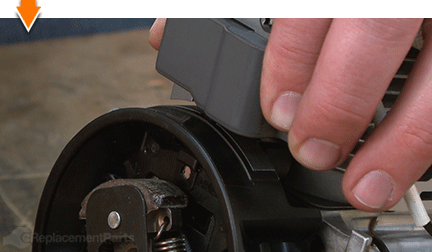
Insert the ignition gapping gauge between the ignition coil and the flywheel.
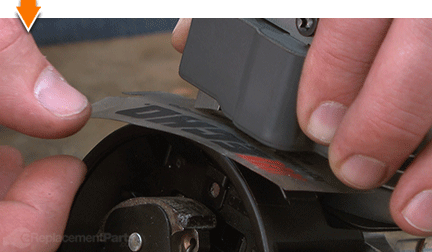
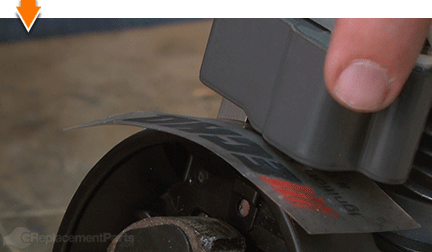
Adjust the position of the ignition coil until the contacts engage the magnets of the flywheel.
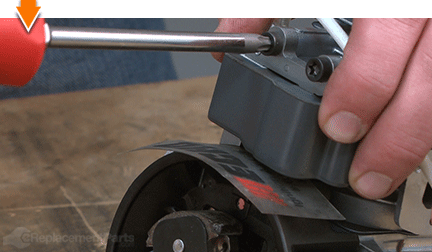
Re-secure the ignition coil with the (2) screws.
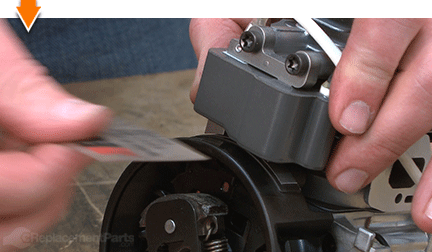
Remove the gapping gauge.
33. Reinstall the muffler and gasket assembly.
Inspect the muffler gasket for damage; replace it as necessary.
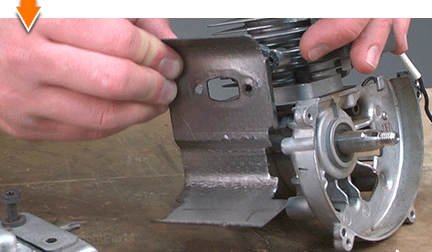
Install the muffler and gasket assembly onto the engine.
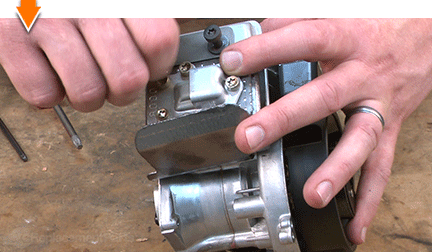
Secure the muffler and gasket with the (2) screws.
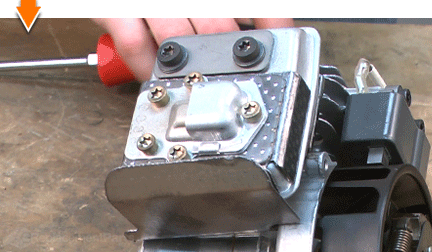
34. Reconnect the engine to the clutch and shaft assembly.
Reconnect the engine assembly to the clutch and shaft assembly.
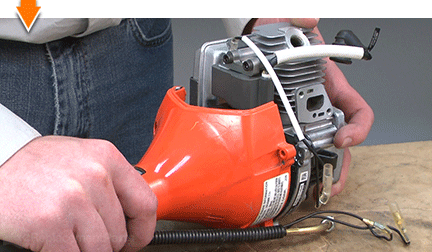
Verify that the alignment pins are properly engaged.
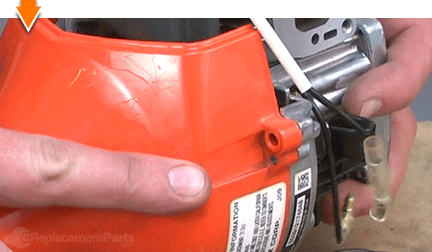
Secure the clutch and shaft assembly to the engine with the (4) screws.
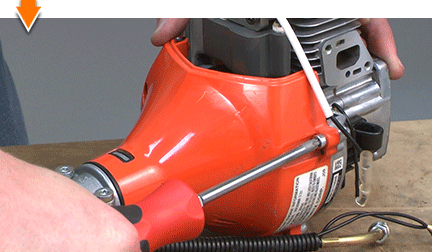
35. Reconnect the ignition wires.
Reconnect the ignition wires.
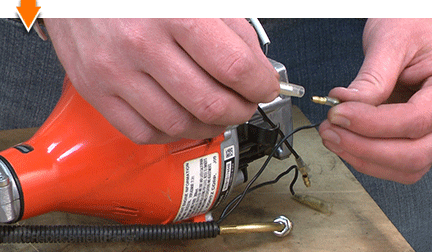
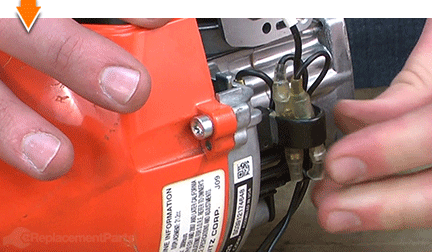
Tuck the wire connections into the holder on the side of the ignition.
36. Reinstall the fuel tank.
Align the fuel tank with the mounting holes on the bottom of the engine.
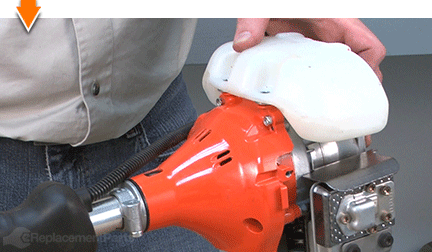
Secure the fuel tank with the (2) screws. Both of the screws should be on the same side of the fuel tank at this point. The remaining hole on the opposite side of the fuel tank will be used to attach additional components in later steps.
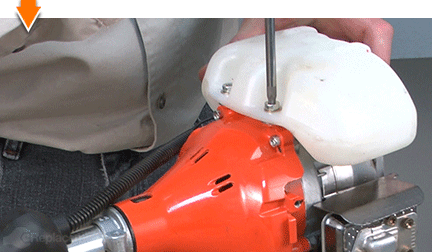
37. Reinstall the air duct.
Install the air duct between the muffler and the fuel tank.
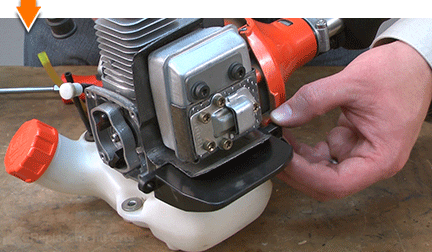
Secure the air duct with a single screw (the outermost hole should remain open at this point).
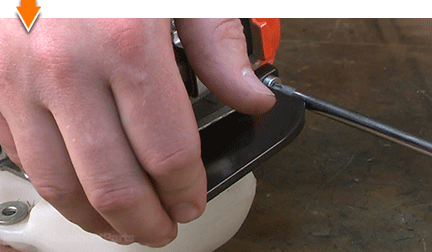
38. Reinstall the starter assembly.
Align the starter assembly with the mounting holes at the rear of the unit.
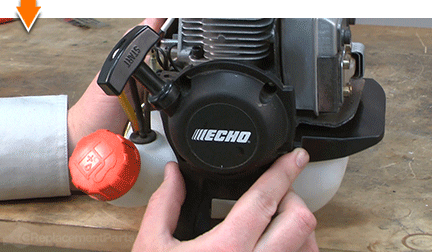
Hold the starter assembly in place while pulling gently on the starter rope. This will engage the starter pawls and ensure proper alignment.
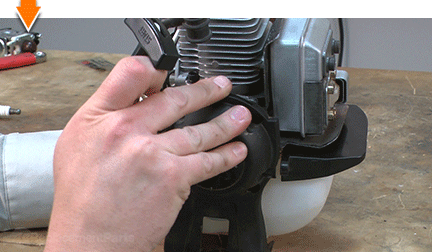
Secure the starter assembly to the engine with the (6) screws.
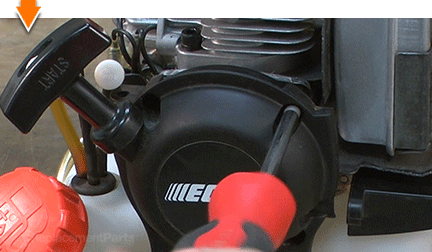
39. Reinstall the intake insulator gasket.
Install the intake insulator gasket in its approximate position against the engine block. (The gasket is secured in later steps; but it must be positioned before the engine cover is reinstalled.)
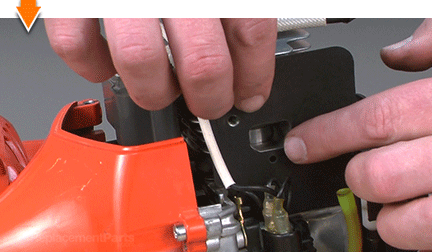
40. Reinstall the engine cover.
Install the engine cover, ensuring that the spark plug wire passes through the hole in the top.
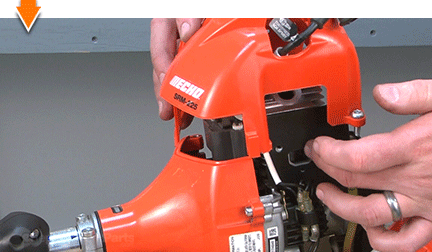
Tuck the ignition wires into the channel behind the engine cover.
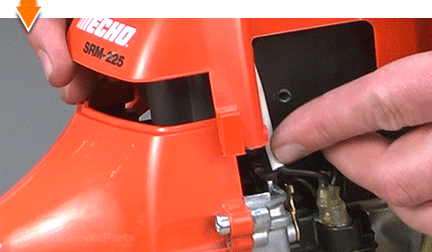
Secure the engine cover with the (2) screws.
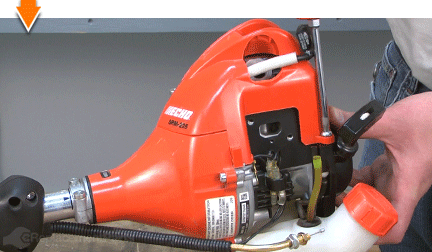
41. Reinstall the spark plug.
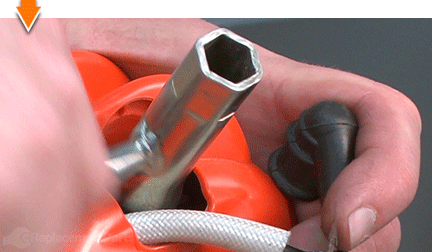
Thread the spark plug into the cylinder head.
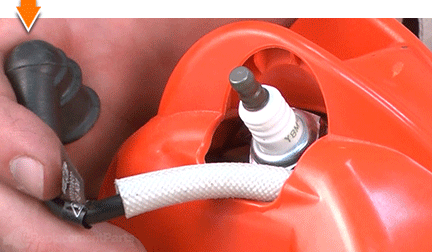
Secure the spark plug with a spark plug wrench.
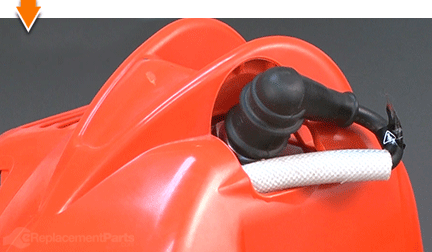
Reinstall the spark plug boot.
42. Reinstall the intake insulator block.
Install the two nuts into the recesses on the back of the insulator block.
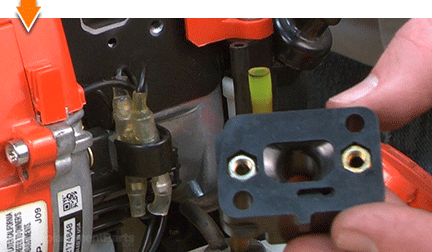
Note that there is a small opening (beneath the main intake port) on the bottom of the insulator block. This opening should align with the small opening beneath the intake port on the engine.
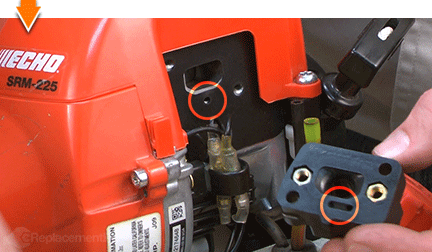
Thread the mounting screws through the holes in the intake insulator block. This will help align the assembly during installation.
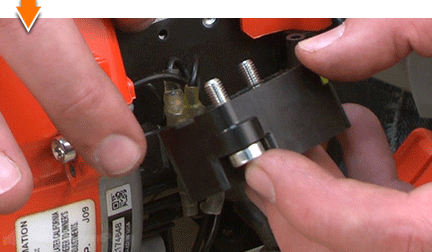
Install the intake insulator block onto the engine.
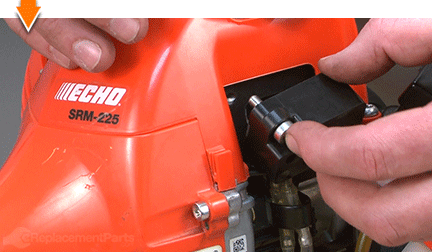
Secure the intake insulator with the (2) screws.
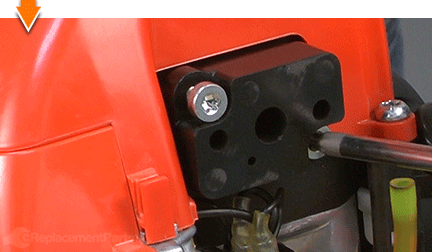
43. Connect the fuel lines to the carburetor.
Remove the gas cap and locate the fuel filter. The filter will be attached to the INCOMING fuel line. Make note of this fuel line for use in the next step.
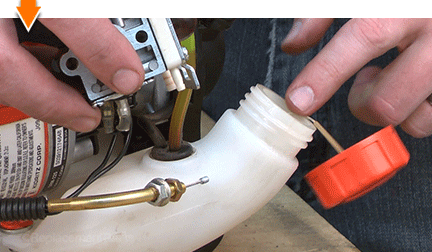
Plug either one of the carburetor ports with the tip of your finger; depress the primer bulb several times. If the primer bulb softens (deflates) without returning to its original shape; you have plugged (and identified) the incoming port.
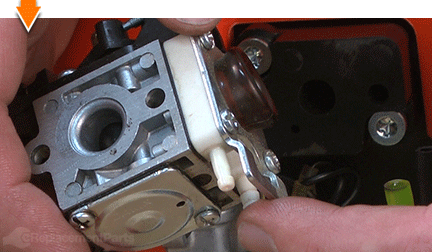
If the primer bulb fills with air (hardens) and wont allow further priming; you have plugged (and identified) the RETURN port.
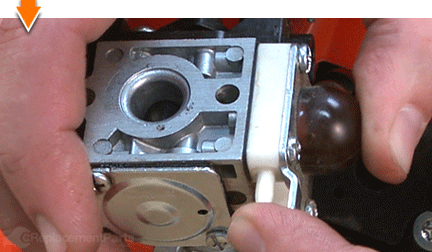
Connect the INCOMING fuel line to the INTAKE port on the carburetor.
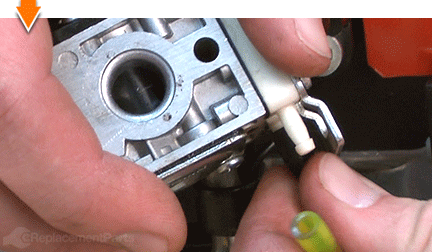
Connect the RETURN fuel line to the RETURN port on the carburetor.
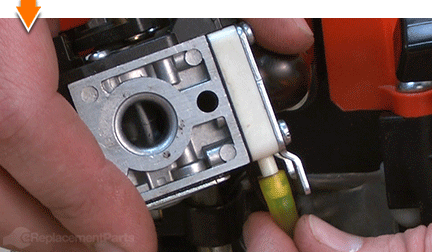
44. Reinstall the throttle cable to the carburetor.
Rotate the throttle lever on the carburetor to fully open the throttle.
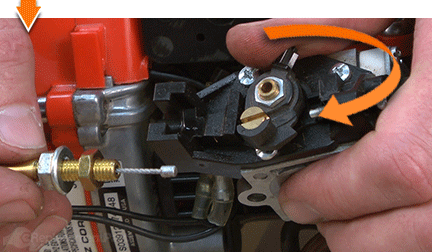
Thread the throttle cable through the brass connector on the top of the carburetor.
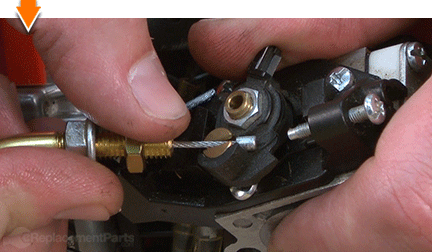
Pull back slightly on the throttle cable (away from the carburetor) to secure the tip of the cable beneath the slots of brass connector.
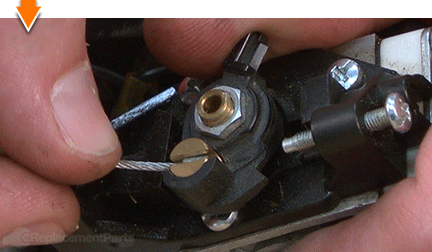
Press the throttle adjustment nut (on the cable) into the recess on the throttle body.
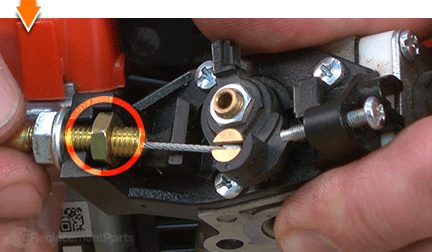
Use a wrench to secure the secondary throttle nut.
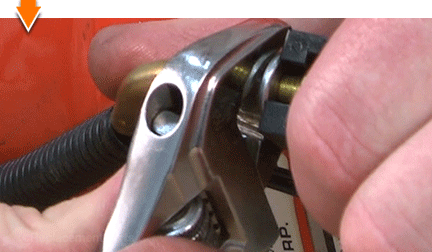
45. Reinstall the carburetor.
Thread the (2) mounting screws through the mounting holes on the air cleaner bracket and the air cleaner case. The bracket should be flush against the interior of the air cleaner case (on the same side as the choke valve).
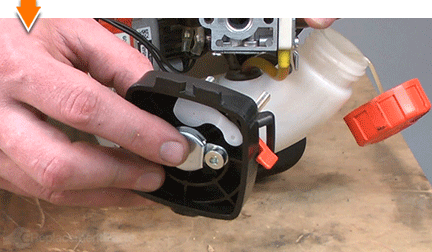
Thread the screws (protruding from the air cleaner case) through the holes on the carburetor assembly.
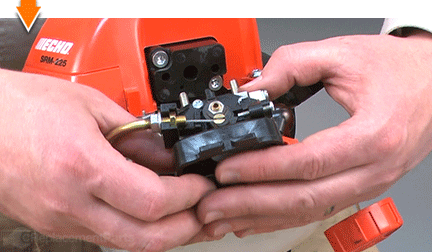
Note that there are two small holes on the intake gasket (besides the main intake opening and the two mounting holes). These small holes need to align with the small hole on the insulator block.
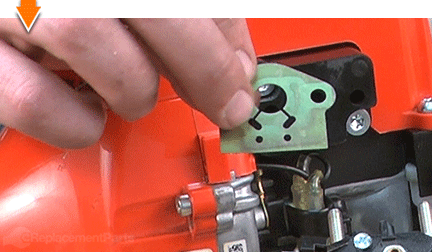
Thread the screws through the mounting holes on the intake gasket and slide the gasket flush against the carburetor.
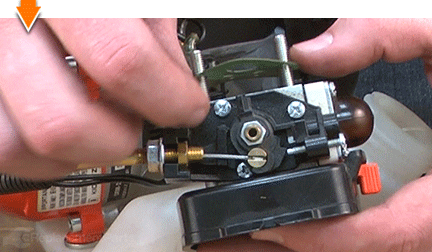
Install the intake assembly (bracket, air cleaner case, carburetor and intake gasket) onto the intake insulator block.
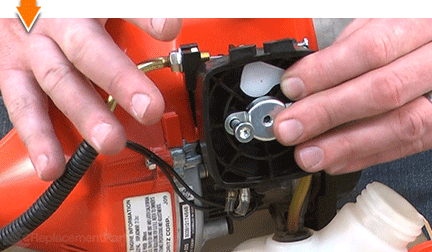
Secure the intake components (bracket, air cleaner case, carburetor and intake gasket) with the screws.
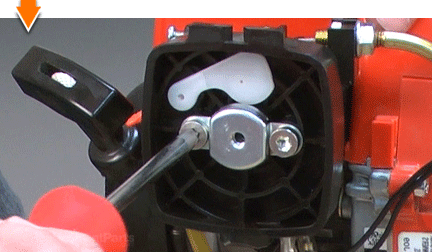
46. Reinstall the air filter.
Install the air filter into the air cleaner case.
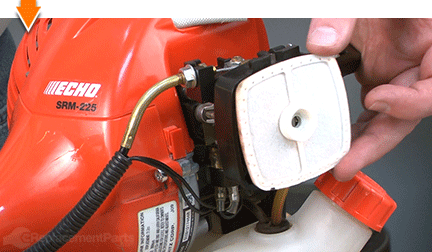
47. Reinstall the air filter lid.
Install the air filter lid onto the air cleaner case.
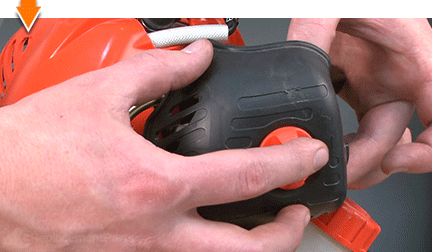
Secure the air filter lid with the thumbscrew.


You don't have to leverage your savings to level your lawns. As you just learned, repairing your own equipment is easy when you follow our step-by-step guides. Not only did you restore trimmer functionality at a fraction of the cost of replacement; you have taken the edge off of future repairs, wherever you may find them.


