


Why Read This Article?
Finish Nailer Repair - Replacing the Driver Guide (Ridgid Part # 79004001022)
Article Breakdown
Finish Nailer Repair - Replacing the Driver Guide (Ridgid Part # 79004001022)
Video

Tools & Materials
 THE FACTS | THE FIX | THE FINISH
If falling leaves and a faulty blower are threatening to bury you beneath a pile of debt and debris, it's time to face the fix. Whether you are a seasonal garden enthusiast or a seasoned landscape professional, eReplacementparts.com provides the parts, procedures and facts you need to fearlessly fix what fails you.
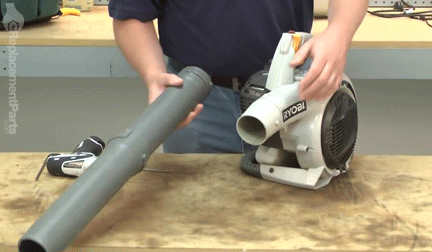
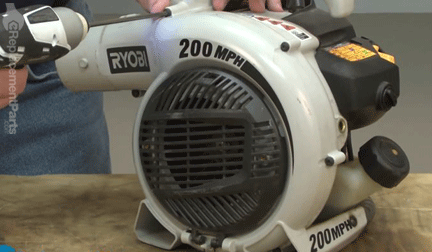
If the starter rope on your blower fails to recoil back into the housing after you pull it, the problem is likely to be a faulty spring or a dirty pulley. This article will walk you through the process of installing a new starter spring, which will also enable you to inspect and remove any dirt or grease that has built-up beneath the pulley. Installing a new starter spring can be tense; both for the installer, and in a very literal sense. That's because creating tension is the key to correctly installing a new spring. Aside from that, it's not a particularly difficult repair. Just follow the simple steps below (and pay close attention to steps 14-17) and the only tension you'll encounter during this repair will be intentional. THE FACTS | THE FIX | THE FINISH REMOVING THE STARTER SPRING [top] 1. Remove the blower tube.
Twist and pull the tube away from the blower.
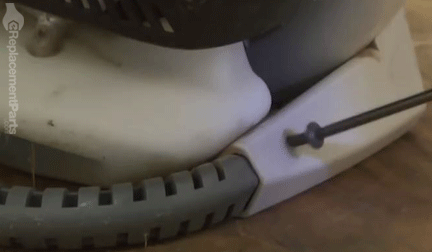
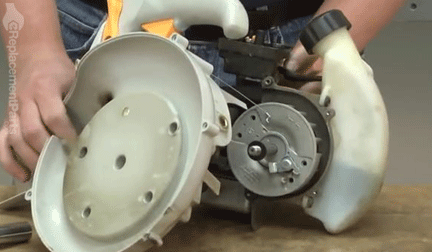
 2. Remove the side housing from the blower.
Remove the two screws holding the base extension to the housing; pull to remove the extension from the housing.
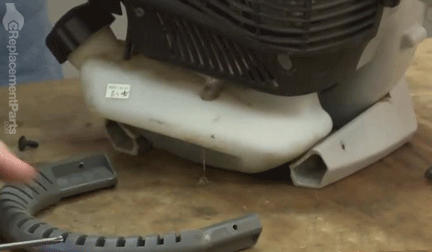
Remove the screws holding the side housing; pull to separate the side housing from the main assembly.
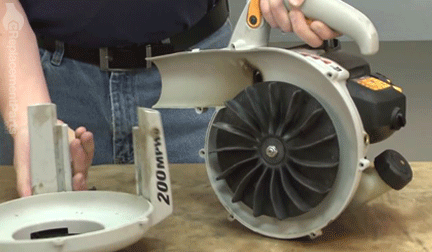 3. (Preparing to) Remove the fan.
FIX TRIX: You will discover that rotating the nut causes the fan and the motor shaft to rotate concurrently, precluding your ability to loosen the nut from the shaft. This obstacle can be overcome by removing the spark plug and binding the cylinder with a short length of starter rope.
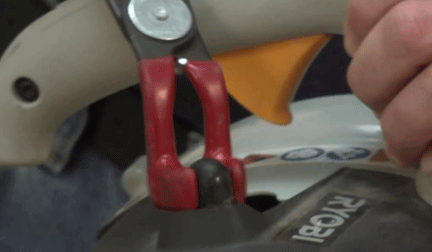
 4. Remove the spark plug.
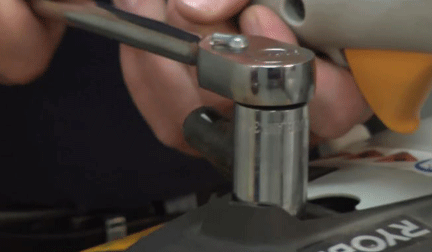
Using a spark plug boot puller tool, remove the spark plug boot.
Use a ratchet wrench to unscrew the spark plug; remove the spark plug.
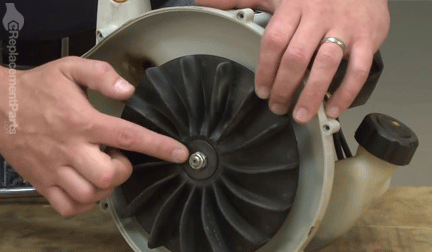
 5. Bind the cylinder.
Thread a short length of starter rope into the cylinder to fill the space between the top of the piston and the top of the cylinder. This will prevent the piston (and motor) from moving during removal of the fan.
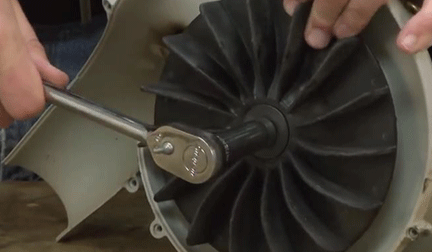
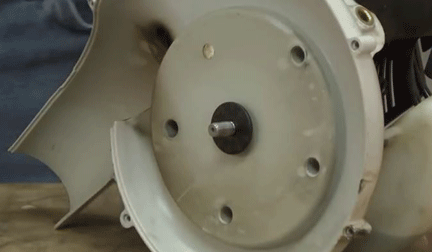
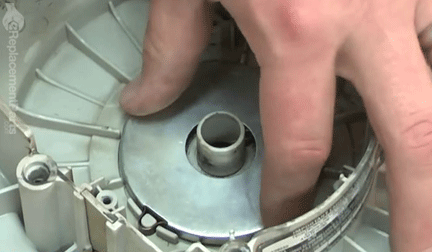
 6. Remove the fan.
Remove the nut holding the fan on the motor shaft; remove the washer.
Remove the fan.
7. Remove the air filter cover and side cover.
Unscrew the retaining bolt and pull gently to remove the air filter cover.
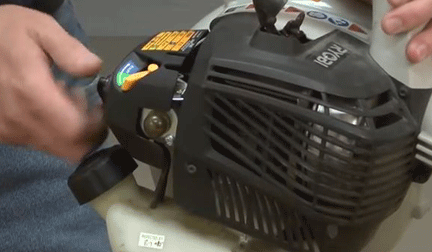
Remove the retaining screws and remove the side cover from the blower.
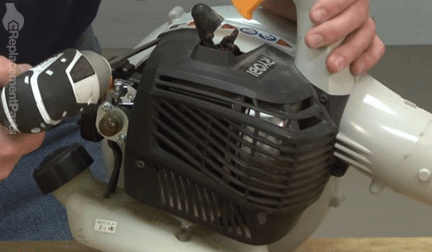
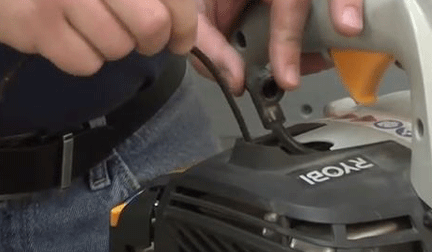
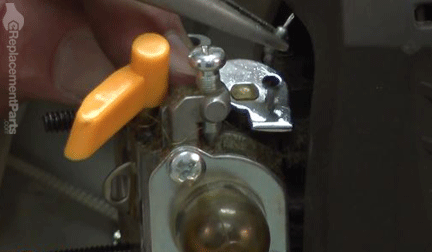
8. Remove the throttle cable from the carburetor.
Retract the throttle arm slightly to create slack in the throttle cable; remove the cable from the carburetor assembly.
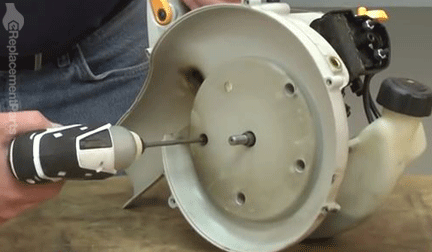
9. Remove the remaining half of housing from the engine assembly.
Extract the housing screws and separate the housing from the engine assembly. Note the position of the spacer tube and washer on the engine shaft, as these may slide readily from the assembly.
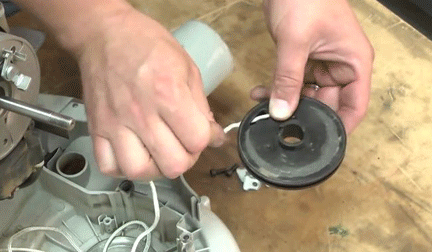
 10. Remove the starter pulley.
Remove the screws from the three tabs that hold the starter pulley in place.
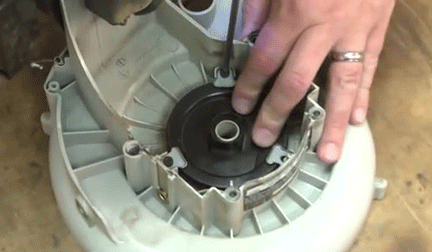
Remove the starter pulley.
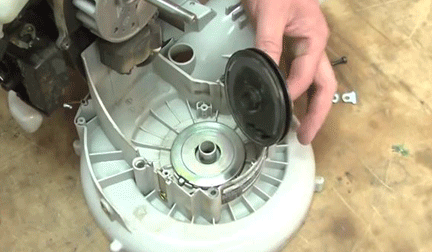
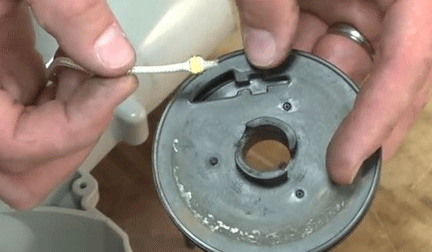
11. Remove the starter spring assembly.
Lift and remove the starter spring assembly from the housing.
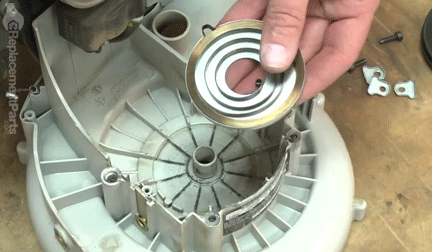
INSTALLING THE NEW STARTER SPRING [top] 12. Install the new starter spring.
Install the new starter spring (spring-side down), ensuring that the metal loop on the starter spring aligns with the plastic tab in the housing.

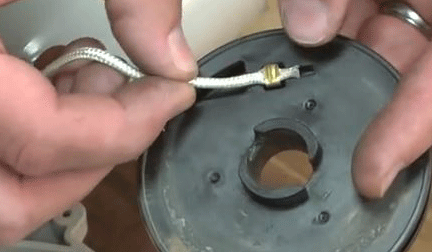
REASSAMBLING THE UNIT [top] 13. Install the starter rope on the pulley.
SPECIFIX: The end of the starter rope is often crimped to facilitate installation on the pulley. If the starter rope you are installing does not contain a crimped end, a small knot should be tied before installing.
Insert the crimped end of the rope into the recessed portion of the pulley; ensure that the crimp (or knot) engages the indents the indents of the pulley to prevent the rope from pulling-free.
Thread the opposite end of the rope into the recessed portion of the pulley and through the hole in the side.
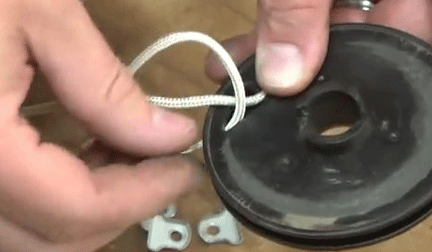
Continue to feed the starter rope through the opening in the pulley until all of the slack is removed from the attachment point.
 14. Install the pulley on the housing.
SPECIFIX: This is where things might get tense. In fact, creating tension is the only way that this repair will be successful. Most starters allow the installer to preload the spring with tension before installing the rope and pulley. This model is unique, and will require you to situate the pulley in the housing before winding the spring.