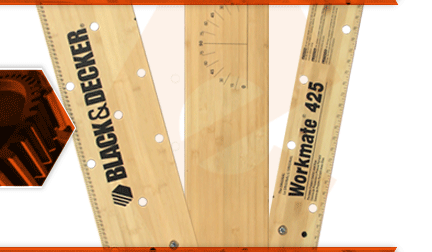
The vise jaws both form your work bench's wooden top, and allow you to clamp work pieces in the vise. The wooden jaws will wear out with use. The edge of the jaw can be damaged from clamping hard items, or the surface might be accidentally cut by a saw.
Let's get started.
REMOVING THE VISE JAWS 1. Remove the (removable) jaws.
a. Open the table to its widest position.
b. Slide the center vise jaw toward the front of the frame to disengage the slide-block.
c. Lift the center vise jaw away from the frame.
d. Slide the rear vise jaw toward the front of the frame to disengage the slide-block.
e. Lift the rear vise jaw away from the frame.
2. Remove the slide-lock brackets.
a. Remove the bolts securing the center vise jaw to the plastic slide-lock brackets (there are two brackets on each jaw).
b. Remove the slide-lock brackets from the center vise jaw.
c. Remove the bolts securing the rear vise jaw to the plastic slide-lock brackets (there are two brackets on each jaw).
d. Remove the slide-lock brackets from the rear vise jaw.
3. Remove the (fixed) jaw.
a. Remove the bolts securing the fixed vise jaw to the plastic slide-blocks beneath it.
b. Lift the fixed vise jaw away from the frame.
INSTALLING THE NEW VISE JAWS
4. Install the (fixed) jaw.
a. Rotate and raise the right-hand pivot nut to align the threaded opening (on the pivot nut) with the slot on the metal frame (the nut will receive the bolt from the top of the vise jaw).
b. Install the (right) slide-block onto the plastic pivot nut. (The plastic webbing on the slide-block should be visible from the top; and the cylindrical protrusion on the slide block should face the front of the work bench).
c. Install the new fixed jaw onto the (right) slide-block.
d. Install (but do not fully tighten) the (right) bolt to hold the vise jaw in its approximate position on the table.
e. Install the (left) slide-block onto the plastic pivot nut. (The plastic webbing on the slide-block should be visible from the top; and the cylindrical protrusion on the slide block should face the front of the work bench).
f. Install the (left) bolt.
g. Tighten both bolts to secure the new fixed vise jaw to the frame.
5. Install the (removable) jaws.
a. Install two of the slide-lock brackets onto the bottom of the new CENTER jaw.
b. Secure the center jaw to the brackets with two of the bolts.
c. Install the center jaw assembly onto the metal frame.
d. Slide the center jaw assembly toward the rear of the frame to engage the slide-blocks.
e. Install the remaining two slide-lock brackets onto the bottom of the new REAR jaw.
f. Secure the rear jaw to the brackets with the remaining two bolts.
g. Install the rear jaw assembly onto the metal frame.
h. Slide the rear jaw assembly toward the rear of the frame to engage the slide-blocks.


