


Video

Tools & Materials
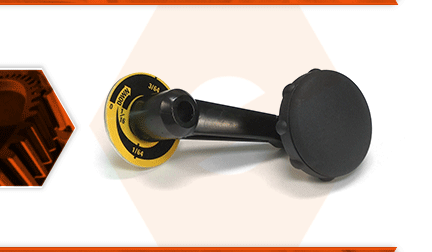
The handle assembly allows you raise and lower your planer's carriage. The assembly consists of a new adjustment handle (with a gauge) and the screw to attach it. The most common issues with the handle are accidental breakage (often caused by something falling on it or from the planer tipping over); and a worn key; usually caused by a loose attachment screw.
Let's get started.
REMOVING THE CRANK HANDLE 1. Remove the crank handle.
a. Remove the screw securing the handle to the planer.
b. Lift the handle away from the planer.
INSTALLING THE NEW CRANK HANDLE
2. Install the crank handle.
a. Align the keyed portion of the new crank handle with the keyed portion of the adjustment spindle.
b. Press the new crank handle onto the adjustment spindle.
c. Secure the crank handle with the new screw.
