


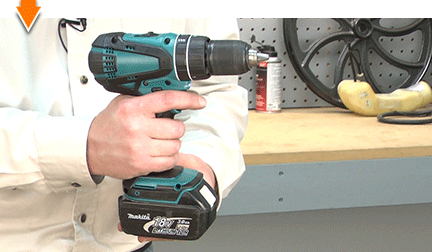
Tools & Materials

Leaf spring missing? It's time to face the fix. Whether you are a master carpenter or an occasional drill-seeker, eReplacementParts.com provides the parts, procedures and facts you need to fearlessly fix what fails you.
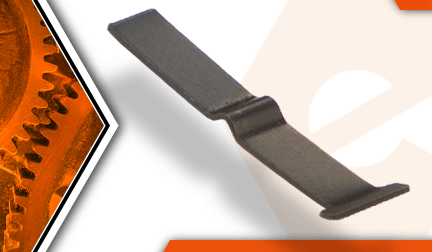
The leaf spring attaches to the drill's housing and creates the positive detent to lock the clutch in each of its modes: drilling, hammer drilling, and clutched screw-driving.
It is possible that the leaf spring can wear out after years of use, but the most common reason for replacement is that it is simply lost (overlooked) while doing another repair. If this happens, the clutch on your drill will rotate freely (often during use) without locking into a specific drilling mode. If your leaf spring has fallen out of your drill, and you just can't figure out where it goes (or what it is); this article will help you solve that as well.
This article provides step-by-step instructions for removing and installing the leaf spring on a Makita cordless hammer drill.
Let's get started.
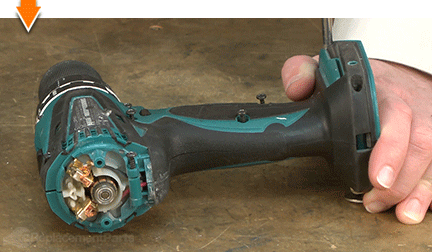
 REMOVING THE LEAF SPRING [top]
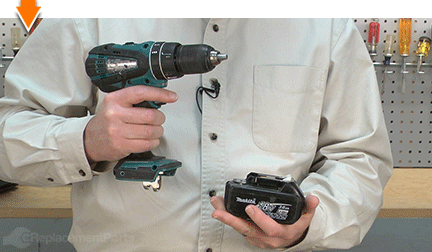
1. Remove the battery.
REMOVING THE LEAF SPRING [top]
1. Remove the battery.
Remove the battery from the drill.
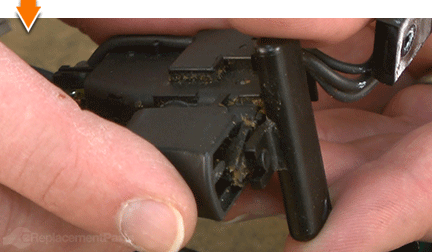
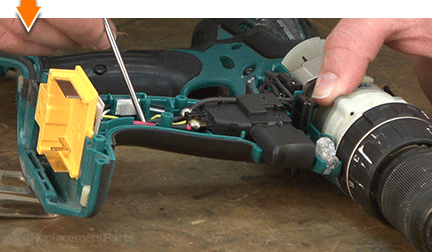
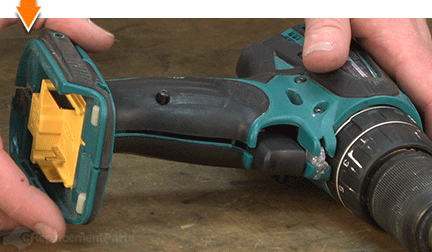
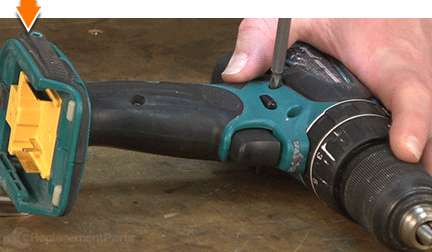
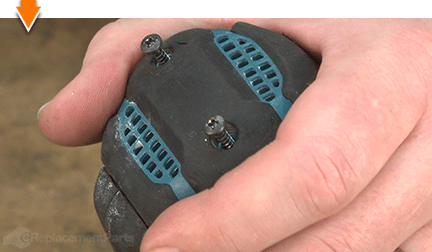
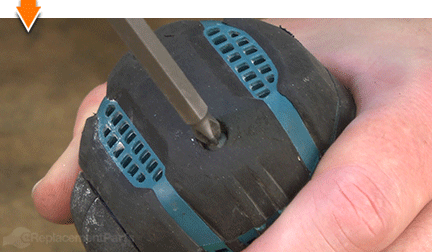
2. Remove the rear cover.
Remove the (2) screws.
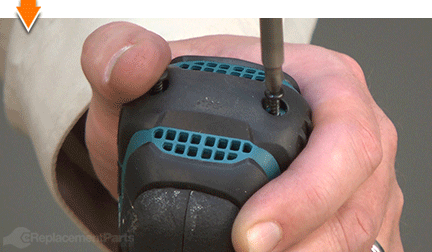
Remove the rear cover from the drill.
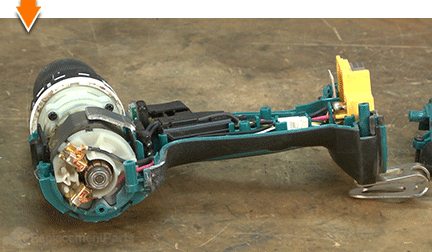
3. Split the housings.
Remove the screws from the top half of the housing.
Lift the top half of the housing away from the unit.
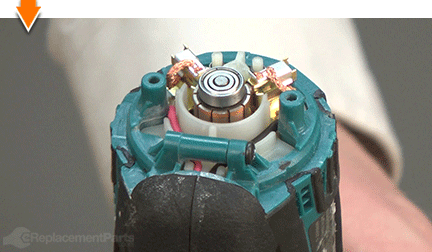
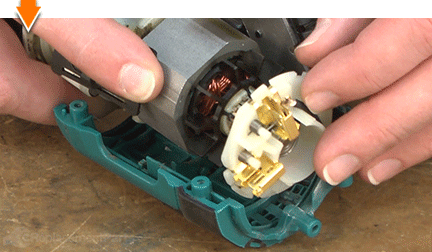
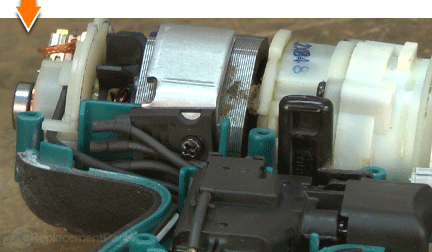
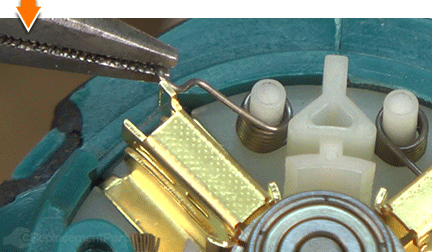
4. Remove the motor brushes.
Use long-nosed pliers to retract the brush spring from the back of the motor brush.
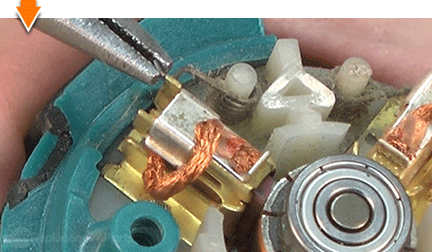
Use a small screwdriver to disengage (pry) the brush clip from the brush holder.
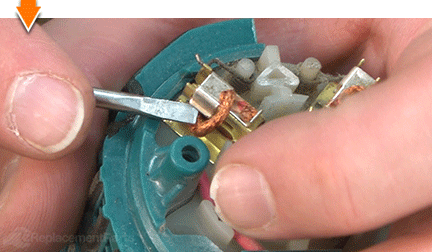
Slide the carbon brush out of the brush holder.
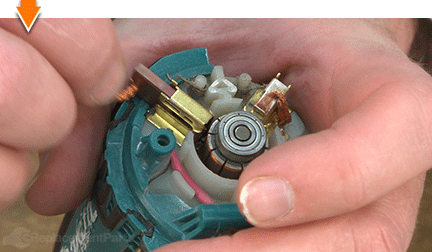
Repeat this step to remove the second motor brush.
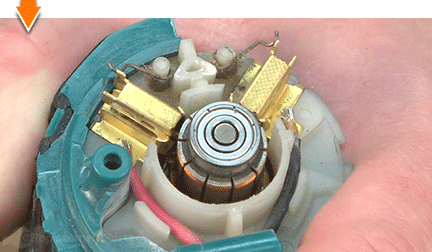
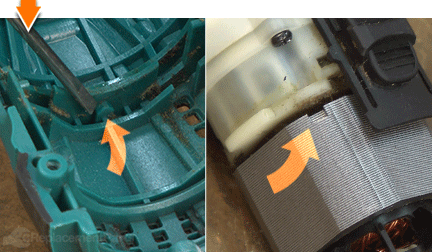
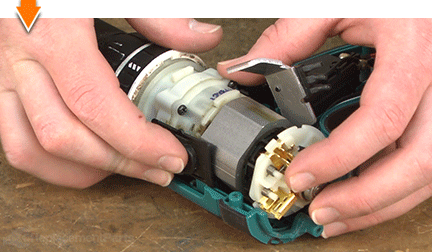
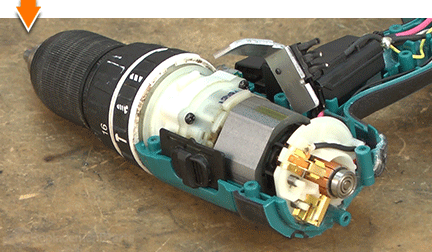
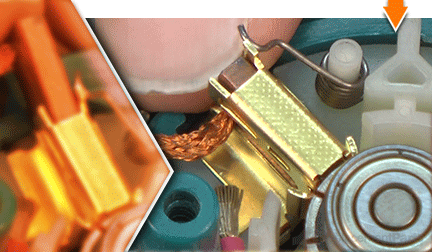
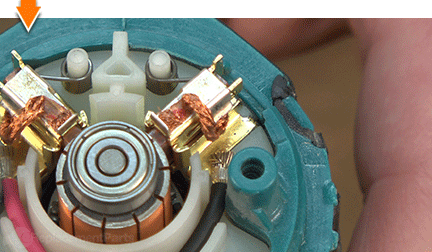
5. Remove the motor and gear assembly.
Partially lift (pry) the heat sink away from the motor.

Lift the motor and gear assembly (as a single unit) slightly out of the housing.
Disengage the brush card from the armature assembly.
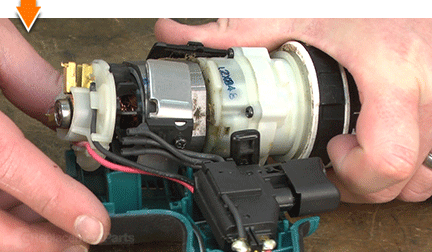
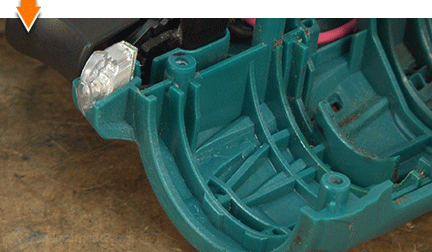
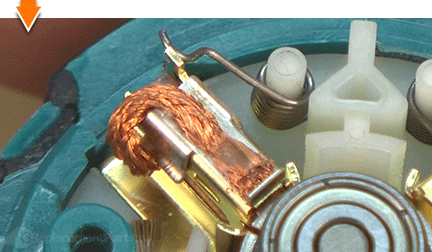
6. Remove the leaf spring.
Slide the leaf spring out of slot in the housing.
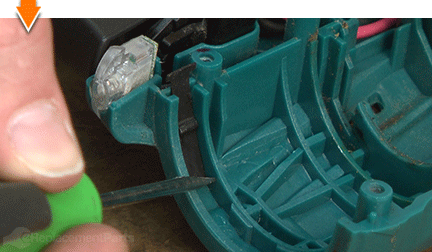
Remove the leaf spring from the housing.
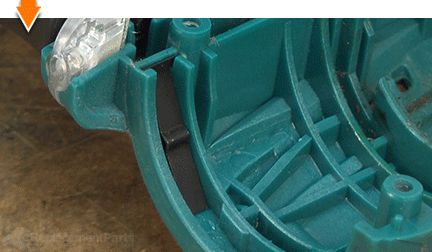
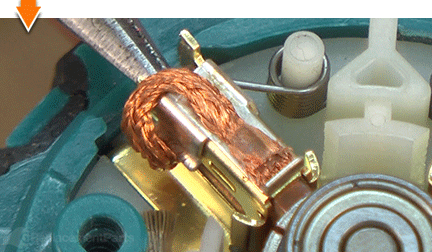
INSTALLING THE NEW LEAF SPRING [top] 7. Install the leaf spring.
Slide the new leaf spring into channel on the housing. The narrow end of the spring should be inserted first; the detent (curved section) should face the gear assembly (away from the lower half of the housing).
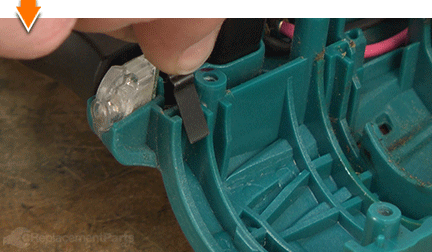
Verify that the top T portion of the leaf spring is seated in the slot on top of the housing.
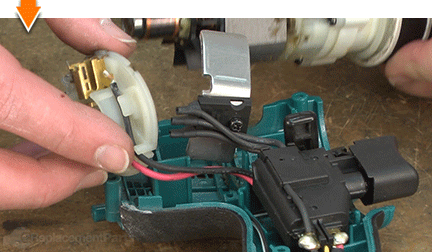
REASSEMBLING THE UNIT [top] 8. Reinstall the switch.
Align the notch on the forward/reverse change lever with the post on the switch.
Install the switch (and F/R change lever) into the lower half of the housing.
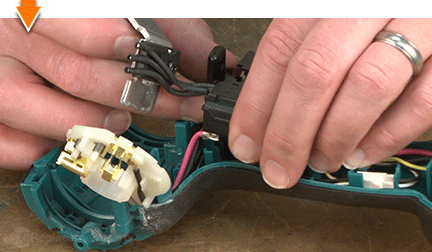
Tuck the switch wires into the channels on the housing.
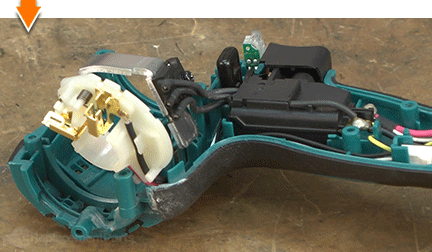
9. Reinstall the motor and gear assembly.
The notch on the yoke unit is designed to engage the plastic tab on the lower half of the housing. Rotate the yoke unit (as necessary) to ensure alignment of these components.
Reinstall the brush card over the armature.
Install the motor and gear assembly (as a single unit) into the lower half of the housing.
Manipulate the components (as necessary) until: 1) the notch on the yoke unit engages the tab on the housing; 2) the speed-selector switch is properly seated within the channels on the housing; and 3) the brush card is properly seated in the lower half of the housing.
10. Reinstall the heat-sink.
Install the heat-sink into the lower half of the housing.
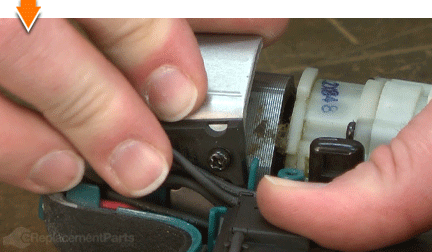
Verify that the wires (extending from the heat-sink) are positioned on the switch-side of the plastic post (not on the motor-side).
11. Reinstall the top half of the housing.
Inspect all of the wires for potential pinch-points; make adjustments as necessary.
Reinstall the top half of the housing.
Secure the housing with the screws.
12. Reinstall the motor brushes.
Retract the brush spring from the brush holder.
Install the motor brush into the brush holder.
Secure the brush clip to the brush holder.
Reposition the brush spring onto the motor brush.
Repeat this step to reinstall the second motor brush.
13. Reinstall the rear cover.
Install the rear cover.
Secure the rear cover with the (2) screws.
14. Reinstall the battery.
Install the battery.

As you just learned, fixing things yourself means more drilling with less billing. Hopefully, this article has restored your ability to drill holes without replacing your whole drill. And that's just the tip of the bit. Our online repair guides can help expand your skills far beyond drills; empowering you to face power tool problems whenever they arise; and to fearlessly fix whatever fails you.
