


Video

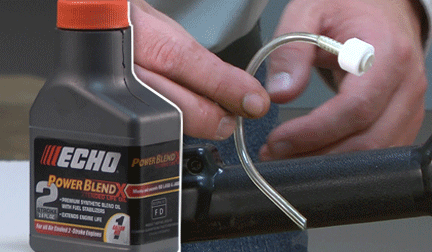
Tools & Materials


Fuel filter filthy? It's time to face the fix. Whether you are a legendary landscaper or a weekend weed whacker, eReplacementParts.com provides the parts, procedures and facts you need to fearlessly fix what fails you.
The fuel filter mounts inside your trimmer's fuel tank. Its purpose is to filter out tiny particles and debris before they can enter the carburetor (potentially causing significant damage). Maintaining the trimmer's fuel filter is an important part of its overall performance and longevity.
This article provides step-by-step instructions for removing and installing the fuel filter and line on a Ryobi trimmer.
Let's get started.
 REMOVING THE FUEL FILTER AND LINE [top]
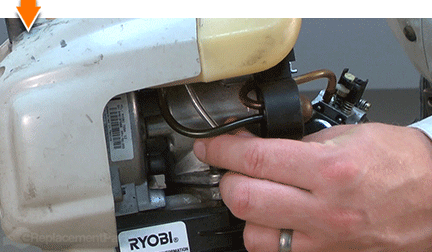
1. Remove the rear cover.
REMOVING THE FUEL FILTER AND LINE [top]
1. Remove the rear cover.
Remove the (4) screws from the rear cover.
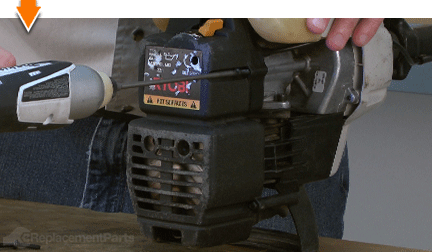
Remove the rear cover from the engine.
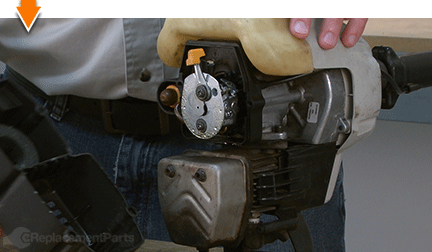
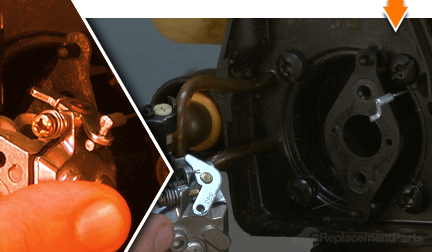
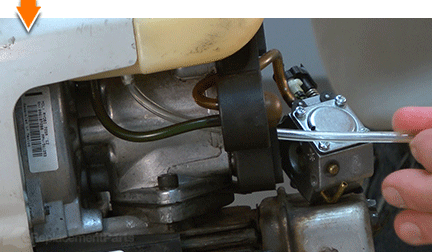
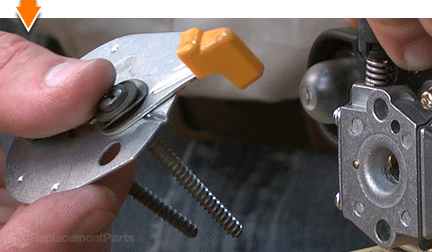
2. Detach the carburetor.
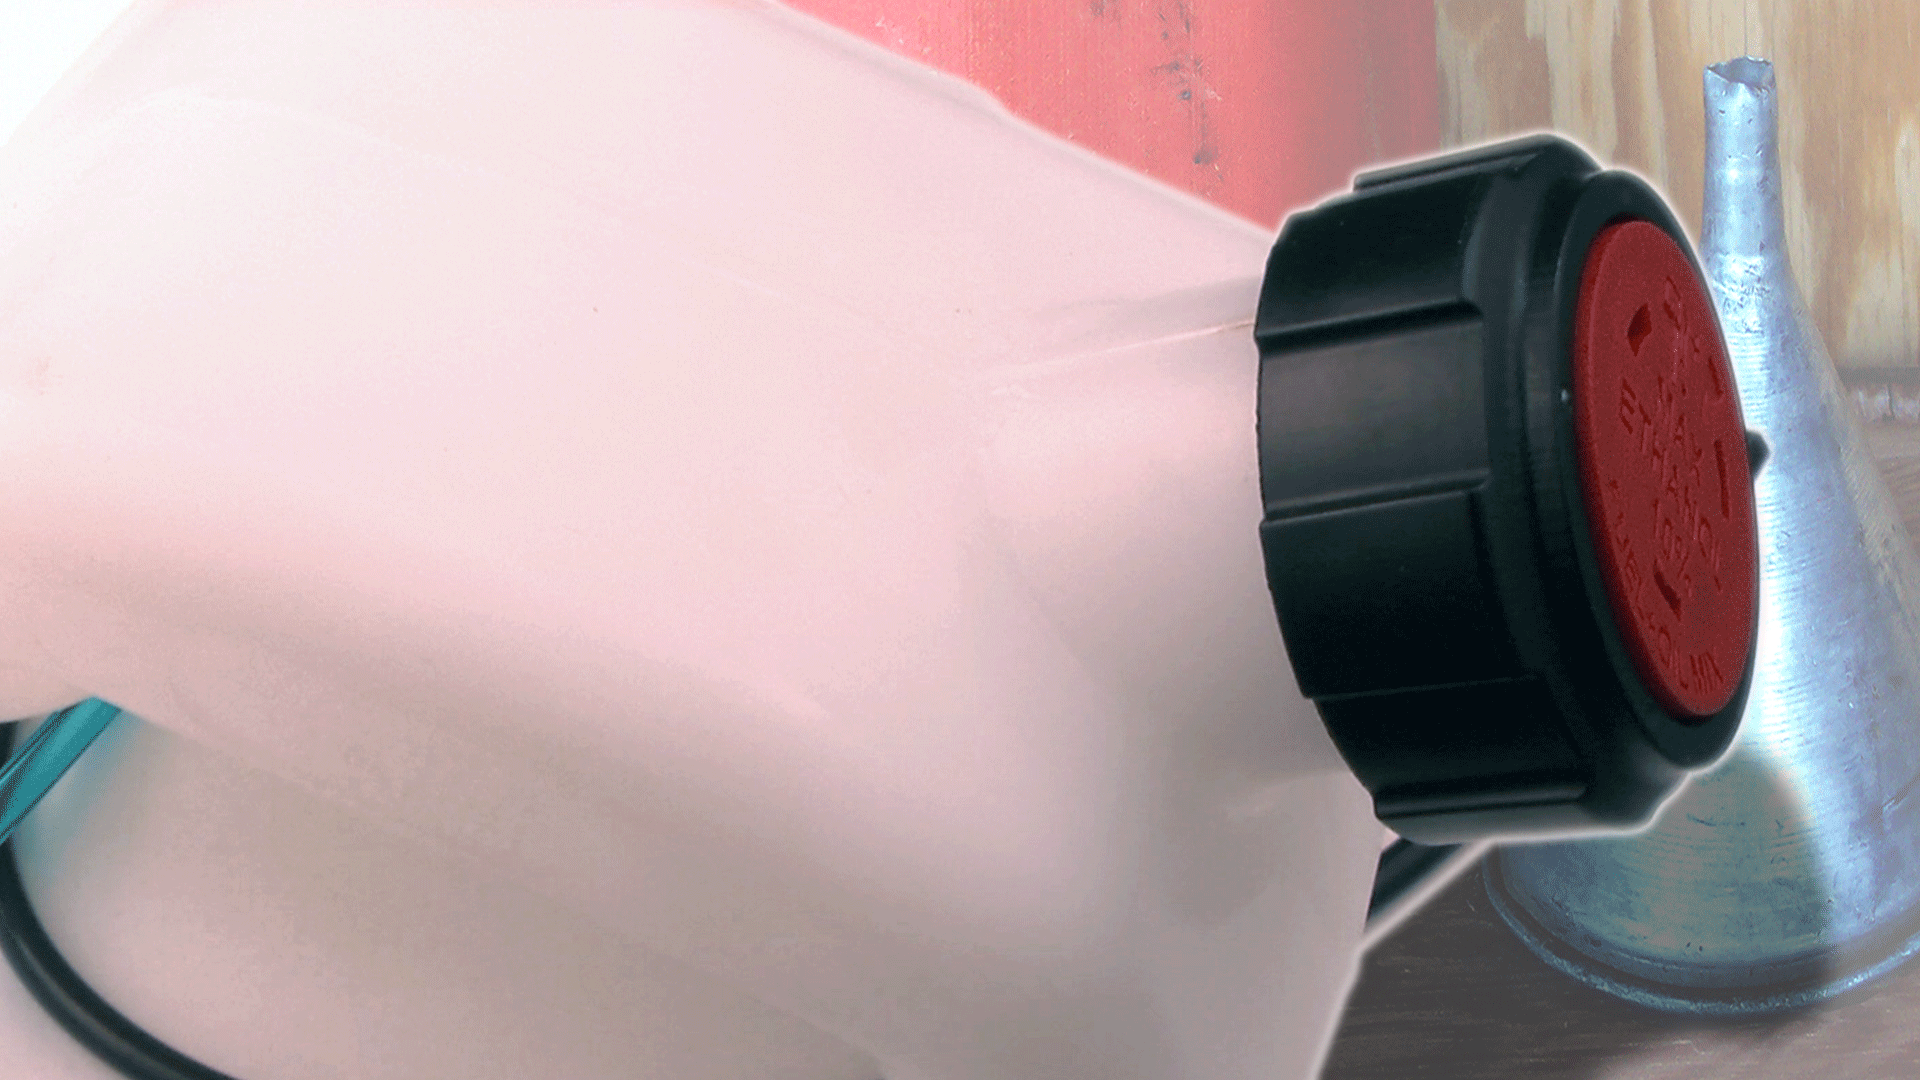
Drain any excess fuel from the fuel tank prior to servicing the carburetor or the fuel lines.
Remove the (2) screws from the carburetor assembly.

Remove the choke plate and choke assembly from the carburetor.
Disconnect the throttle cable from the carburetor (this is accomplished using a lift-and-twist motion).
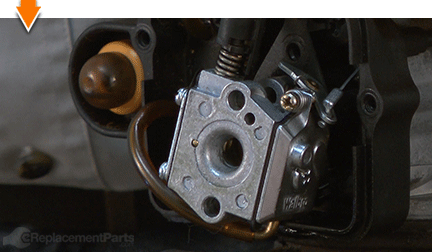
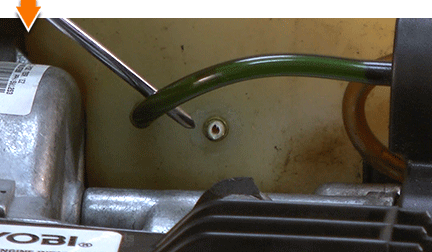
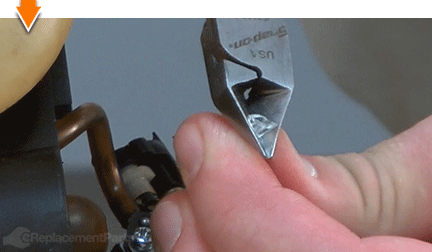
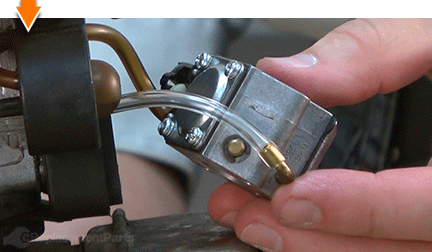
3. Disconnect the incoming fuel line.
Disconnect the incoming fuel line from the carburetor. The line should pull away from the carburetor inlet relatively easily; however, long-nosed pliers may be used to disconnect the line (as necessary).
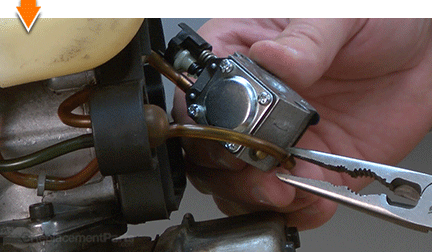
Push (or pull) the incoming fuel line through the carburetor mounting plate.
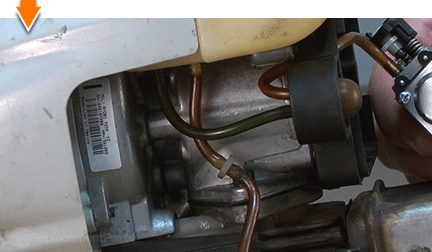
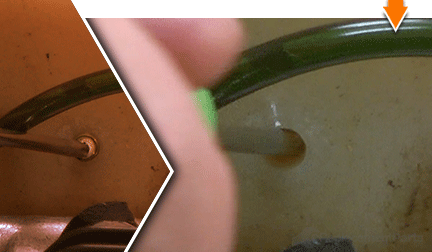
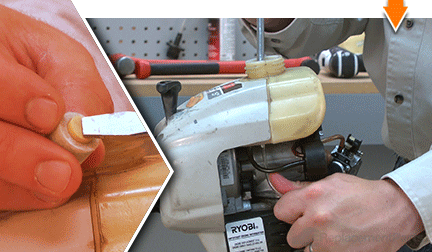
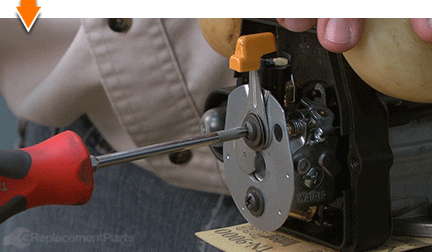
4. Remove the fuel filter.
Pry the plastic washer away from the fuel filter/line outlet on the bottom of the fuel tank.
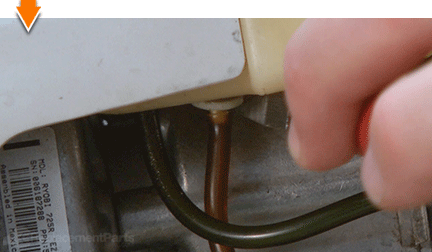
Use wire cutters to cut the fuel filter/line outlet flush with the fuel tank.
Use a small screwdriver to press the remainder of the fuel filter into the fuel tank.
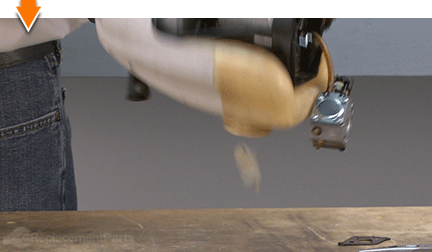
With the fuel tank cap removed, rotate the trimmer upside-down until the fuel filter falls from the fuel tank.
INSTALLING THE NEW FUEL FILTER AND LINE [top] 5. Install the new fuel filter.
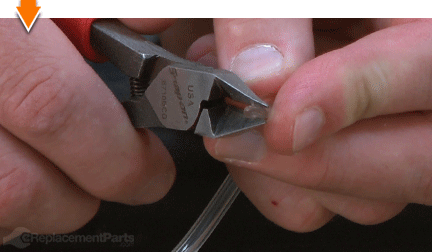
Use wire cutters to cut a taper at the end of the new fuel line (this will allow the line to pass through the mounting hole more smoothly).
Lubricate the outside of the new fuel line with two-cycle engine oil (this will allow the line to pass through the mounting hole more smoothly).
Insert the new fuel line into the fuel tank and thread the tapered end of the line through the mounting hole in the bottom of the tank.

Pull the fuel line through the opening until the fuel filter nipple is partially seated in the mounting hole.
Use a large screwdriver to press (down) on the center (plastic) portion of the fuel filter while pulling firmly and steadily on the fuel line (from the bottom). Continue this motion until the fuel filter/line is fully seated within the mounting hole.
Slide the plastic washer onto the new fuel line.
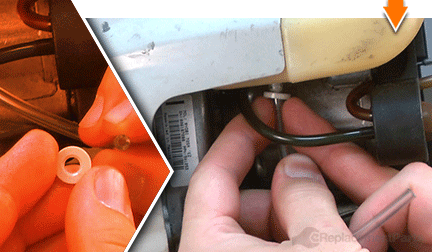
Use pliers to slide the plastic washer over the fuel filter nipple (flush against the fuel tank). This secures the fuel filter in position.

Pass the tapered end of the fuel line through the opening in the back of the carburetor mounting assembly.
Use cutters to remove the taper from the line (the line must be cut squarely for proper connection to the carburetor)
Reconnect the incoming fuel line to the carburetor inlet.
REASSEMBLING THE UNIT [top] 6. Reinstall the carburetor.
Connect the throttle cable onto the throttle linkage of the carburetor.
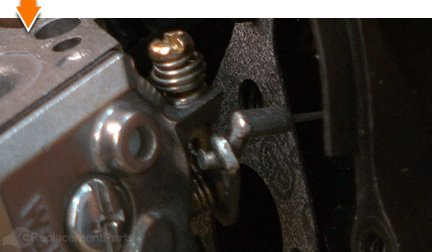
Install the carburetor mounting screws onto the choke plate and lever.
Secure the carburetor (and choke plate) to the engine with the (2) screws. Note that the choke lever and the wavy washer must be properly aligned before tightening the upper screw.
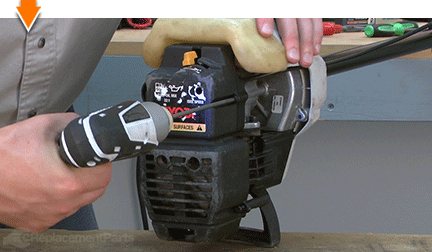
7. Reinstall the rear cover.
Reinstall the rear cover onto the engine.
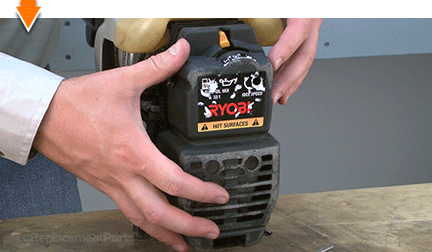
Secure the rear cover with the (4) screws.

You don't have to leverage your savings to level your lawns. As you just learned, repairing your own equipment is easy when you follow our step-by-step guides. Not only did you restore trimmer functionality at a fraction of the cost of replacement; you have taken the edge off of future repairs, wherever you may find them.
