


Why Read This Article?
Finish Nailer Repair - Replacing the Driver Guide (Ridgid Part # 79004001022)
Article Breakdown
Finish Nailer Repair - Replacing the Driver Guide (Ridgid Part # 79004001022)
Video
Tools & Materials
- Phillips-head screwdriver
- Needle-nose pliers
Remember to use our Makita parts finder to find the switches designed specifically for your Makita tools.
Replacing the Switch
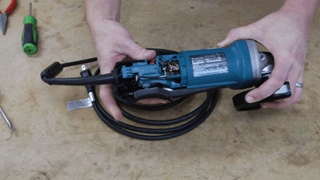
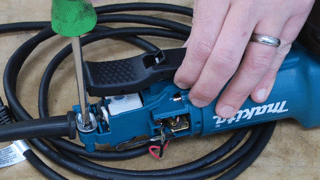
1. Remove the covers
Remove the screws that secure the covers and remove the top cover. Also remove the lock button and back cover.
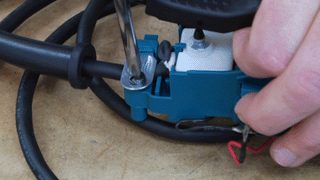
2. Remove the switch
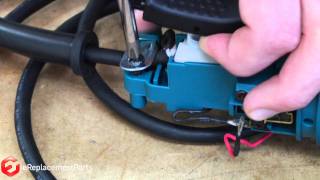
Use your needle-nose pliers to disconnect the motor wires from the switch.
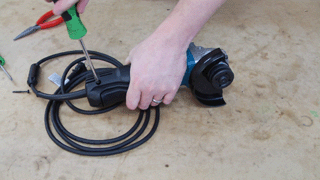
Flip the grinder over and remove the screw that secures the strain relief, then remove it from the grinder.
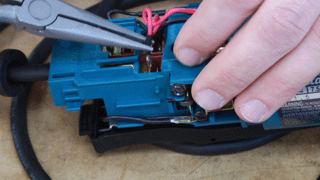
Pull back on the tab that holds the switch, then use your pliers to lift the switch out of the grinder.
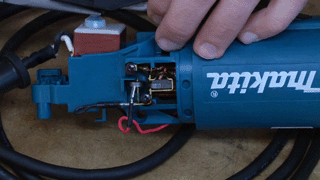
With the switch removed, you can disconnect the cord wires with a screwdriver.

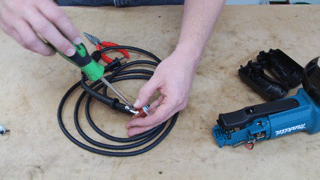
3. Install the new switch
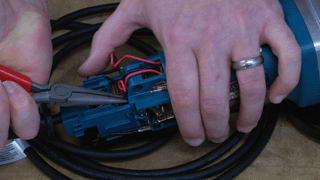
The installation works in reverse order of removal. First connect and tighten down the cord wires.
Then place the switch in the grinder housing.
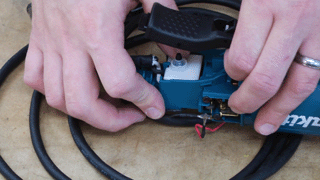
Secure the power cord with the strain relief.
Then flip the grinder over and connect the motor wires.
4. Reattach the covers
Now just re-install the back cover, lock button, and top cover. Then tighten down the screws to finalize the repair.
[Back to Top]
Conclusion
Replacing the switch on a Makita grinder is a simple repair that you can complete in about 10 minutes. It will help get your grinder running again and will save you a lot of time and money compared to the repair shop.
Remember to use our power tool parts finder to find switches, brushes, and other parts for all the power tools on your workbench.
[Back to Top]
What We're About
