

How to Remove and Replace a Drill Press Spindle
The spindle in your drill press can take quite a beating as it's the part that actually rotates when you drill. A spindle can bend or the bearings that hold it in the quill can fail when the spindle is placed under too much pressure while drilling.
Fortunately, you can replace the spindle in your drill press yourself. While this isn't the easiest or fastest repair, it will save you a lot of money compared to the repair-shop alternative.
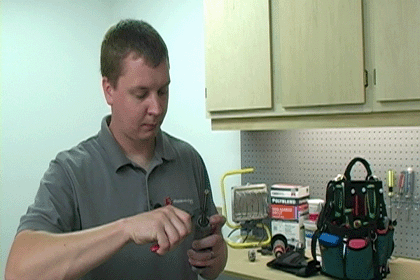
Before you begin this repair, be sure you have a good set of tools including a drill chuck removal tool that works with your drill press, retaining ring pliers, and a set of wrenches that will work with your press's nuts.
Remember to use eReplacementParts.com's handy power tool part finder to make sure you get the right parts for your press.
Removing the Quill Assembly
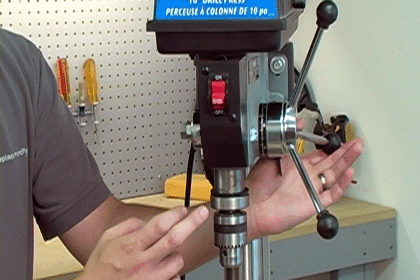
1. Remove the drill chuck
Use the appropriate drill chuck removal tool to remove the chuck from your drill press. For more information on removing chucks, check out our articles on removing a drill press chuck and removing tapered chucks (the method Mark used for the chuck on this drill press).
2. Remove the belt
Open the drill's top cover and remove the drive belt.

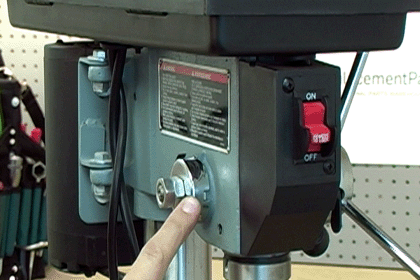
3. Remove the quill set screw
First remove the nut threaded onto the set screw.

Then you can thread the set screw out of the drill press body.

4. Remove the return spring assembly
Caution: The return spring assembly is under tension. The return spring assembly can cut you very badly if you are not careful when releasing that tension.
Two nuts create the proper tension on the spring assembly. Begin by removing only the outer nut.

Now you can back the inner nut off the spring assembly, but do not remove it yet. At this point, the return spring is only being held in place by a notch on the assembly that matches up with a lip on the press.

Use a screwdriver to pry the the spring housing away from the drill press. Remember to use caution. When the spring tension releases, the spring assembly will be spinning--fast.

Now you can completely remove the inner nut and spring housing from the drill press.

5. Remove the handle and quill
At this point, the only thing holding the quill assembly into the drill are the gears on these two parts. While holding the quill assembly, remove the handle from the drill. This will fee the quill.

Removing and Replacing the Spindle
You can use a bearing press to remove the bearings if you own one. Otherwise, you can use a vice by following the instructions below.
1. Remove the quill retaining ring
Use your retaining ring pliers to remove the retaining ring from the quill assembly.
2. Separate the quill and spindle
Adjust your vice so the opening is large enough for the quill, but does not touch the spindle.

Then just tap the spindle out of the quill.


3. Remove the spindle bearing
Set your vice so that the inner race of the bearing will rest on the jaws, without letting the jaws touch the spindle.

Then tap it off the spindle.

4. Install the bearing on your new spindle
Installing the bearing on your new spindle is just like removing it. Set the vice so the bearing's inner race rests on the jaws, then tap it onto the spindle.

5. Install the spindle into the quill
Insert the spindle into the quill.

Adjust the vice again so the quill rests on the jaws, but the jaws don't interfere with the spindle. Then tap the spindle into place.

Now that you have the lower bearing seated, you will want to re-seat the top bearing since it has a tendency to slip a little when you set the lower one. Close your vice so the jaws are below the bearing and give it a few taps.

6. Replace the retaining ring
Now just slide the retaining ring back into place so it sits in its little groove.

Reinstalling the Quill Assembly
1. Remount the handle and quill
Now you can set the quill assembly back in place by sliding it into position and inserting the handle.

2. Install the return spring assembly
Caution: You will want a good set of work gloves when re-install the return spring assembly. If you lose your grip while putting tension on the spring, you will get cut.
Set the spring assembly into place and loosely thread one of the nuts into place.

Tension the spring by turning it counter-clockwise one full rotation. You can use the notches on the spring housing to measure the rotation.

Then press the housing onto the tab and tighten the nut.

3. Adjust the handle tension
Now you can adjust how much tension the return spring puts on the drill press handle. Use the handle to raise and lower the drill press quill and adjust the nut until the handle moves smoothly. You know the tension is correct when you feel a small amount of rubbing. The return spring assembly should not be so loose that it can come free of the tabs.

Now you can install the second nut. Use a pair of needle-nose pliers to hold the inner nut as you tighten the outer nut with a wrench. This will prevent you from changing the spring tension as you lock the assembly into place.

4. Install the quill set screw
The quill set screw has flat spots that prevent the quill from spinning while you drill. The flat spots on the set screw are lined up with the screw's notch.

Install the set screw and when the tension feels right--when the quill doesn't spin--align the slot so it is vertical.

Then thread the nut onto the set screw and use a screwdriver to hold the screw in place as you tighten the nut with a wrench.

5. Install the belt
Re-install the belt into the top of the drill press.

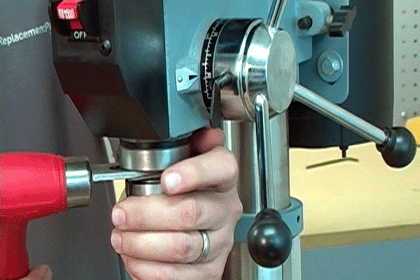
6. Install the chuck
The last step in this repair is to install the chuck. Check out our article on removing and installing drill press chucks to find the method that fits your drill press style. For the tapered-style spindle on the drill press used in this repair, you just need give the chuck a sharp snap to set it on the taper.

Then forcefully hit the chuck two or three times with the plastic side of your shop hammer (or a wooden hammer) to set it on the taper.

Conclusion
Repairing the spindle on your drill press is not the easiest of home repairs, but it will save you lots of money compared to the repair shop--not to mention the trouble of hauling a heavy drill press to the repair shop.
With our power tool parts finder, you can rest assured that you'll get the right part for your press. And since our huge inventory of in-stock parts ship within 24 hours, you can know you'll get the right part fast.