Why Read This Article?
Finish Nailer Repair - Replacing the Driver Guide (Ridgid Part # 79004001022)
Article Breakdown
Finish Nailer Repair - Replacing the Driver Guide (Ridgid Part # 79004001022)
Tools & Materials
- wrench
- a flat head screwdriver
Because impellers are responsible for picking up and throwing the snow, having a healthy drive belt is essential for a snowblower to operate correctly.
Although drive belts are made of a tough, durable rubber, they still wear out over time and eventually break, causing the impeller paddle to stop spinning while the snowblower is in operation.
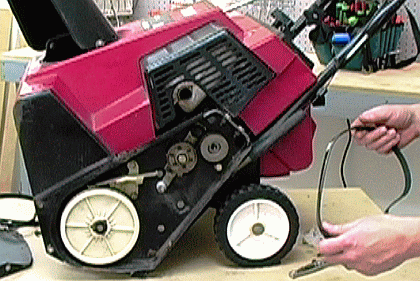 In fact, a broken drive belt is almost always the cause of an impeller that has stopped spinning.
Since drive belts are designed to wear, replacing one in a snowblower is a common repair, and one that any snowblower owner can perform him/herself.
Follow the drive belt replacement steps below to replace the belt on a Toro single stage snowblower.
Steps to Change a Snowblower Drive Belt
1. Remove the side cover.
There are five bolts that hold the side cover to the machine.
Three of the bolts are on the face of the cover.
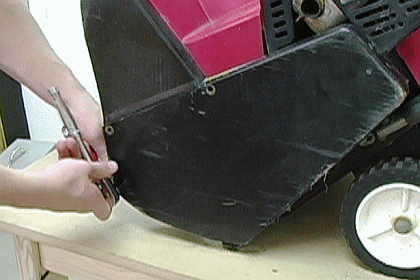
The last two bolts are on the underside of the cover.
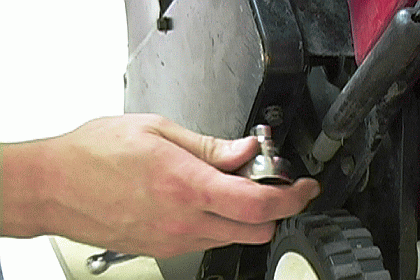
After removing the five bolts with a wrench, the side cover can be lifted away from the machine.
[Back to top]
2. Remove the old drive belt.
Lifting the side cover will expose the pulley system in which the drive belt is positioned.
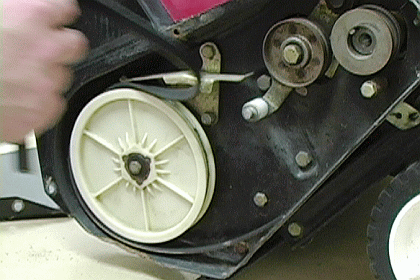
Remove the old drive belt from the snowblower.
[Back to top]
3. Refer to the belt routing diagram.
Nearly every Toro single stage snowblower will have a diagram on the inside of its side cover.
The diagram displays the routing orientation of the snowblower's drive belt.
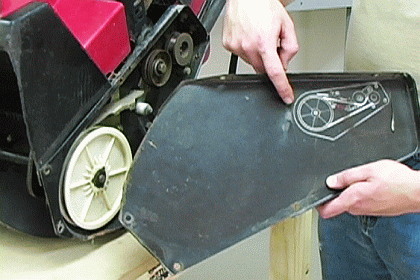
Refer to the drive belt orientation depicted in the diagram to prepare for installation of the new drive belt.
[Back to top]
4. Install the new drive belt.
Install the new belt according to the belt diagram.
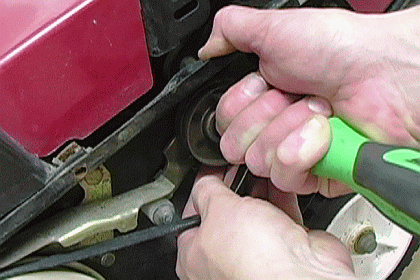
For many snowblowers, it will be necessary to temporarily lift one or more pulleys in order to position the new belt.
Shifting the position of the pulleys can be done easily with the help of a screwdriver.
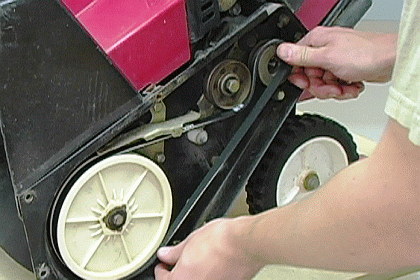
Give the belt one last check to make sure that it is correctly centered on its track.
[Back to top]
5. Replace the side cover.
To complete this repair, replace the side cover and return the five bolts that hold it in place.
[Back to top]
Conclusion
Get the genuine Toro replacement parts you need by visiting our Toro Snowblower Parts page, here at eReplacementParts.com.
A new drive belt for your Toro snowblower is just a few clicks away.
Take advantage of this professional repair advice and start saving on your tool, machine, and appliance repairs!
[Back to top]
What we're about.


