Why Read This Article?
Finish Nailer Repair - Replacing the Driver Guide (Ridgid Part # 79004001022)
Article Breakdown
Finish Nailer Repair - Replacing the Driver Guide (Ridgid Part # 79004001022)
Tools & Materials
- a flat head screwdriver
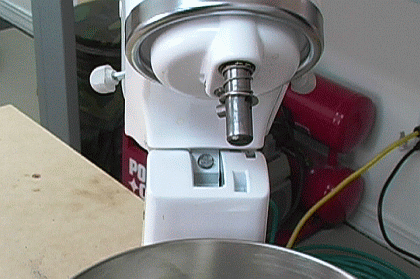 Luckily, adjusting a mixer's beater height back into the correct position takes only seconds to do and only requires the use of a flat head screwdriver.
Read to steps below to learn how to adjust your mixer's beater height.
Steps to Adjust KitchenAid Beater Height
1. Tilt the mixer's head back and remove the beater.
This will give you access to the mixer's beater height adjustment screw.
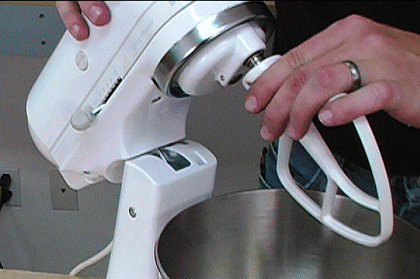
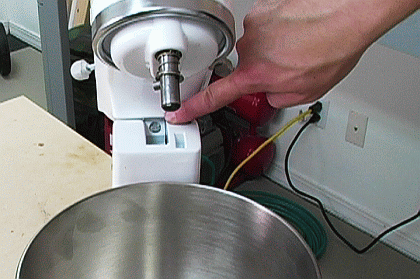
The beater height adjustment screw is located in the joint where the mixer's head pivots.
 [Back to top]
2. Turn the adjustment screw one full turn counterclockwise.
Turning the beater height adjustment screw counterclockwise raises the beater, while tightening the screw lowers the beater.
The correct position for the beater is to be just out of reach of the bowl edges.
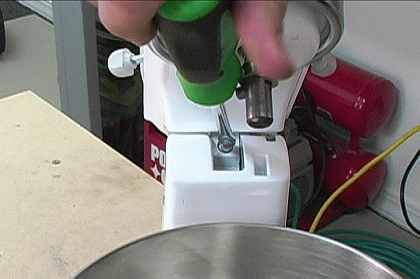
If your mixer's beater only recently began to hit the bowl, turning the adjustment screw a full turn is a good rule of thumb to get the beater back where it should be.
Exactly how much to turn the screw can vary a little, depending on the mixer.
[Back to top]
3. Test the new height of the beater.
Just to double check the adjustment, reattach the beater and run the machine at full speed for a second or two.
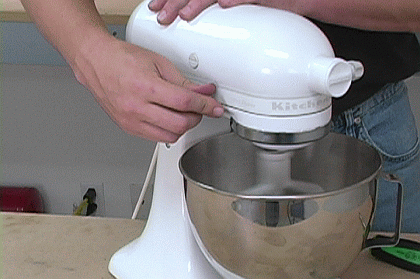
If the beater doesn't hit the sides of the bowl, then the height adjustment was successful!
[Back to top]
Conclusion
eReplacementParts.com is an authorized dealer for O.E.M. KitchenAid mixer parts. We hope this article and video helped you with your mixer adjustment.
Come back again for the parts and repair information you need to save money on household repairs!
[Back to top]
What we're about.


