


Why Read This Article?
Finish Nailer Repair - Replacing the Driver Guide (Ridgid Part # 79004001022)
Article Breakdown
Finish Nailer Repair - Replacing the Driver Guide (Ridgid Part # 79004001022)
Video
Tools & Materials
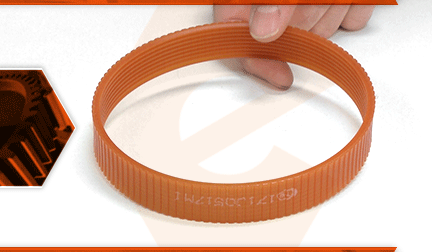
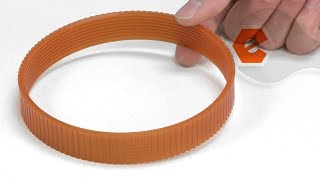
The v-belt links the motor to the cutter head on your planer. The belt is made of a reinforced neoprene material. Over time, the belt can wear or break. A worn belt might squeal or give off a burning smell. If the belt breaks, the motor will run, but the cutter head won't rotate.
Let's get started.
REMOVING THE V-BELT 1. Remove the crank handle.
a. Remove the screw securing the crank handle to the planer.
b. Remove the crank handle from the crank shaft.
2. Remove the side cover.
a. Remove the (4) screws securing the side cover to the planer.
b. Remove the side cover.
3. Remove the pulley cover plate.
a. Loosen the screw securing the pulley cover plate.
b. Remove the pulley cover plate from the unit.
4. Remove the idler arm.
a. Remove the screw securing the idler arm to the planer.
b. Remove the idler arm from the unit. 5. Remove the sprocket and chain.
a. Remove the screw securing (right) sprocket.
b. Remove the sprocket and chain from the unit. 6. Remove the v-belt.
a. Use an impact driver to remove the nut securing the drive pulley to the motor shaft.
b. Use a gear-puller to remove the drive pulley from the motor shaft.
c. Remove the v-belt from the planer.
INSTALLING THE NEW V-BELT 7. Install the v-belt.
a. Install the top half of the new v-belt onto the upper pulley.
b. Install the lower half of the new v-belt onto the drive pulley.
c. Align the keyway on the drive pulley with the key on the motor shaft.
d. Insert a punch through the drive pulley and into the center recess on the motor shaft.
e. Using the punch as lever; carefully pry the drive pulley (along with the v-belt) onto the motor shaft.
f. Use a rubber mallet to tap and seat the drive pulley onto the motor shaft.
g. Secure the drive pulley with the nut.
REASSEMBLING THE UNIT 8. Reinstall the chain and sprocket.
a. Loosely align the (right-hand) sprocket (and the chain) with the roller shaft.
b. Install the opposite end of the chain onto the (left-hand) sprocket.
c. Install the (right-hand) sprocket onto the roller shaft.
d. Secure the (right-hand) sprocket with the washer and the screw. 9. Reinstall the idler arm.
a. Connect the end of the idler arm to the spring.
b. Align the mounting hole on the idler arm with the mounting post.
c. Secure the idler assembly to the post with the screw. 10. Reinstall the side cover.
a. Install the side cover.
b. Secure the side cover with the (4) screws. 11. Reinstall the pulley cover plate.
a. Install the pulley cover plate.
b. Secure the pulley cover plate with the screw. 12. Reinstall the crank handle.
a. Install the crank handle.
b. Secure the crank handle with the screw.
