


Why Read This Article?
Finish Nailer Repair - Replacing the Driver Guide (Ridgid Part # 79004001022)
Article Breakdown
Finish Nailer Repair - Replacing the Driver Guide (Ridgid Part # 79004001022)
Video
Tools & Materials
- a socket wrench set
- a flat head screwdriver
- hemostats or fuel line clamps
- a small container
- spark plug pullers (optional)
- a pair of pliers
For Toro single stage snowblowers, a tune-up consists of just replacing the machine's spark plug and fuel filter.
 This article explains the steps and required disassembly to perform a tune-up on a Toro single stage snowblower.
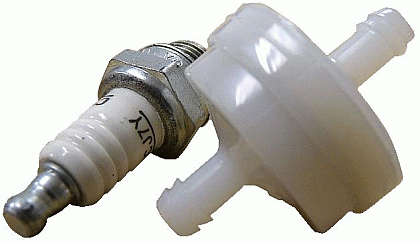
How to Replace a Toro Snowblower Fuel Filter
The fuel lines and fuel filter are located underneath the snowblower's front housing.
The control plate and control plate cover will also have to be removed for the housing to come off.
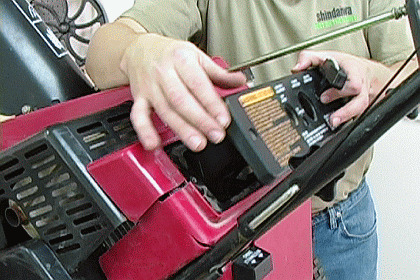
1. Remove the control plate cover.
The first step in removing the control plate is to remove the control plate cover.
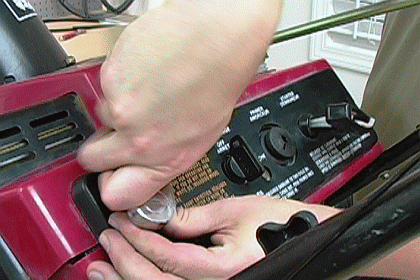
To remove the control plate cover, first remove the three fasteners that hold it to the control plate.
Next, remove the ignition key from the control plate cover. Now the control plate cover can be lifted from its position.
 [Back to top]
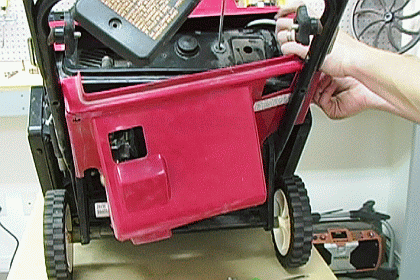
2. Remove the front housing.
[Back to top]
2. Remove the front housing.
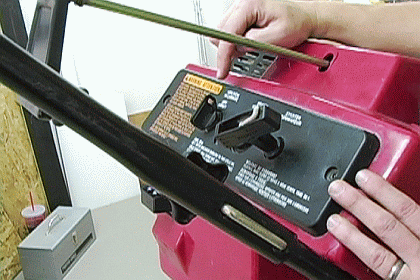
The front housing also holds the control plate down. And two handle bar screws hold the front cover to the machine.
Use a wrench to remove the two handle bar screws, one on each side of the snowblower.
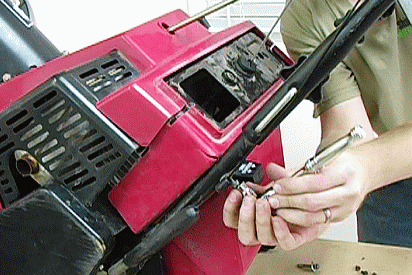
Now the front cover can be removed. It may take a little coaxing to get it away from the handle bars.
 [Back to top]
3. Carefully remove the control plate.
[Back to top]
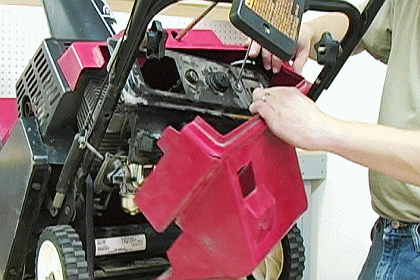
3. Carefully remove the control plate.
It's time to lift the control plate away from the snowblower, but this has to be done carefully.
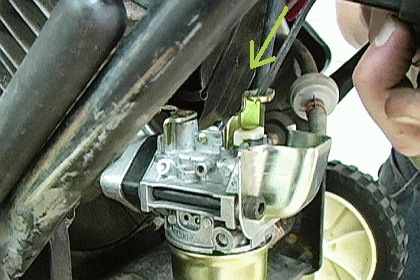
The back of the snowblower's choke lever attaches to the carburetor.
While lifting the control plate away from the machine, carefully thread the choke lever out of the carburetor.
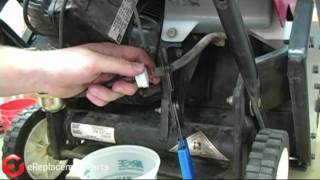
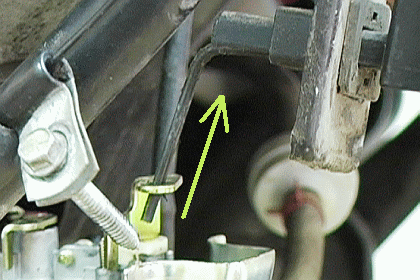
4. Clamp the incoming fuel line.
Now that that control plate and front housing are off, the fuel lines and filter are accessible in the front of the snowblower.
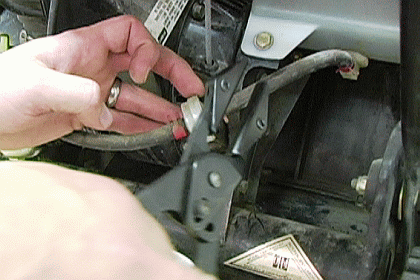
To prevent fuel from leaking out of the fuel line, clamp off the incoming fuel line to the fuel filter before removing the filter.
Clamping the fuel line can be done with hemostats, fuel line clamps, or any other clamp that will not damage the line. [Back to top] 5. Remove the fuel lines from both sides of the filter.
The fuel lines attach to the sides of the filter with small fuel line clamps. Use a pair of pliers to slide the small clamps aside before attempting to pull the lines off of the filter.
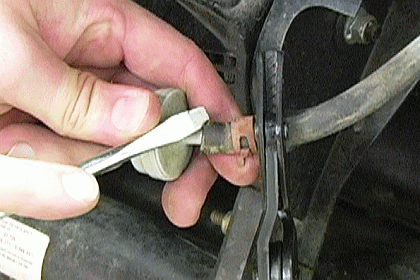
Use a flat head screwdriver to push the fuel lines off of the filter. Attempting to simply pull the lines off of the filter risks breaking the lines.
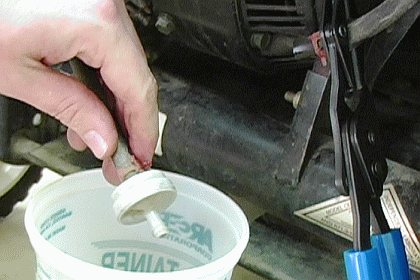
Make sure to have a small container handy when removing the old filter. Even with the incoming fuel line clamped off some fuel will most likely drain out of the filter. [Back to top] 6. Install the new fuel filter.
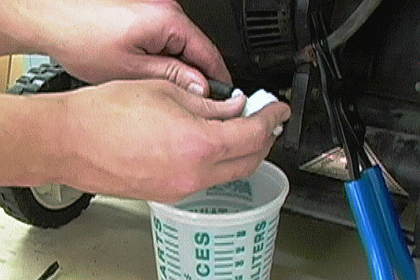
Install the new snowblower fuel filter by pressing the attachment ends of the filter into the fuel lines.
 [Back to top]
7. Replace the fuel line clamps over the filter.
[Back to top]
7. Replace the fuel line clamps over the filter.
Use a pair of pliers to replace the two small clamps on the sides of the filter. This will finish securing the fuel lines on the filter.
To complete the fuel filter replacement, just release the clamp on the incoming fuel line.
[Back to top]
How to Replace a Toro Snowblower Spark Plug
The disassembly from the fuel filter replacement makes it easy to finish up this snowblower tune-up.
In fact, the only disassembly needed to access the spark plug is removal of the control plate cover.
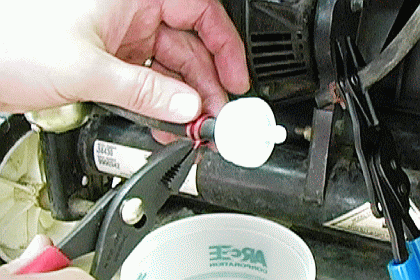
1. Pull the spark plug boot.
The spark plug boot can be pulled by hand, with a pair of pliers, or with a pair of spark plug boot pullers, as pictured below.
 [Back to top]
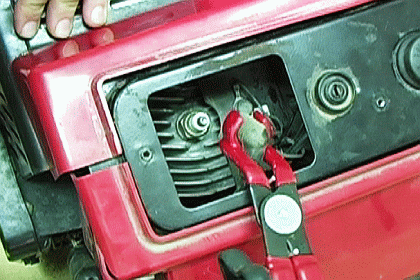
2. Remove the old spark plug.
[Back to top]
2. Remove the old spark plug.
Use a socket wrench to remove the old spark plug.
 [Back to top]
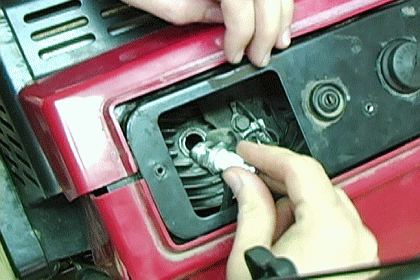
3. Thread the new spark plug in.
[Back to top]
3. Thread the new spark plug in.
Thread the new spark plug in by hand to start.
 [Back to top]
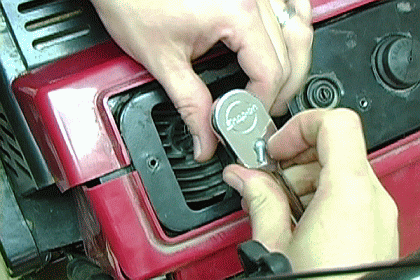
4. Tighten the new plug down.
[Back to top]
4. Tighten the new plug down.
Finally, tighten down the new spark plug with the socket wrench.
 [Back to top]
5. Replace the spark plug boot.
[Back to top]
5. Replace the spark plug boot.
After replacing the spark plug boot, the spark plug replacement is complete. [Back to top] 6. Reassemble the machine.
Finishing up the snowblower tune-up from here just means returning all of the machine's pieces to their places.
Remember that the choke lever needs to be threaded back into the carburetor as it is adjusted into place.
Also, keep in mind that returning that front housing to its place can be just as tricky as getting it out.
Trying to ease the cover around all the necessary parts and back into place may take a few attempts, but a little patience will go a long way.
Make sure to replace the handle bar screws, control plate cover, the control plate cover screws, and the ignition key.
[Back to top]
Conclusion
This snowblower tune-up can take less than ten minutes, and you'll be sure to notice the difference in your machine's performance.
Get the Toro snowblower parts you need--like spark plugs and fuel filters--by typing the model number of your machine in the search field at the top of this page.
For other snowblower parts brands, visit our Snowblower Parts page to view eReplacementParts.com's complete inventory.
[Back to top]
What we're about.
