


Why Read This Article?
Finish Nailer Repair - Replacing the Driver Guide (Ridgid Part # 79004001022)
Article Breakdown
Finish Nailer Repair - Replacing the Driver Guide (Ridgid Part # 79004001022)
Video

Tools & Materials

Chainsaw need a checkup? It's time to face the fix. Whether you are a legendary lumberjack or a weekend woodworker, eReplacementParts.com provides the parts, procedures and facts you need to fearlessly fix what fails you.
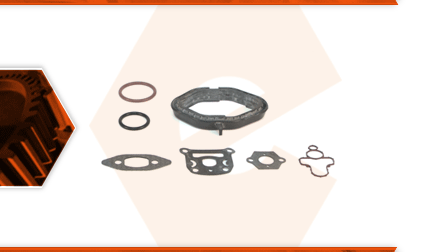
Doing a major overhaul of your saw? You'll want to install a cylinder gasket and O-ring kit. The cylinder gasket and O-ring kit consists of the intake gaskets, the exhaust gasket, and the fuel and oil tank O-rings.
Gaskets should be replaced whenever a part that they seal is removed. When a gasket is reused, there is a good chance that it won't reseal properly. This can allow dirt into the engine. If a gasket is reused between the carburetor and the cylinder, it could let extra air into the engine. This will cause the engine to run lean, which can quickly lead to serious engine damage.
O-rings will break down as they age. When you are doing maintenance on your saw, you should inspect the O-rings for cracks, and replace them as needed.
This article provides step-by-step instructions for installing the cylinder gasket and O-ring kit on a Poulan chainsaw.
Let's get started.
 REPLACING THE INTAKE GASKETS [top]
1. Drain the fuel.
REPLACING THE INTAKE GASKETS [top]
1. Drain the fuel.
Drain any excess fuel from the tank.
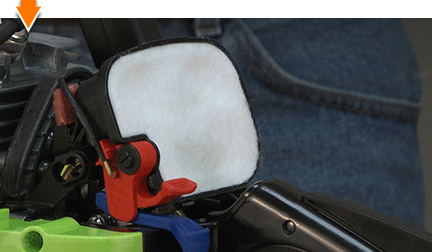
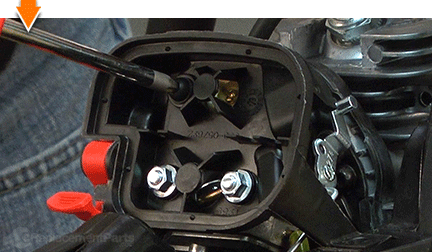
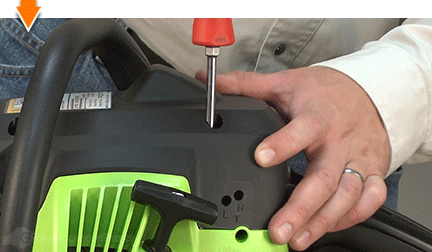
2. Remove the top cover.
Remove the (3) screws securing the top cover to the saw.
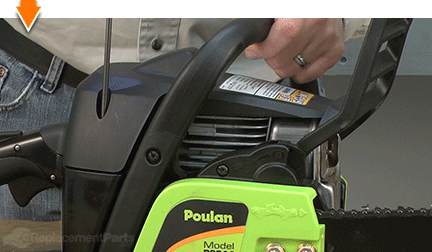
Lift the top cover away from the saw.
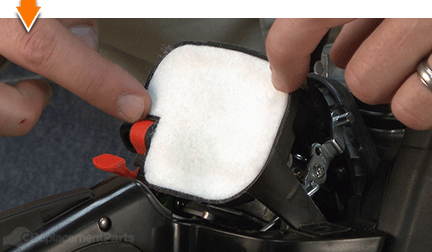
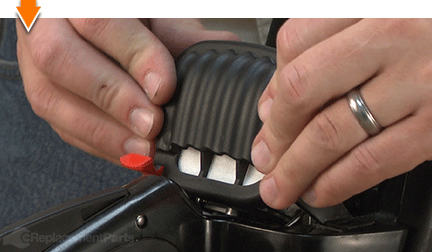
3. Remove the air filter housing.
Remove the air filter cover.
Remove the air filter from the housing.
Remove the (1) screw securing the air filter housing to the engine.

Remove the (2) nuts securing the air filter housing to the engine.
Lift the air filter housing away from the carburetor assembly.

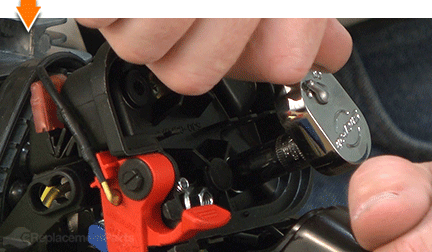
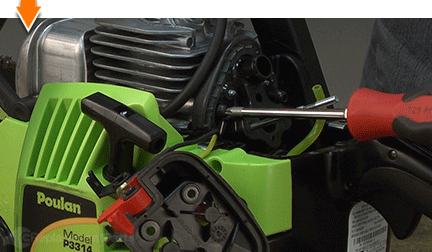
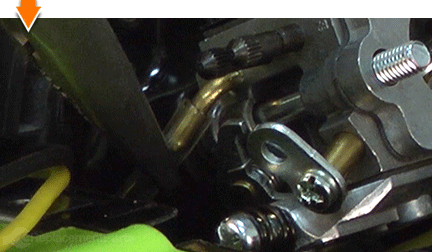
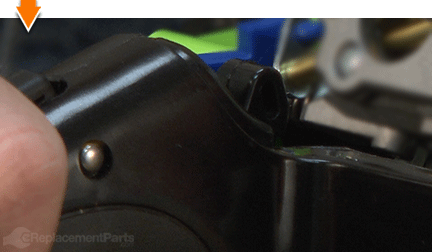
4. Remove the carburetor (and gasket).
Pull and hold the throttle trigger to expose the throttle linkage attachment point (on the trigger).
Disconnect the linkage from the throttle trigger.
Disconnect and remove the throttle linkage from the carburetor.

Disconnect and remove the choke lever from the carburetor.
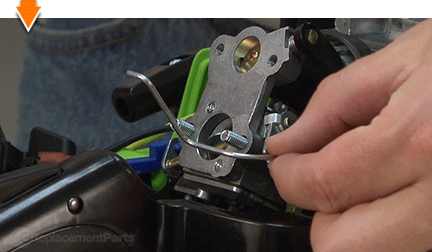
Use long-nosed pliers to disconnect the fuel intake tube from the carburetor.
Use long-nosed pliers to disconnect the purge line from the carburetor.
Slide the carburetor assembly off the mounting bolts and away from the engine.
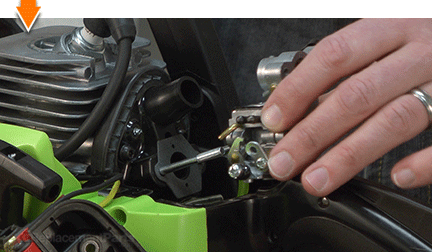
Remove the CARBURETOR GASKET from the carburetor adapter.
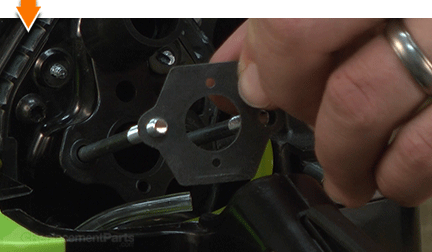
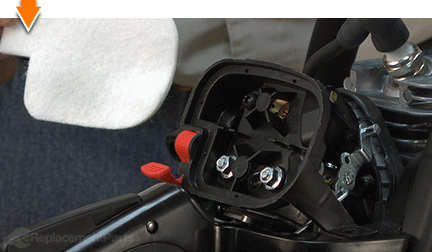
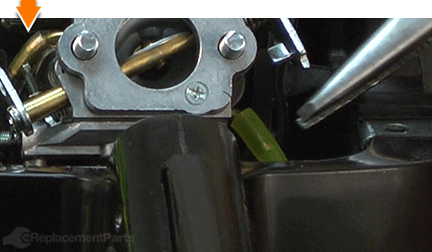
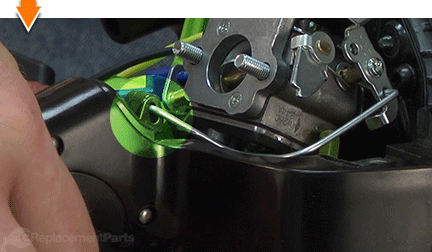
5. Remove the carburetor adapter.
There are four screws securing the carburetor adapter to the engine. The top (2) screws are easily accessible (using a Torx driver). The lower (2) screws are a bit more difficult to access, and will require a small ratchet and (Torx) socket.
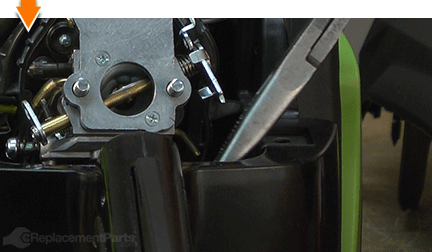
Remove the top (2) screws from the carburetor adapter.
Remove the lower (2) screws from the carburetor adapter.
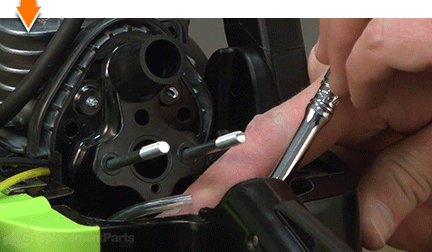
Remove the carburetor adapter assembly from the engine.
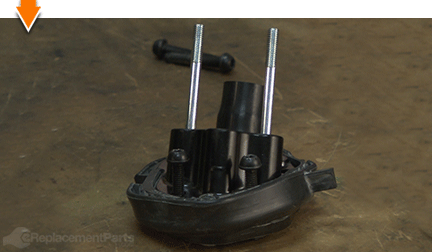
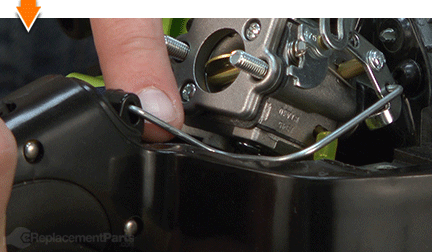
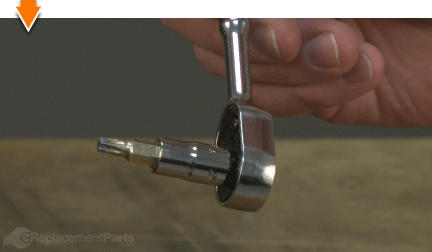
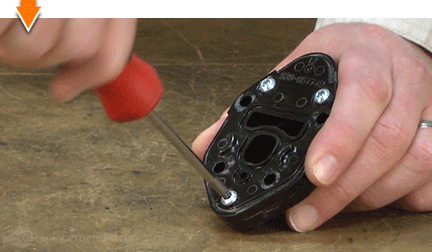
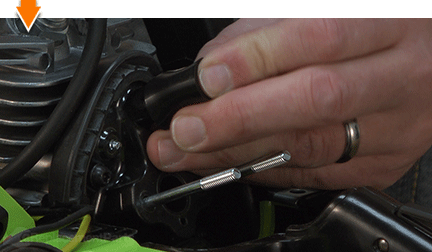
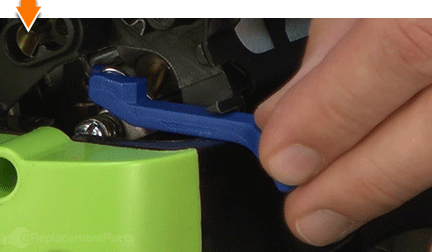
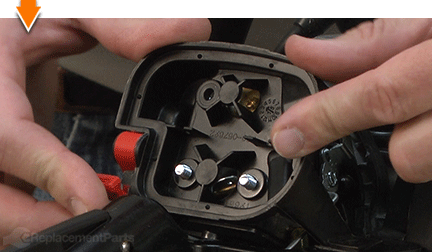
6. Disassemble the carburetor adapter.
Remove the ADAPTER SLEEVE from the carburetor adapter.
Remove the (3) screws securing the two halves of the carburetor adapter.
Separate the two halves of the carburetor adapter.
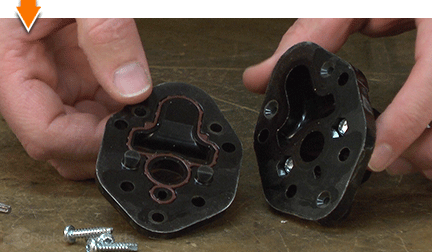
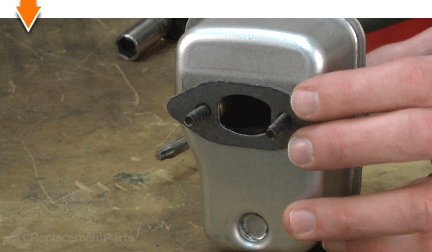
Remove the INNER GASKET from the inside of the carburetor adapter.
Remove the CYLINDER GASKET from the outside of the carburetor adapter.
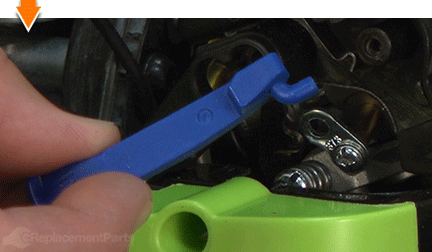
Use a gasket scraper or razor to remove residual gasket material from the adapter.
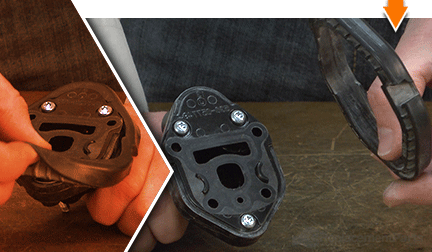
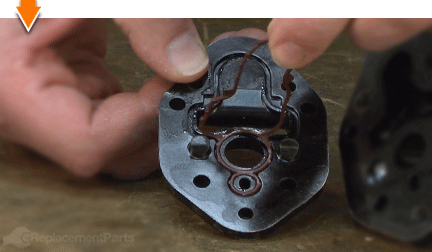
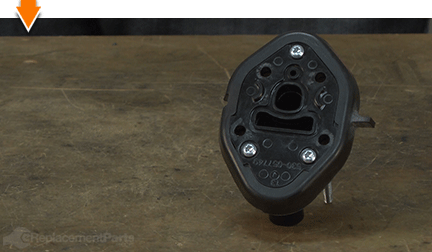
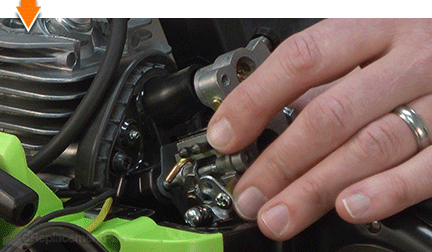
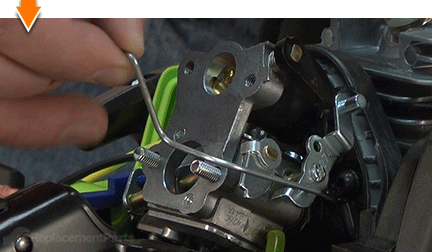
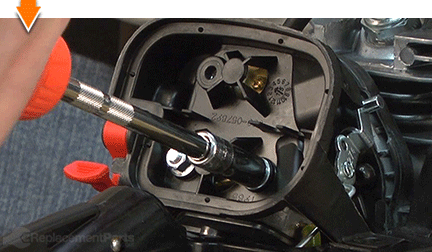
7. Reassemble the carburetor adapter.
Align the new INNER GASKET with the groove on the lower half of the adapter assembly.
Install the inner gasket into the adapter.
Slide your finger along the edges of the gasket to ensure that the gasket is properly seated in the groove.
Reassemble the two halves of the carburetor adapter.
Secure the two halves of the carburetor adapter with the (3) screws.
Install the new OUTER SLEEVE onto the carburetor adapter assembly.
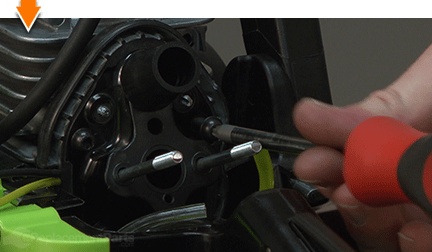
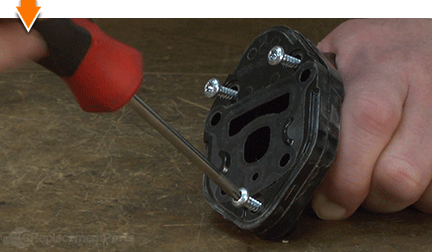
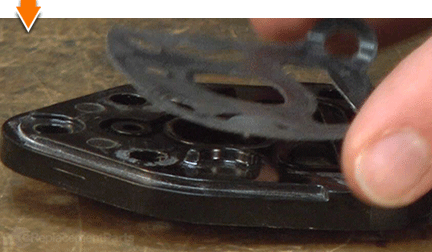
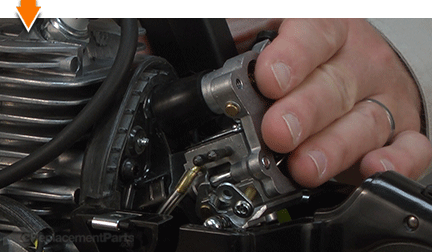
8. Reinstall the carburetor adapter.
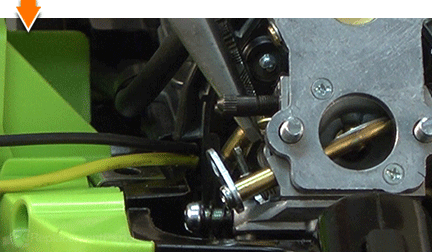
Install the new CYLINDER GASKET onto the carburetor adapter.
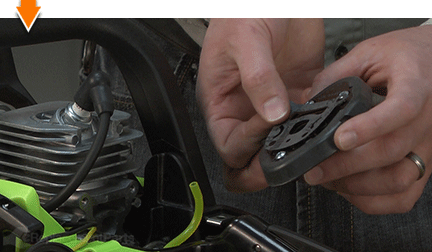
Install the carburetor adapter onto the engine, ensuring that the cylinder gasket aligns with the intake opening on the engine.
Secure the carburetor adapter to the engine with the (4) screws.
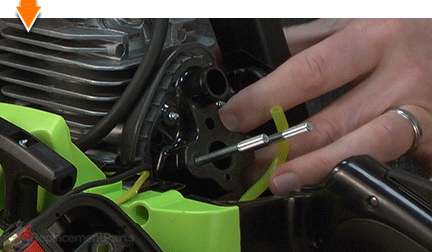
9. Reinstall the intake tube.
Install the intake tube onto the carburetor adapter.
10. Reinstall the carburetor.
Install the new CARBURETOR GASKET onto the carburetor adapter.

Slide the carburetor onto the two mounting posts on the engine.
Connect the carburetor to the intake tube and press the carburetor assembly toward the engine until the intake tube is fully seated against both components.
Reconnect the fuel purge tube to the top of the carburetor.
Reconnect the fuel intake tube to the bottom of the carburetor.
Install the choke lever to the carburetor.
Connect the throttle linkage to the carburetor linkage.
Pull and hold the throttle trigger to expose the attachment point for the trigger-portion of the throttle linkage.
Connect the throttle linkage to the throttle trigger.
11. Reinstall the air filter housing.
Slide the air filter housing over the carburetor mounting posts.
Secure the air filter housing to the engine with the (2) nuts.
Secure the air filter housing to the carburetor with the (1) screw.
Install the air filter.
Install the air filter cover.
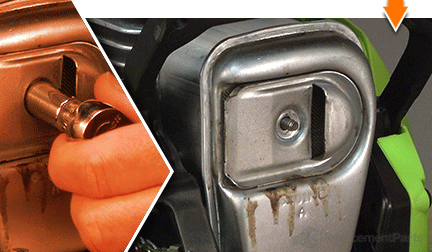
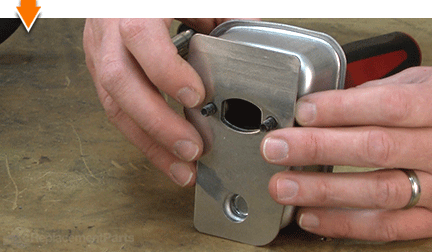
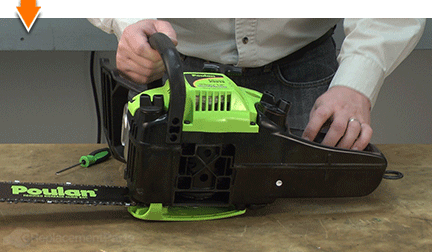
REPLACING THE EXHAUST GASKET [top] 12. Remove the muffler assembly.
Remove the nut securing the spark arrestor cover to the muffler.
Remove the spark arrestor cover from the muffler.
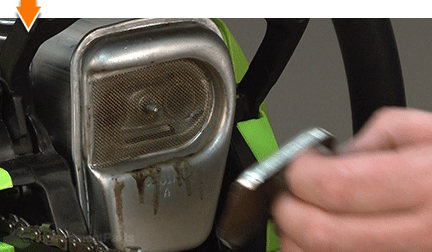
Remove the spark arrestor (screen) from the muffler.
Loosen the (2) screws securing the muffler to the cylinder.
Remove the muffler from the saw.
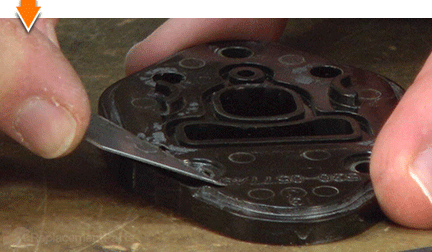
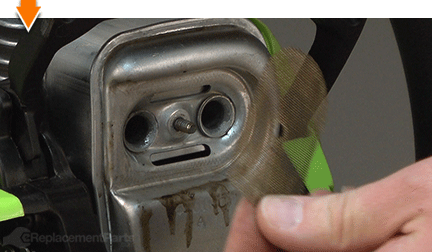
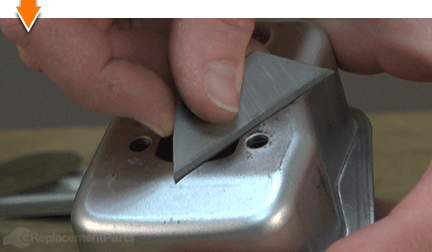
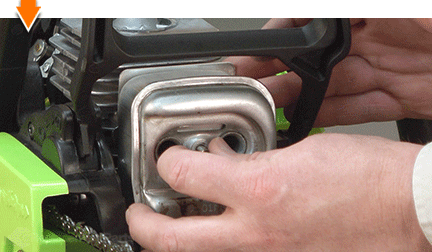
13. Remove the exhaust gasket.
Remove the EXHAUST GASKET from the muffler.
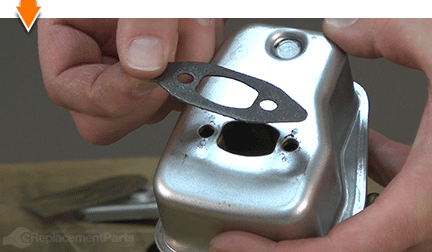
Use a gasket scraper or razor to remove any residual gasket material.
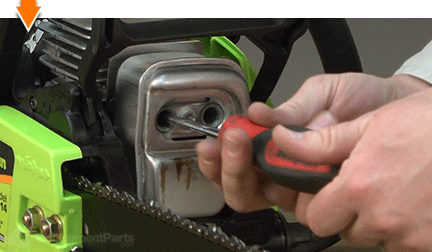
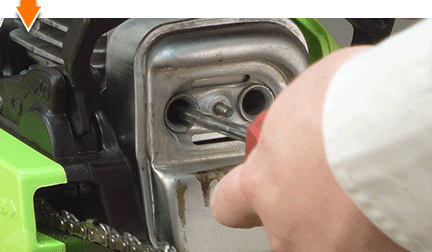
14. Install the exhaust gasket.
Install the (2) screws into the holes on the muffler assembly.
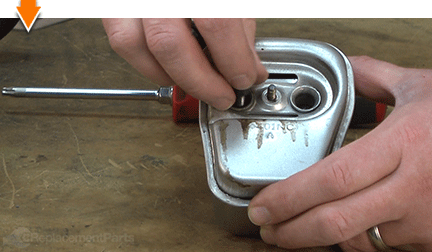
Thread (or press) the screws through the holes until the threads extend fully from the back of the muffler assembly.

Install the new EXHAUST GASKET onto the muffler assembly (using the screws to keep the gasket aligned).
Install the heat dam onto the muffler assembly (over the exhaust gasket).
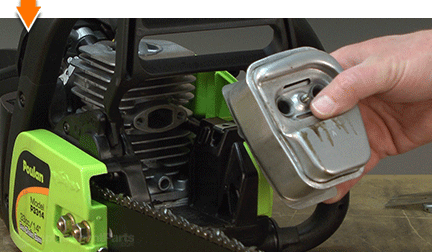
15. Reinstall the muffler assembly.
Align the muffler assembly (and the screws) with the openings on the cylinder.
Secure the muffler to the cylinder with the (2) screws.
Install the spark arrestor (screen) onto the muffler.
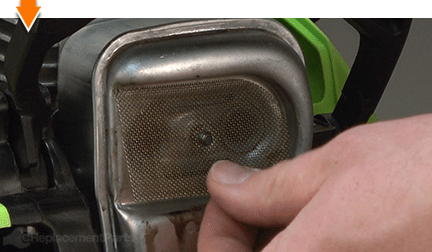
Install the spark arrestor cover over the spark arrestor.
Install the nut securing the spark arrestor to the muffler.
Secure the spark arrestor assembly to the muffler with the nut.
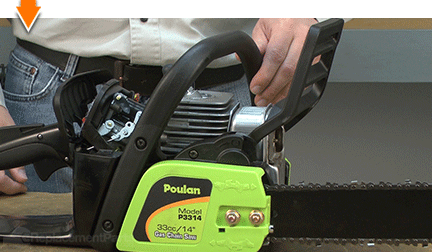
16. Reinstall the top cover.
Install the top cover onto the saw.
Secure the top cover with the (3) screws.
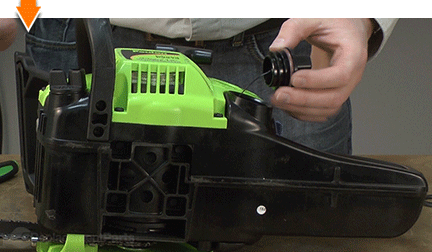
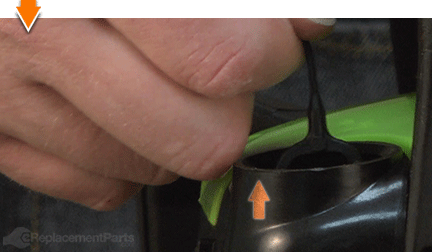
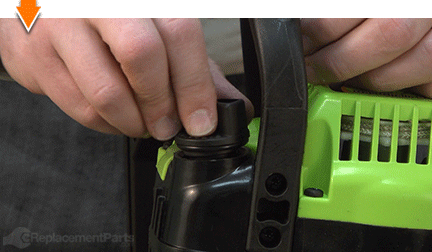
REPLACING THE O-RINGS [top] 17. Remove the fuel cap O-ring.
Tilt the saw on its side to prevent fuel from leaking when the cap is removed.
Unscrew and remove the fuel cap from the fuel tank.
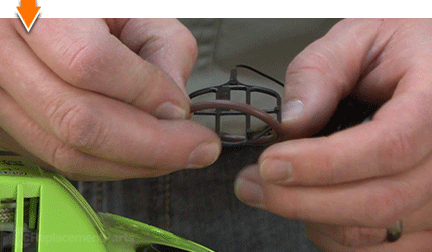
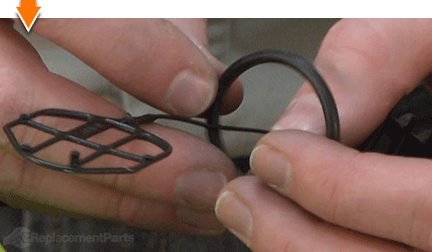
Use a pick to pry the FUEL CAP O-RING away from the fuel cap.

Squeeze or fold the sides of the lanyard while gently pulling the fuel cap assembly out of the tank.
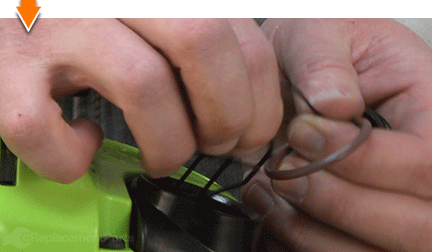
Remove the O-ring from the fuel cap assembly.
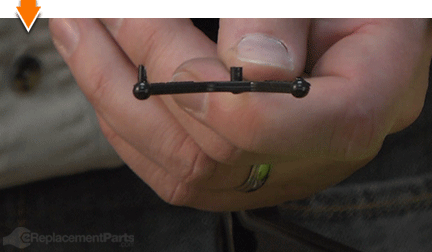
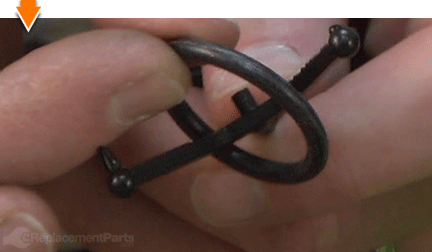
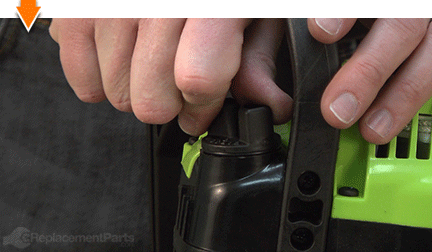
18. Install the fuel cap O-ring.
Install the new FUEL CAP O-RING onto the fuel cap assembly.
Work your finger around the edges of the assembly to seat the new O-ring into the groove on the fuel cap.
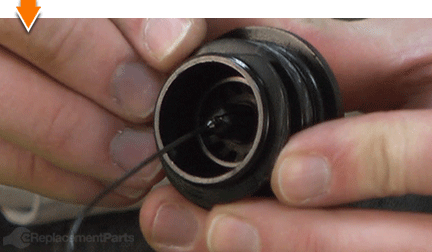
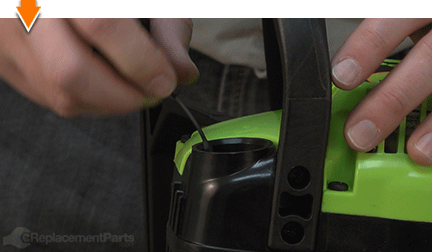
Insert the lanyard into the fuel tank.
Thread the fuel cap into the fuel tank.
Hand-tighten the fuel cap assembly (do not overtighten).
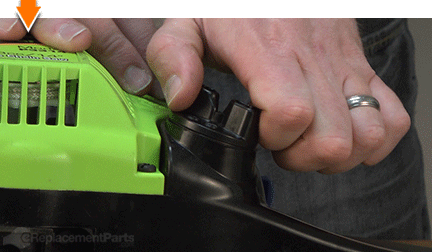
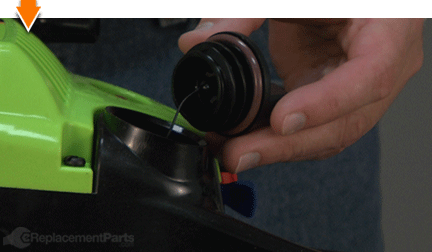
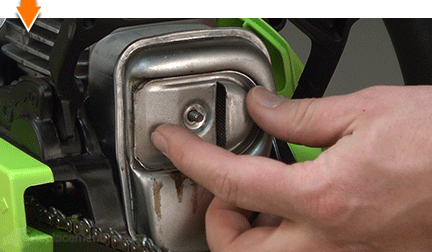
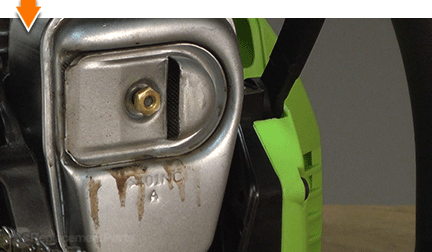
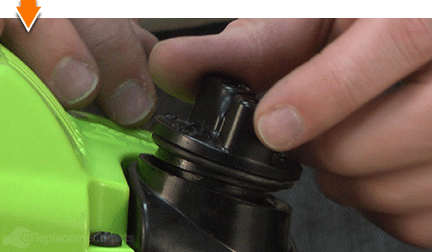
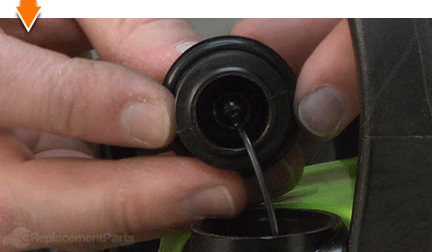
19. Remove the oil cap O-ring.
Unscrew and remove the oil cap from the oil reservoir.
Use a pick to pry the OIL CAP O-RING away from the oil cap.
Squeeze or fold the sides of the lanyard while gently pulling the oil cap assembly out of the reservoir.
Remove the O-ring from the oil cap assembly.
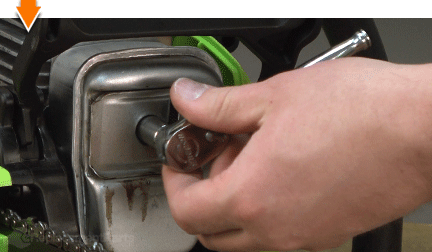
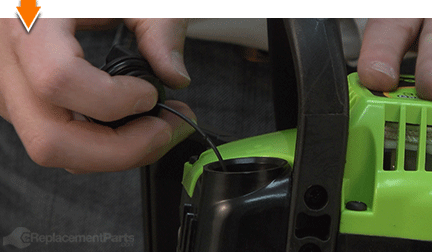
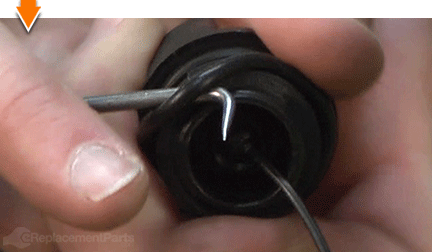
20. Install the oil cap O-ring.
Install the new OIL CAP O-RING onto the oil cap assembly.
Insert the lanyard into the oil reservoir.
Work your finger around the edges of the assembly to seat the new O-ring into the groove on the oil cap.
Thread the oil cap into the oil reservoir.
Hand-tighten the oil cap assembly (do not overtighten).

Do-it-yourself repairs like these are easier than you might think: From lawn machines to cordless drills, kitchen mixers to outdoor grills. Our "how-to" articles walk you through each repair from start to finish.
So, doing-it-yourself means never having to do it alone.
