


Why Read This Article?
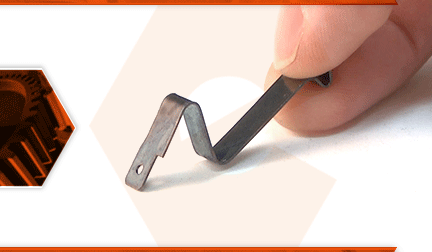
Finish Nailer Repair - Replacing the Driver Guide (Ridgid Part # 79004001022)
Article Breakdown
Finish Nailer Repair - Replacing the Driver Guide (Ridgid Part # 79004001022)
Video

Tools & Materials

Chainsaw won't turn off? It's time to face the fix. Whether you are a legendary lumberjack or a weekend woodworker, eReplacementParts.com provides the parts, procedures and facts you need to fearlessly fix what fails you.
Most chainsaw ignition switches are pretty simple designs. In this case, a plastic switch lever with a metal contact mounted to it, and the ignition switch spring. The switch is open when the saw is running. This sends power from the ignition coil to the spark plug. When the saw is turned off, the switch is closed. This creates a second circuit from the ignition coil -- through the switch -- and grounds to the engine. There is much less resistance in this kill circuit, and since electricity will always follow the path of least resistance, the spark plug no longer gets power, and the engine turns off.
A bad ignition switch spring can usually be diagnosed visually. Most problems are the result of the two switch contacts not making contact with each other. Corrosion or rust can also cause an incomplete circuit.
This article provides step-by-step instructions for removing and installing the ignition switch spring on a Poulan chainsaw.
Let's get started.
 REMOVING THE IGNITION SWITCH SPRING [top]
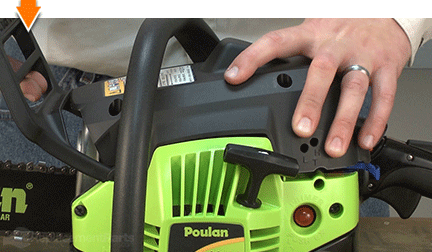
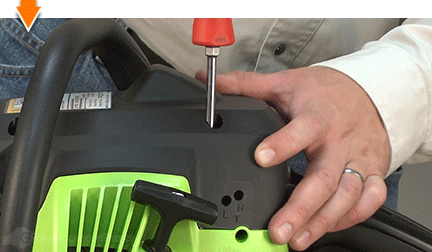
1. Remove the top cover.
REMOVING THE IGNITION SWITCH SPRING [top]
1. Remove the top cover.
Remove the (3) screws securing the top cover to the saw.
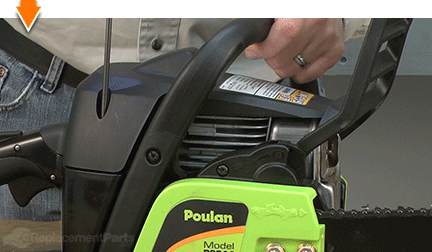
Lift the top cover away from the saw.
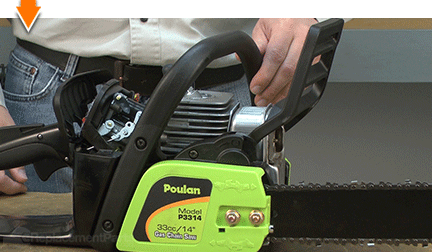
2. Remove the air filter cover.
Remove the air filter cover from the air filter housing.
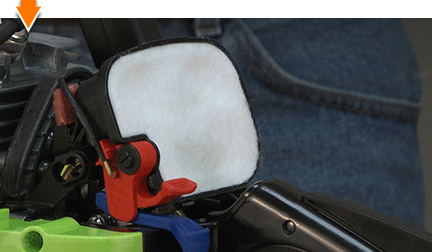
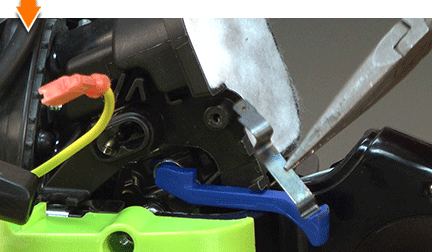
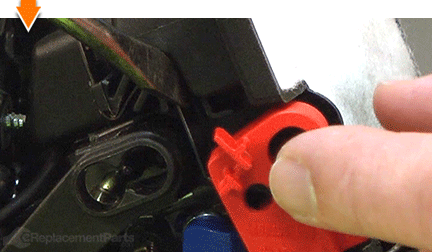
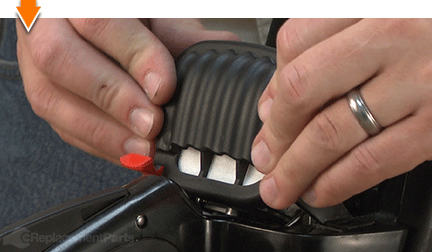
3. Remove the ignition switch spring.
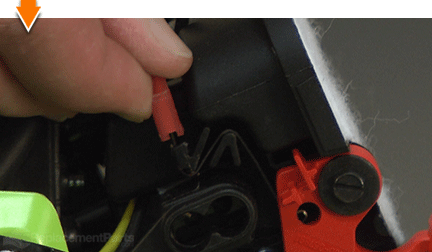
Use a screwdriver to disconnect the ignition contact from the (red) ignition switch lever.
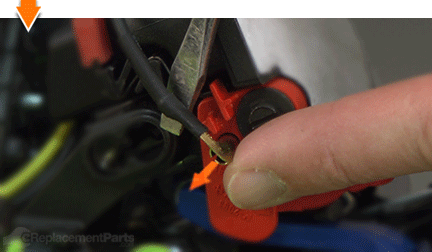
Use long-nosed pliers to disconnect the ignition terminal from the ignition switch spring.
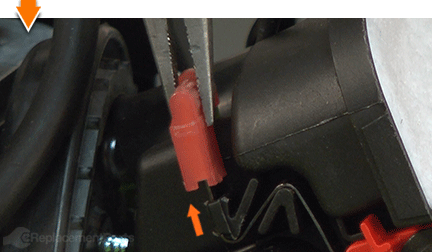
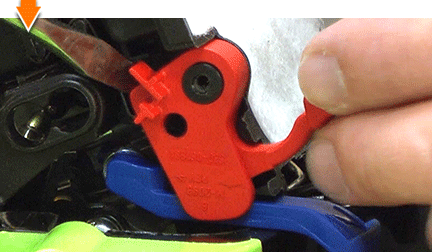
Remove the screw securing the ignition switch lever to the engine.
Slide the ignition switch lever away from the engine.
Remove the ignition switch spring from the housing.
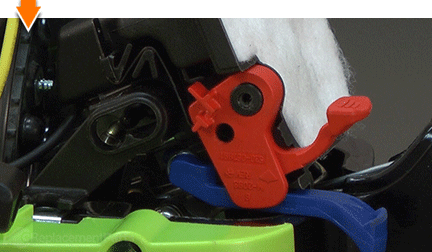
INSTALLING THE NEW IGNITION SWITCH SPRING [top] 4. Install the ignition switch spring.
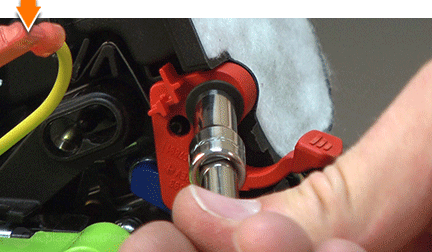
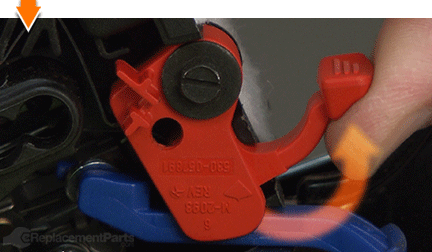
Align the new ignition switch spring with the tabs on the engine housing.
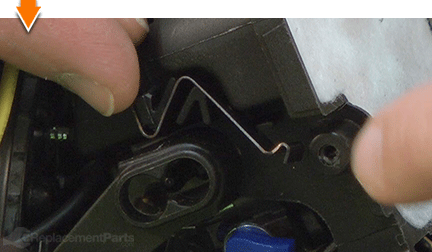
Press (and hold) the lower portion of the spring toward the front of the saw.

Slide the ignition switch spring into the tabs on the housing.
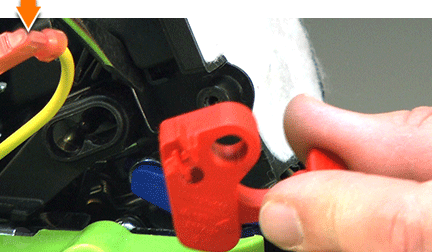
Release the lower portion of the spring (allowing it to lock into position within the tabs).
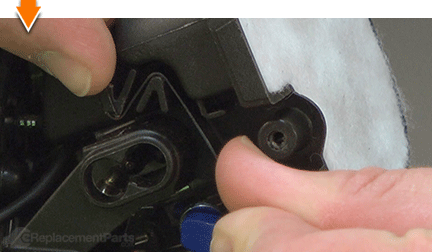
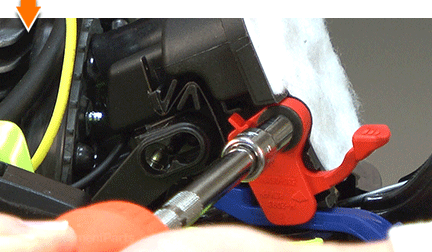
REASSEMBLING THE UNIT [top] 5. Reinstall the ignition switch lever.
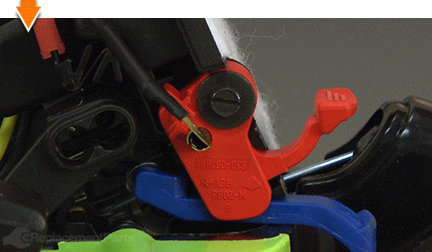
Use a small screwdriver to press (and hold) the ignition switch spring away from the plastic mounting post (on the engine housing).
Install the ignition switch lever onto the plastic mounting post.
Release the ignition switch spring (allowing it to engage the bottom of the ignition switch).
Secure the ignition switch lever with the screw.
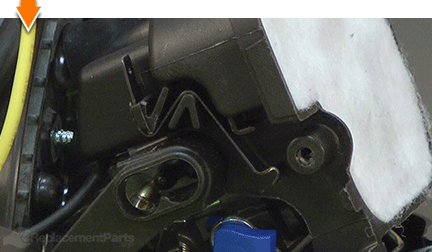
6. Connect the ignition wires.
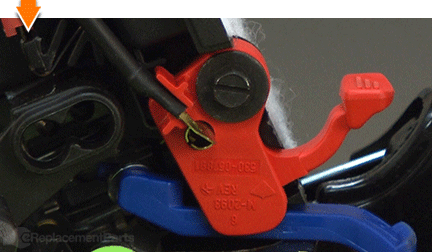
Connect the ignition wire to the top of the new ignition switch spring.
Switch the ignition lever to the on position.
Slide the ignition contact terminal into the ignition switch lever.
Tuck the ignition wire into the holders on the switch lever.
7. Reinstall the air filter cover.
Install the new air filter cover.
8. Reinstall the top cover.
Install the top cover onto the saw.
Secure the top cover with the (3) screws.

Do-it-yourself repairs like these are easier than you might think: From lawn machines to cordless drills, kitchen mixers to outdoor grills. Our "how-to" articles walk you through each repair from start to finish.
So, doing-it-yourself means never having to do it alone.
