Why Read This Article?
Finish Nailer Repair - Replacing the Driver Guide (Ridgid Part # 79004001022)
Article Breakdown
Finish Nailer Repair - Replacing the Driver Guide (Ridgid Part # 79004001022)
Tools & Materials

Chainsaw need a checkup? It's time to face the fix. Whether you are a legendary lumberjack or a weekend woodworker, eReplacementParts.com provides the parts, procedures and facts you need to fearlessly fix what fails you.
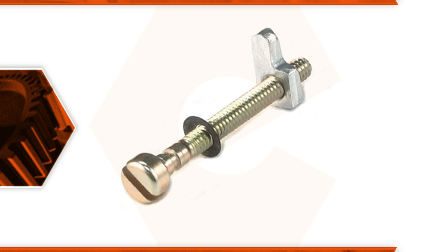
The bar adjustment kit is part of the clutch cover assembly. It is made up of the adjustment screw, the adjustment pin, and a retainer. If you can't tension the guide bar, a quick inspection of the bar adjuster will usually reveal the problem. Look for a sheared-off adjustment pin, stripped threads on the adjustment screw, or a damaged screw retainer.
Sometimes, the problem will be broken or worn plastic where the adjustment kit attaches to the clutch cover. Most damage to the bar adjustment kit is caused by over-tightening the adjustment screw. This will quickly wear out the threads, or even shear the pin right off.
This article provides step-by-step instructions for removing and installing the bar adjustment kit on a Poulan chainsaw.
Let's get started.
 REMOVING THE BAR ADJUSTMENT KIT [top]
1. Remove the clutch cover assembly.
Remove the (2) nuts from the bar mounting bolts.
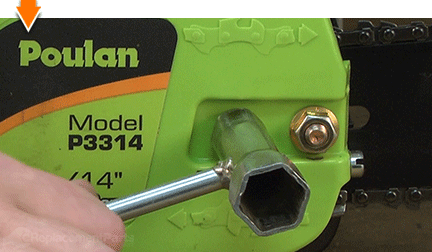
Rotate the chain tensioner screw counterclockwise to release tension from the chain.
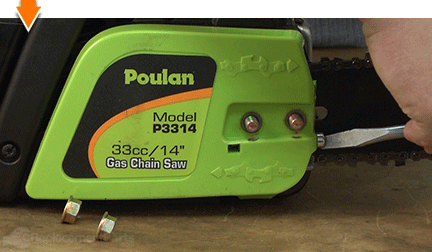
Remove the clutch cover assembly.
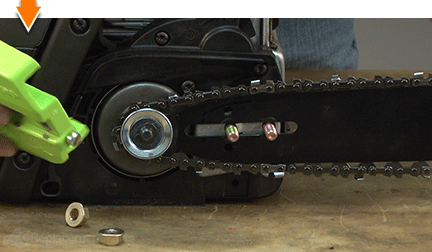
2. Disassemble the tensioning assembly.
Using a screwdriver, rotate the adjustment screw (as if tensioning the chain) to advance the adjustment pin to the opposite side of the housing.
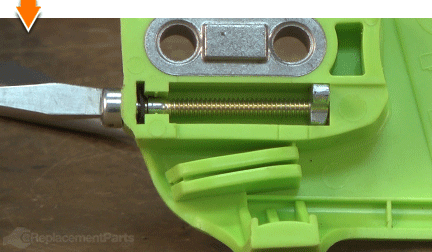
Continue rotating the screw until the head of the screw begins to protrude from the plastic housing.
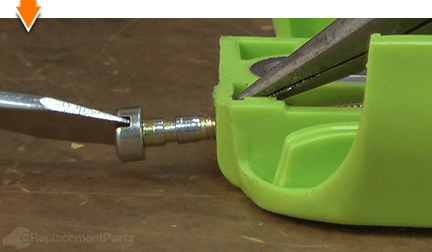
Unscrew and remove the adjustment screw from the housing.
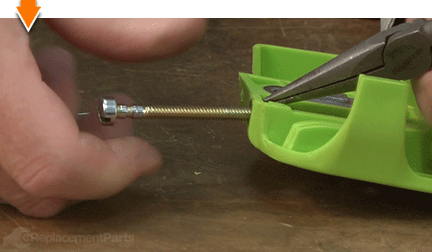
Remove the adjustment retainer from the housing.
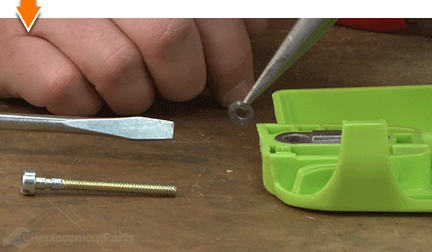
Remove the adjustment pin from the housing.
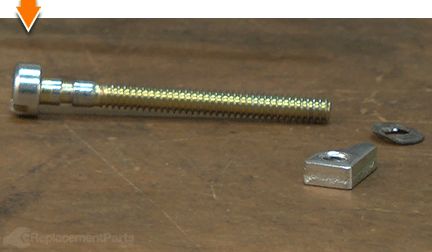
INSTALLING THE NEW BAR ADJUSTMENT KIT [top] 3. Install the bar adjustment pin.
Install the new adjustment retainer into the slot on the housing. The beveled (cone) portion of the retainer should face away from the screw head.
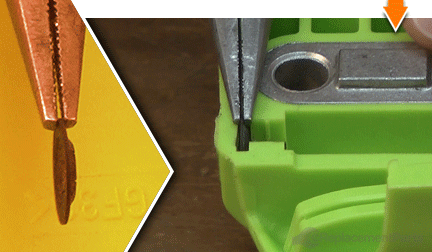
Install the new bar adjustment pin into the housing. The offset portion of the pin should face the top of the housing.
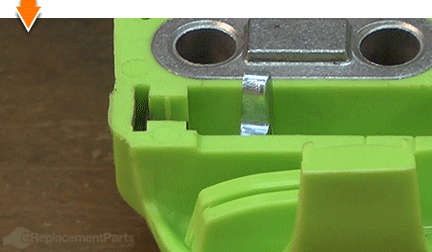
Thread the adjustment screw into the retainer (by hand) until the screw engages the adjustment pin.
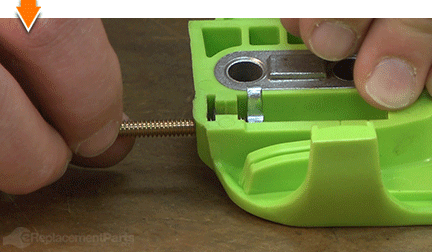
Thread the adjustment screw into the new adjustment pin until the pin is positioned tightly against the wall of the housing (near the screw head).
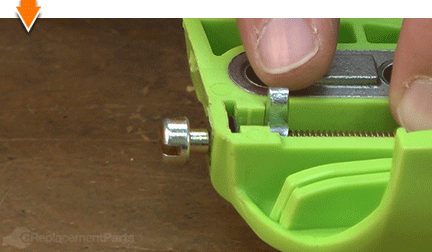
Use a screwdriver to continue tightening the screw until the retainer engages the slot at the top of the screw post.
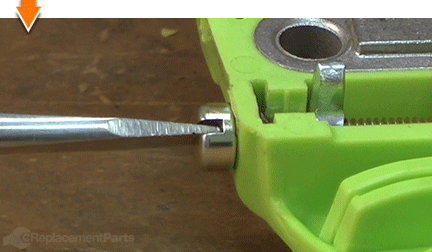
Rotate the screw in the opposite direction to advance the pin to the center of the tensioning assembly.
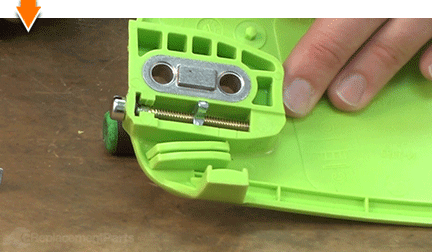
REASSEMBLING THE UNIT [top] 4. Reinstall the clutch cover assembly.
Install the clutch cover assembly.
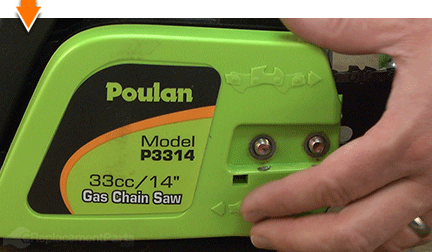
Apply (side) pressure to the clutch cover assembly.
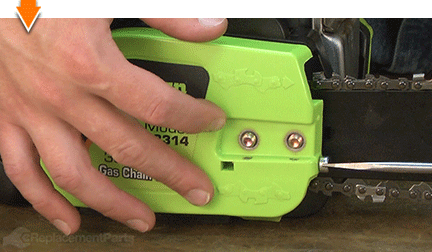
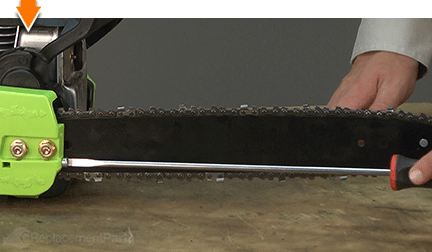
Using a long screwdriver, rotate the tensioner screw (in either direction) until the bar adjustment pin engages the hole on the bar. (The entire assembly should snap into place when this occurs).
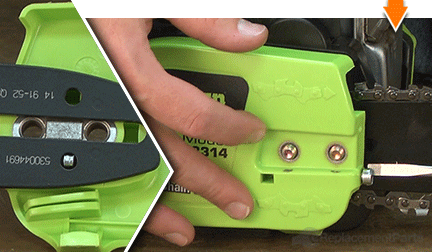
Once the adjustment pin engages the bar; rotate the tensioner screw in the opposite direction until the chain begins to tension.
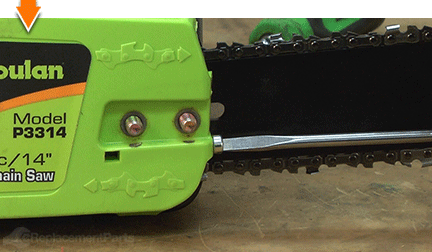
Install and hand-tighten the bar nuts.
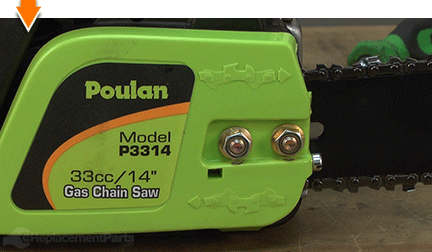
5. Tension the chain.
Grasp and raise the distant end of the bar and chain assembly (opposite the engine) until the saw begins to rise.
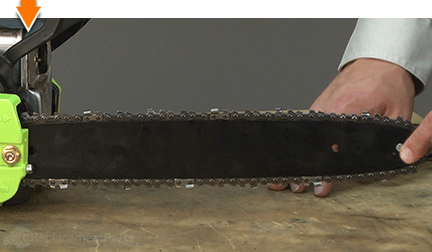
Grasp the chain at the center (and top) of the bar.
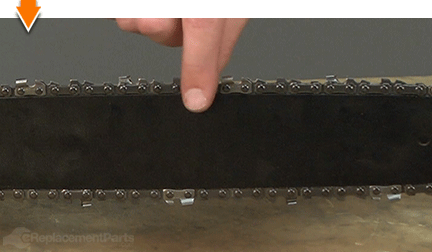
Lift the chain away from the bar assembly and inspect the gap between the two components.
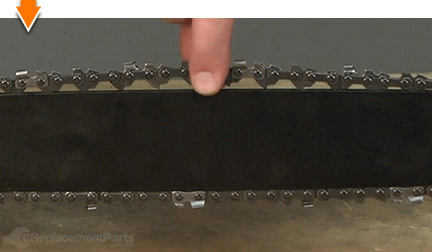
The chain is tensioned correctly when the weight of the chain does not cause it to sag below the guide bar.
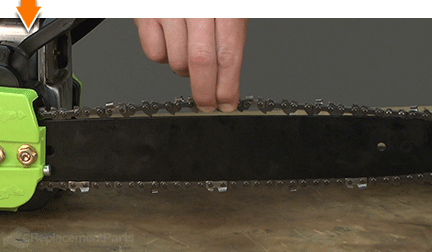
Rotate the tensioner screw (as necessary) to tighten or loosen the chain until it is correctly tensioned.
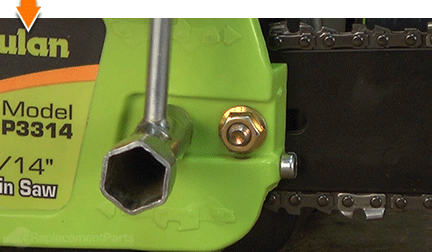
Tighten the bar nuts to secure the clutch cover assembly.

Do-it-yourself repairs like these are easier than you might think: From lawn machines to cordless drills, kitchen mixers to outdoor grills. Our "how-to" articles walk you through each repair from start to finish.
So, doing-it-yourself means never having to do it alone.


