


Why Read This Article?
Finish Nailer Repair - Replacing the Driver Guide (Ridgid Part # 79004001022)
Article Breakdown
Finish Nailer Repair - Replacing the Driver Guide (Ridgid Part # 79004001022)
Video
Tools & Materials

If raised grains and elbow strains are sanding away your patience, it's time to face the fix. Whether you are a sanding pro or a seasonal sander, eReplacementParts.com provides the parts, procedures and facts you need to fearlessly fix what fails you.
The drum on a belt sander rotates on a set of bearings. Considering how fast the sanding belt moves, it's amazing that these bearings last as long as they do. Eventually, they will fail, and you'll probably hear a loud squeaking noise when you try to use your sander. You may also notice that the drum doesn't rotate as smoothly as it did when the bearings were new. Fortunately, replacing the drum bearing is easy to do, especially when you follow the steps shown in this article.
Let's get started.
 REMOVING THE DRUM BEARING [top]
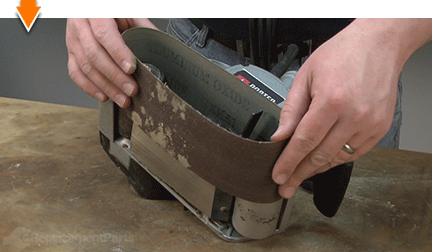
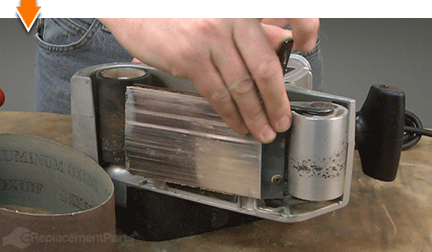
1. Remove the sanding belt from the sander.
REMOVING THE DRUM BEARING [top]
1. Remove the sanding belt from the sander.
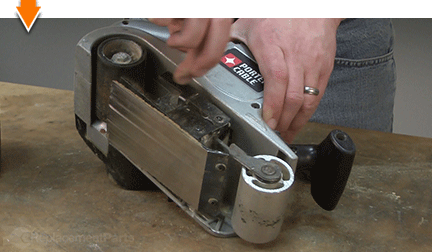
Raise the tensioning lever to release tension on the belt.
Remove the sanding belt from the sander.
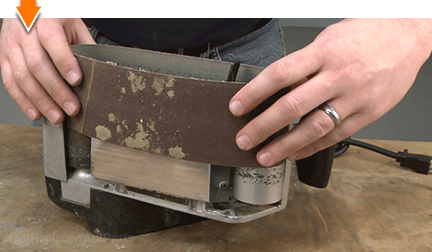
Lower the tensioning lever into to the operating position. This extends the front drum, and provides better access to the retaining ring.
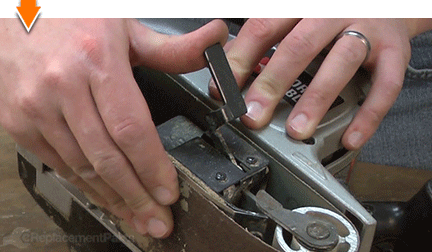
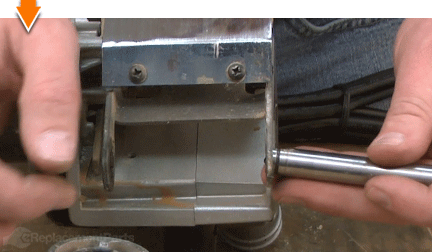
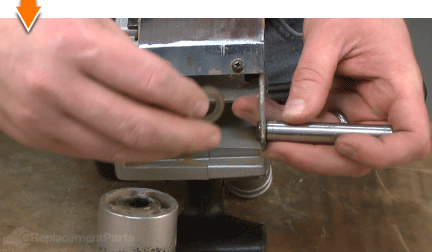
2. Remove the front drum.
Use snap-ring pliers to remove the retaining ring from the shaft.
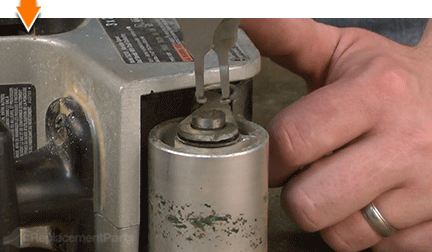
Slide the shaft out of the drum.
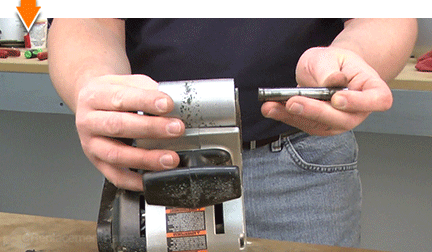
Remove the drum from the frame. Note that there are washers on both sides of the drum; be careful not to lose these washers when you separate the drum from the shaft.
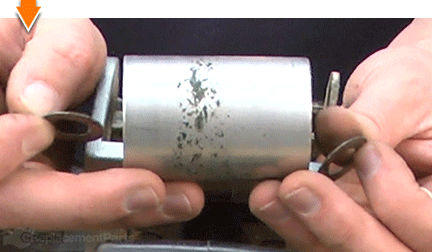
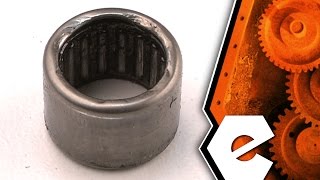
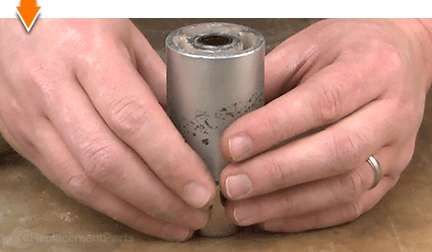
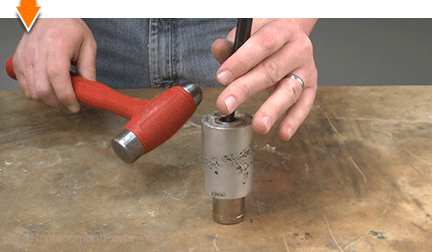
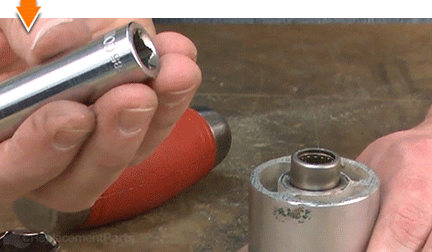
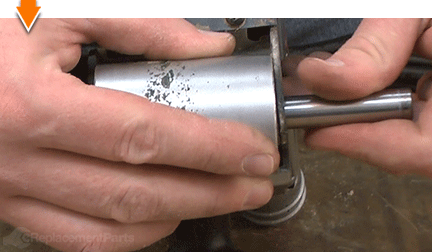
3. Remove the drum bearing.
Locate a socket that is significantly larger than the bearing inside the drum.
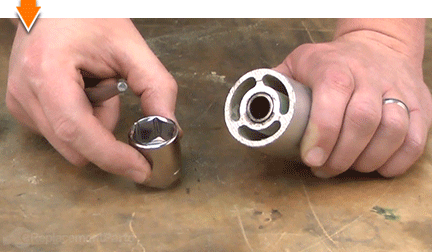
Position the drum (and bearing) on top of the socket.
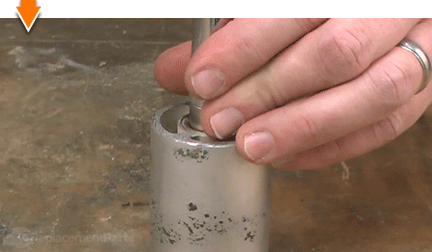
Insert a metal punch through the opposite end of the drum until you feel punch engage the edge of the bearing.
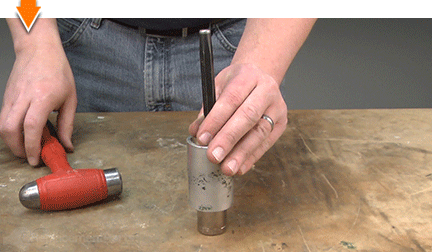
Tap the end of the punch (two or three times) with a hammer.
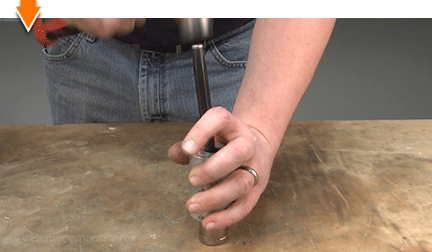
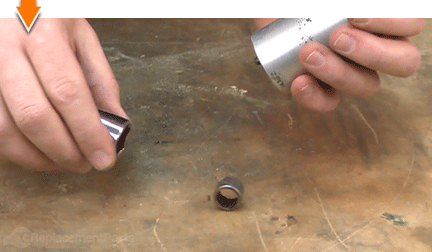
Change the angle of the punch and tap it again with the hammer.
Continue working around the edge of the bearing until it breaks free of the drum.
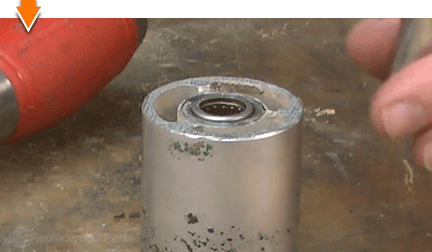
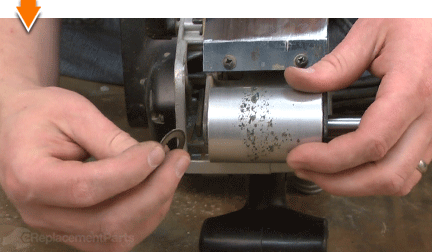
INSTALLING THE NEW DRUM BEARING [top] 4. Install the bearing.
Align the new bearing with the opening on the top of the drum.
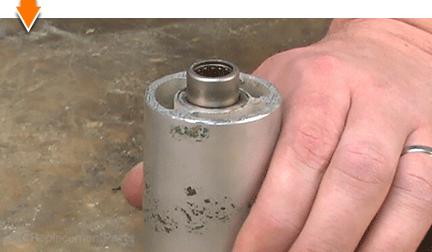
Use a hammer to lightly tap the bearing until it is partially seated in the drum.
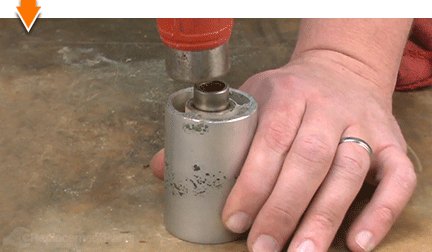
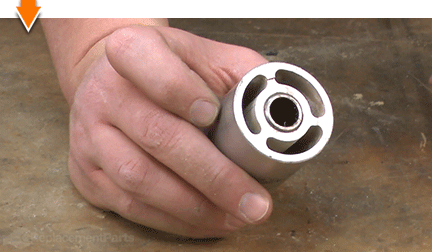
Locate a socket that is approximately the same size as the bearing.
Position the socket on top of the bearing.
Tap the end of the socket with a hammer until the face of the bearing is slightly proud of the face of the drum.
Repeat this step (as necessary) to replace the bearing on the opposite side of the drum.
REASSEMBLING THE UNIT [top] 5. Reinstall the drum onto the sander.
Insert the shaft through the outer mounting hole on the frame.
Reinstall one of the washers onto the shaft.
Reinstall the drum onto the shaft.
Reinstall the second washer onto the shaft (the washer should be positioned between the frame and the drum).
Pass the shaft through the inner mounting hole on the frame.

Secure the shaft with the retaining ring.
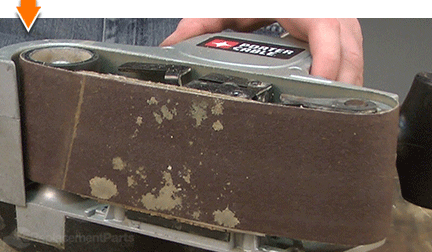
 6. Reinstall the sanding belt.
Raise the tensioning lever.
Install the sanding belt onto the sander.
Lower the tensioning lever into to the operating position.

Sanding can be a demanding task. But you don't have to rough-up your accountant to smooth-out your countertops. As you just learned, repairing your own power tools is simple when you follow our step-by-step guides. Not only did you expand sander functionality at a fraction of the cost of replacement; you have taken the edge off all future repairs. Find your next fix here. [top]
