


Why Read This Article?
Finish Nailer Repair - Replacing the Driver Guide (Ridgid Part # 79004001022)
Article Breakdown
Finish Nailer Repair - Replacing the Driver Guide (Ridgid Part # 79004001022)
Video

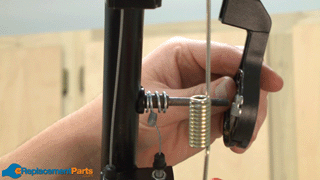
Tools & Materials
- Socket Wrench
- Screwdriver
 Find this throttle spring and more by visiting our Honda HRX217 parts page
Removing the Throttle Lever Spring
Find this throttle spring and more by visiting our Honda HRX217 parts page
Removing the Throttle Lever Spring
1. Remove the lever cover
Remove the two screws that are holding this to the handle, then set it aside.

2. Remove the tension spring
Use a pair of pliers to unhook this spring from the handle.

3. Remove change cable
Loosen the nut on the change cable, then pull it away from the bracket.

4. Remove change lever assembly
Remove the nut holding the change lever to the handle, then pull it away as an assembly. Try to keep it assembled when removing it.

5. Remove the bracket
Use a socket wrench to remove the bolt holding the bracket to the handle.

6. Pull throttle cable away from throttle lever
This will just pop out of the lever.

7. Remove the throttle lever
With the throttle cable removed, this will just slide off of the handle.
8. Remove the throttle level spring
This will simply pull away from the mower.

[Back to Top]
Installing the Throttle Lever Spring
1. Install the new throttle lever spring
Slide this on the same way it was removed.

2. Install throttle lever
Slide this back over the throttle lever spring.

3. Thread throttle cable onto throttle lever
This will just pop back into the throttle lever.

4. Reinstall the bracket
Thread this back over the stud while making sure c-shaped end of the throttle lever fits over the tab on the bracket.

Then tighten the bracket bolt hand-tight.

5. Reinstall the change lever spring and assembly
Slide the change lever spring onto the stud, then the complete assembly. Make sure the tab on the orange assembly fits into the hole in the bracket. Then tighten the bolt with a socket wrench.

6. Tighten bracket bolt
Now you can go back to the bracket and tighten the bolt.

7. Reinstall change cable
Slide this back into its bracket and tighten the bolt with a wrench.

8. Re-secure tension spring
Hook this back into place.

9. Replace lever cover
Slide the cover over the controls into its original position and secure with the two screws.

[Back to Top]
Conclusion
It's that easy! And this is just one of the many repairs that anyone can perform in the comfort of their own home in less than a couple hours. Keeping your lawn mower working properly will save you time, get you the perfect cut of grass and help you avoid those pesky repair shops.
Need any other parts to maintain your lawn equipment? We've got those too.
[Back to Top]
What We're About
