


Why Read This Article?
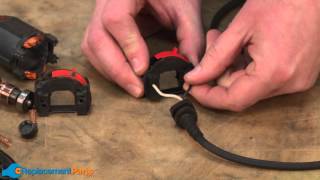
Finish Nailer Repair - Replacing the Driver Guide (Ridgid Part # 79004001022)
Article Breakdown
Finish Nailer Repair - Replacing the Driver Guide (Ridgid Part # 79004001022)
Video
Tools & Materials
- Torx driver
- Pick
Safety Guidelines

Remember to find the exact right parts for your tool by visiting our Dremel 395 parts page.
Removing the Switch
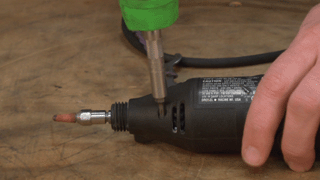
1. Remove the front cap
Unscrew the cap at the front of the moto-tool.

2. Separate the housings
Remove the four screws that secure the two housings, then split them apart.
3. Remove the motor and switch
Now pull the motor and switch assembly out of the housing.

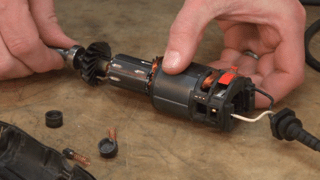
4. Remove the motor brushes
Unscrew the two motor brushes from the side of the armature.

5. Pull the armature away from the switch and field
Pull the armature out of the switch and field assembly and set it aside.
6. Pull the switch away from the field
Now gently separate the switch and field by pulling the switch away.

7. Remove the cord wires
The wires connect with push-in tabs. Insert a pick into the connector, next to the wire, then gently pull both the pick and wire out of the switch.

[Back to Top]
Installing the New Switch
1. Re-install the wires
Push the wires back into the connectors--the tabs will lock them into place.

2. Connect the switch and field
You'll see some tabs on the switch. Insert them into the slots on the field to combine the two.

3. Install the armature
Slide the armature back into place through the switch and field assembly.

4. Place the armature and field assembly back in the housing
For this step, first grab the half of housing with the opening for the switch and the hole up front for the lock pin.

Now put the lock pin back into place near the tool's nose.

Add the the lock-pin spring.

Now install the motor and switch assembly. Take a moment to make sure the bearings line up with the notches.

5. Route the wires in the housing
You'll see some notches in the housing. Route the wires into these notches to prevent them from getting pinched later.

6. Re-install the other housing half
Now set the other half of the housing into place and secure it with the four screws.

7. Re-install the brushes
Now you can re-install the brushes. Just screw them back into each side of the housing.

8. Re-install the front cap
Screw the front cap back into place to finalize the repair.

[Back to Top]
Conclusion
And that's how easy it is to replace the switch in your Dremel 395 Moto-Tool. This repair will save you tons of time and money compared to a repair shop, and will also give you a great idea of how your tool works on the inside.
Remember to visit our power tool parts page to find parts for all your tools!
[Back to Top]
What We're About
