


Why Read This Article?
Finish Nailer Repair - Replacing the Driver Guide (Ridgid Part # 79004001022)
Article Breakdown
Finish Nailer Repair - Replacing the Driver Guide (Ridgid Part # 79004001022)
Video

Tools & Materials
- Screwdriver
- Needle-nose pliers
- Pen and paper
 If you need a new switch, visit our DeWalt miter saw parts page to find the part you need for your specific model and type of DW703 miter saw.
Removing the Switch
If you need a new switch, visit our DeWalt miter saw parts page to find the part you need for your specific model and type of DW703 miter saw.
Removing the Switch
1. Remove the top handle
Remove the two screws that secure the top handle to the saw and set the top handle aside.

2. Remove the switch handle
Now you'll remove the top half of the handle that covers the switch. Note that the screw that goes through the switch is smaller than the others. Set this screw aside so you don't mix it up with the others.

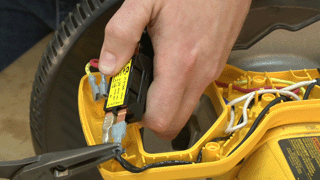
3. Remove the switch screw
Now remove the screw that secures the switch inside the saw housing.

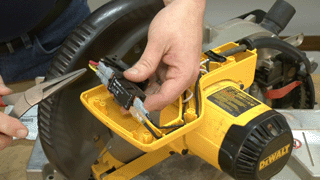
4. Remove the wires
Before you begin removing wires, make a diagram of where each one connects to the switch. Then use a pair of needle-nose pliers to pull the wire connections away from the switch. Then remove the bad switch from your saw.
 [Back to Top]
Installing the Replacement Switch
[Back to Top]
Installing the Replacement Switch
1. Connect the wires to the new switch
Use your pliers to attach the leads where they were before.
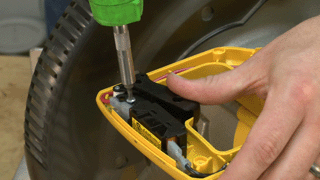
2. Secure the switch in the saw housing
Nestle your switch back into the housing. Before you secure it, make sure the wires all run under their tabs in places where they won't get pinched by the handle. Then just tighten the screw to secure the switch.
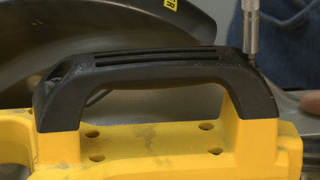
3. Re-install the switch handle
Place the switch handle back into position. Secure the shorter switch screw first. Then tighten the others as well.

4. Re-install the top handle
Now just fasten the two screws that attach the top handle to the saw, and your repair is finished!
 [Back to Top]
Conclusion
And that's how easy it is to replace the switch in your DW703 miter saw. This repair will save you more than $20 compared to a repair shop, and you'll likely have your saw up and running before a shop could have, too. Now that's what we call a bargain!
Remember that we stock parts for a full line of DeWalt products. You can browse them all on the DeWalt parts page on our site.
[Back to Top]
What We're About
[Back to Top]
Conclusion
And that's how easy it is to replace the switch in your DW703 miter saw. This repair will save you more than $20 compared to a repair shop, and you'll likely have your saw up and running before a shop could have, too. Now that's what we call a bargain!
Remember that we stock parts for a full line of DeWalt products. You can browse them all on the DeWalt parts page on our site.
[Back to Top]
What We're About
