


Why Read This Article?
Finish Nailer Repair - Replacing the Driver Guide (Ridgid Part # 79004001022)
Article Breakdown
Finish Nailer Repair - Replacing the Driver Guide (Ridgid Part # 79004001022)
Video
Tools & Materials
- Screwdriver
- Socket Wrench
- Wrench
 Find this valve plate and more by visiting our Porter Cable compressor parts page.
Replacing the valve plate
Find this valve plate and more by visiting our Porter Cable compressor parts page.
Replacing the valve plate
1. Remove the feed tube
First, drain all of the air out of the compressor.
Then use a adjustable wrench to remove the feed tube that's connected to the cylinder head and the tank.
2. Remove the cylinder head
Use a socket wrench to remove the cylinder head, then set it aside.
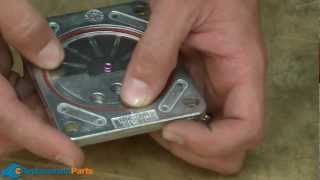
3. Remove the valve plate
Once you have removed the cylinder head, pull the old valve plate off of the unit.

4. Install the gaskets onto the new valve plate
When you open up your new valve kit, you'll notice that it includes some new gaskets. Make sure to install these new gaskets onto your valve plate before it's placed in the cylinder head.
5. Secure the new valve plate and cylinder head onto the cylinder
Set the new valve plate assembly onto the cylinder and place the cylinder head over the valve plate.
Then secure the cylinder head with the four bolts that were removed in step two.
6. Reinstall the feed tube
Re-attach the feed tube to the cylinder and tank.
[Back to Top] Conclusion And it's just that easy to replace the valve plate in your air compressor. Although we used a Porter Cable air compressor in this video, the steps in this article should apply to most other brands. Don't forget to browse our huge selection of compressor parts here. [Back to Top] What We're About
