


Why Read This Article?
Finish Nailer Repair - Replacing the Driver Guide (Ridgid Part # 79004001022)
Article Breakdown
Finish Nailer Repair - Replacing the Driver Guide (Ridgid Part # 79004001022)
Video
Tools & Materials
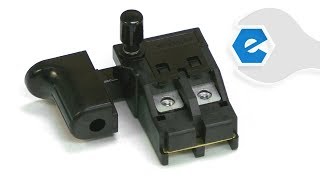
Your power tool uses a basic toggle switch that breaks the hot side of the circuit. The opposite side of the switch provides two terminals to connect the neutral wires. This side is not switched. After thousands of cycles and years of use, the switch will wear out. Testing for a bad switch can be easily done using a multimeter.
Let's get started.
REMOVING THE SWITCH
1. Remove the side cover from the top handle with a screwdriver.
2. Note the location of each of the wires.
3. Remove the wires from the switch.
4. Remove the old switch from the housing.
INSTALLING THE NEW SWITCH
5. Secure the black wire with a screw.
6. Secure the wire from the field.
7. Connect the white wire and the second field wire.
8. Reinstall the top handle cover.
