


Why Read This Article?
Finish Nailer Repair - Replacing the Driver Guide (Ridgid Part # 79004001022)
Article Breakdown
Finish Nailer Repair - Replacing the Driver Guide (Ridgid Part # 79004001022)
Video
Tools & Materials
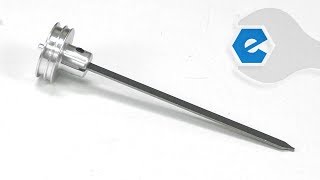
The piston driver assembly consists of an assembled piston and a driver. The piston pushes the driver down the cylinder to drive the nails in your workpiece. The most common issue with the piston assembly is damage to the driver. Over time, the tip of the driver will wear. Eventually, it can round off, which can cause the nails to jam. Sometimes the tip will crack or break off. This causes the gun to no longer drive the nails completely. The tip of the driver might also be broken if a nail strikes something hard like concrete or a piece of metal.
Let's get started.
REMOVING THE PISTON DRIVER
1. Remove the top cap from the nail gun.
2. Remove the piston.
INSTALLING THE NEW PISTON DRIVER
3. Place the piston ring over the top of the piston and carefully work it into place.
4. Notice there are grooves in the driver; those grooves need to go back toward the rear of the gun.
5. Install the piston into the cylinder (aligning the driver).
6. Install the gasket onto the top of the gun and then install the head valve.
7. Install the screws to align the head valve with the gasket, and tighten them up.
