Why Read This Article?
Finish Nailer Repair - Replacing the Driver Guide (Ridgid Part # 79004001022)
Article Breakdown
Finish Nailer Repair - Replacing the Driver Guide (Ridgid Part # 79004001022)
Tools & Materials

It's common for fuel lines to harden and crack over time. If fuel is left sitting in the tank for large periods of time, it will cause the lines to harden faster. Cracked fuel lines lead to potentially dangerous fuel leaks. If your engine is leaking fuel, you should stop using it and fix the leak immediately.
Let's get started.
REMOVING THE FUEL LINES 1. Drain the fuel tank.
a. Drain any excess fuel from the fuel tank.
2. Remove the fuel lines.
a. Use long-nosed pliers to disconnect the fuel lines from the carburetor.
b. Use wire cutters to cut the fuel lines flush with the fuel tank.
c. Use a small screwdriver to press the remaining portions of the fuel lines into the fuel tank.
d. Remove the fuel cap.
e. Use long-nosed pliers and/or a long wire hook to retrieve the lower halves of the fuel lines from inside the fuel tank. (One of these lines will contain the fuel filter.)
INSTALLING THE NEW FUEL LINES
3. Install the (filtered) fuel line.
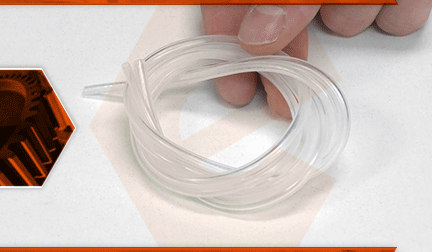
a. The fuel line kit contains two different sizes of line (to fit a variety of different models). Inspect your specific tool to determine which line(s) to use. For this particular blower, we will only be using the large fuel line (for both the return and supply).
b. Insert the tapered end of the new fuel line into one of the openings on the top of the fuel tank.
c. Feed approximately six inches of the new line into the fuel tank. d. Use a wire hook to retrieve the fuel line from inside the fuel tank (via the filler neck).
e. Use wire cutters to cut away the tapered portion of the fuel line.
f. Install the fuel filter onto the end of the new line.
g. Install the fuel filter (and line) back into the fuel tank and use the wire hook to position the filter at the rear of the fuel tank.
h. Place the fuel line in its approximate position (on the carburetor) and use wire cutters to trim the excess line (slightly longer than needed).
4. Install the (return) fuel line.
a. Use wire cutters to cut a taper onto one end of the new (return) fuel line.
b. Insert the tapered end of the new fuel line into the second opening on the top of the fuel tank.
c. Feed approximately two inches of the new line into the fuel tank.
d. Place the return line in its approximate position (on the carburetor) and use wire cutters to trim the excess line (slightly longer than needed).
5. Connect the fuel lines to the carburetor.
a. Place your finger over either of the ports on the carburetor while pressing and releasing (priming) the purge bulb.
b. The intake (incoming) port on the carburetor will draw your finger toward it (while priming); and the outgoing port on the carburetor will push (blow) your finger away from it.
c. Determine whether the fuel lines require addition trimming, and use wire cutters (if necessary) to trim the lines to their final length.
d. Install the fuel line containing the fuel filter onto the incoming port on the carburetor.
e. Install the return fuel line (the line that does not contain the fuel filter) onto the outgoing port on the carburetor.
REASSEMBLING THE UNIT
6. Reinstall the fuel cap.
a. Install the fuel cap onto the fuel tank.


