


Why Read This Article?
Finish Nailer Repair - Replacing the Driver Guide (Ridgid Part # 79004001022)
Article Breakdown
Finish Nailer Repair - Replacing the Driver Guide (Ridgid Part # 79004001022)
Video

Tools & Materials


Drill chuck stuck? It's time to face the fix. Whether you are a master carpenter or an occasional drill-seeker, eReplacementParts.com provides the parts, procedures and facts you need to fearlessly fix what fails you.
The chuck could really be considered a normal-wear item on any drill. Each time a drill bit slips (under a high-torque situation), it will wear the chuck a small amount. Eventually, the chuck will need to be replaced. If the drill is often used in dirty or dusty conditions, it's not uncommon for the chuck to seize-up completely (or open and close with extreme difficulty). Replacing the chuck is very easy to do.
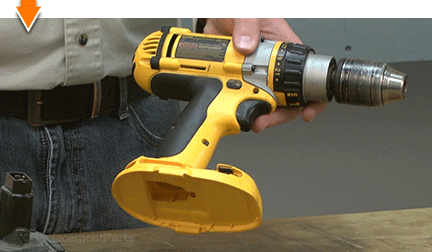
This article provides step-by-step instructions for removing and installing the keyless chuck on a DeWALT cordless hammer drill.
Let's get started.
 REMOVING THE CHUCK [top]
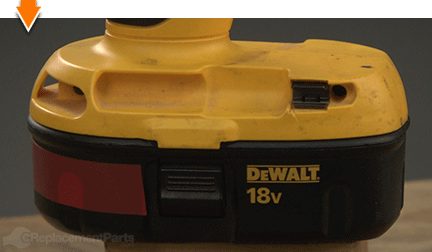
1. Remove the battery.
REMOVING THE CHUCK [top]
1. Remove the battery.
Remove the battery from the drill.
2. Remove the chuck retaining screw.
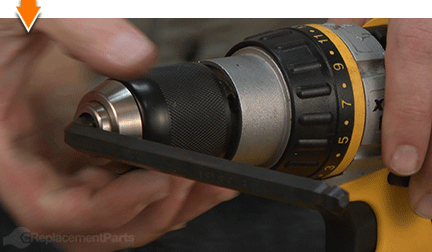
Open the chuck to the widest position.
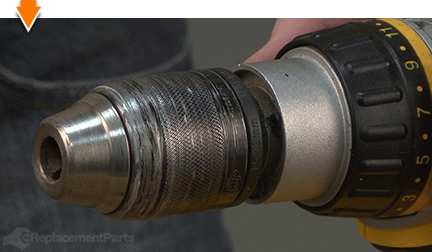
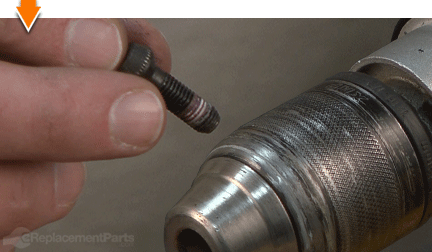
Use a Torx driver (size may vary) to loosen the retaining screw. This screw is REVERSE-THREADED (requiring CLOCKWISE rotation to loosen).
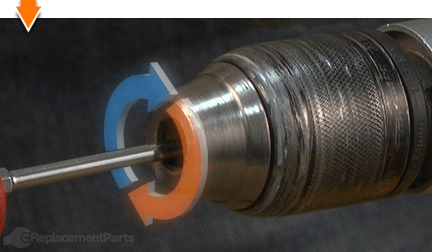
Remove the screw from the chuck assembly.
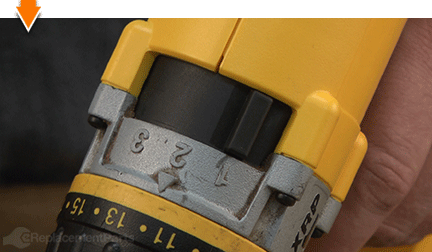
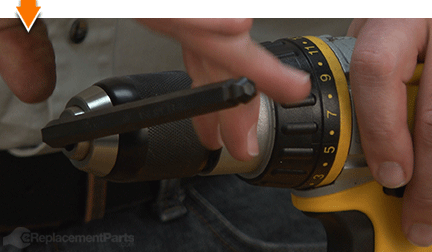
3. Switch the transmission to the lowest setting.
Slide the gear selector switch to the lowest setting.
4. Remove the chuck from the drill.
Insert the short end of a large Allen wrench (as large as the chuck will accommodate) into the chuck assembly.
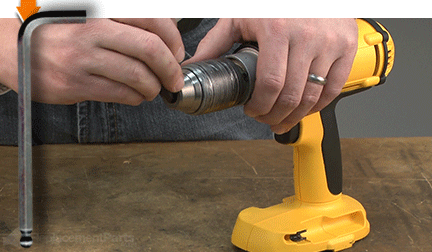
Secure the Allen wrench in the chuck.
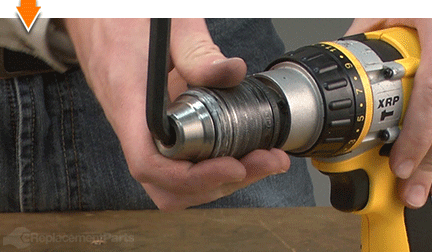
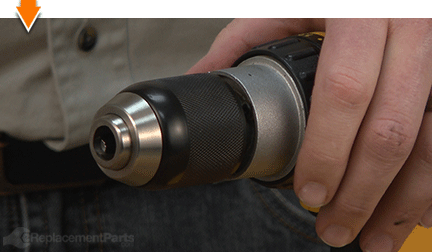
Position the drill on a surface that allows the chuck (and Allen wrench) to overhang the edge.
While securely holding the drill against the work surface, strike the exposed end of the Allen wrench with a hammer. This will (eventually) loosen the chuck assembly. (It may require several attempts).
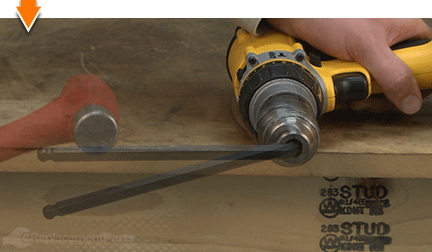
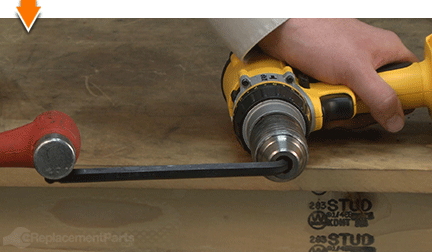
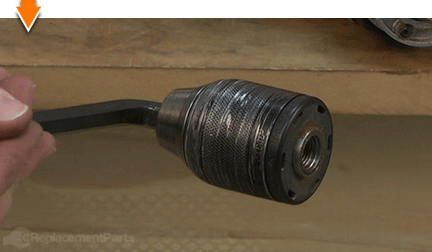
Continue to rotate (unscrew) the chuck assembly (by hand) until it disengages the spindle.

Remove the chuck assembly from the drill.
INSTALLING THE NEW CHUCK [top] 5. Install the chuck.
Thread the new chuck assembly onto the spindle until it is hand-tight.
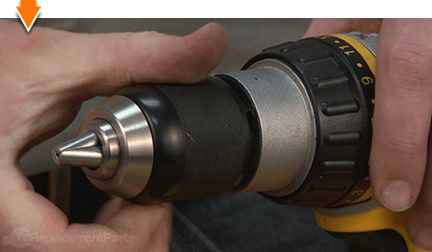
Open the chuck as wide as possible.
Re-secure the Allen wrench in the chuck assembly.
Use the Allen wrench to finish tightening the new chuck. (It is not necessary to strike the Allen wrench with a hammer).
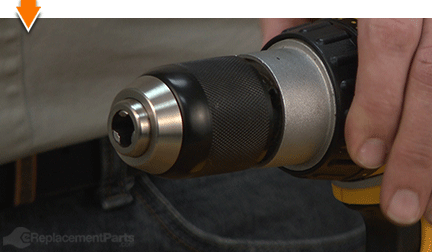
Remove the Allen wrench from the chuck.
Install the retaining screw.
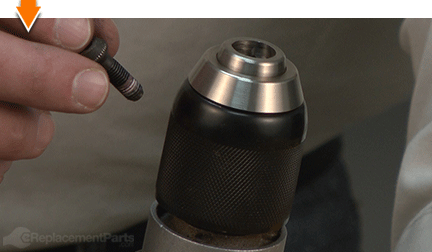
Secure the retaining screw with a Torx driver. The screw is REVERSE-THREADED (requiring COUNTERCLOCKWISE rotation to secure).

REASSEMBLING THE UNIT [top] 6. Reinstall the battery.
Install the battery.

As you just learned, fixing things yourself means more drilling with less billing. Hopefully, this article has restored your ability to drill holes without replacing your whole drill. And that's just the tip of the bit. Our online repair guides can help expand your skills far beyond drills; empowering you to face power tool problems whenever they arise; and to fearlessly fix whatever fails you.
