Why Read This Article?
Finish Nailer Repair - Replacing the Driver Guide (Ridgid Part # 79004001022)
Article Breakdown
Finish Nailer Repair - Replacing the Driver Guide (Ridgid Part # 79004001022)
Tools & Materials
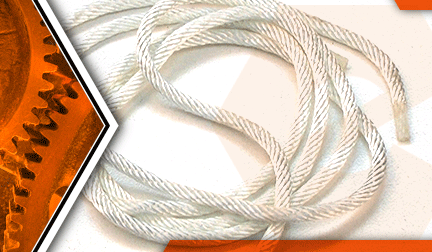

String trimmer out of whack? It's time to face the fix. Whether you are a legendary landscaper or a weekend weed whacker, eReplacementParts.com provides the parts, procedures and facts you need to fearlessly fix what fails you.
The starter rope wraps around the starter pulley. The rope allows you to manually crank (pull) the engine to get it started. After years of use, the starter rope will weaken and break.
Installing a new starter rope is easy to do. However, the process can be a bit tense. That's because creating "tension" is the key to correctly installing the rope. Aside from that, it's a very simple repair to complete on your own; especially when you follow the steps below.
This article provides step-by-step instructions for removing and installing the starter rope on a Ryobi trimmer.
Let's get (your trimmer) started.
 REMOVING THE STARTER ROPE [top]
1. Remove the rear cover.
Remove the (4) screws from the rear cover.
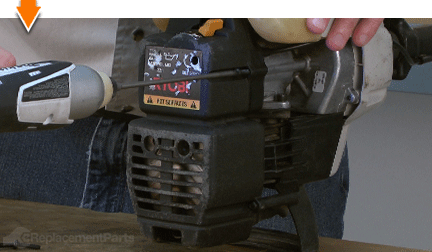
Remove the rear cover from the engine.
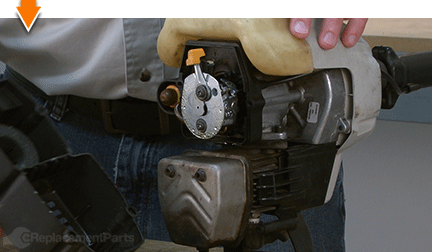
2. Remove the carburetor.
Drain any excess fuel from the fuel tank prior to servicing the carburetor or the fuel lines.
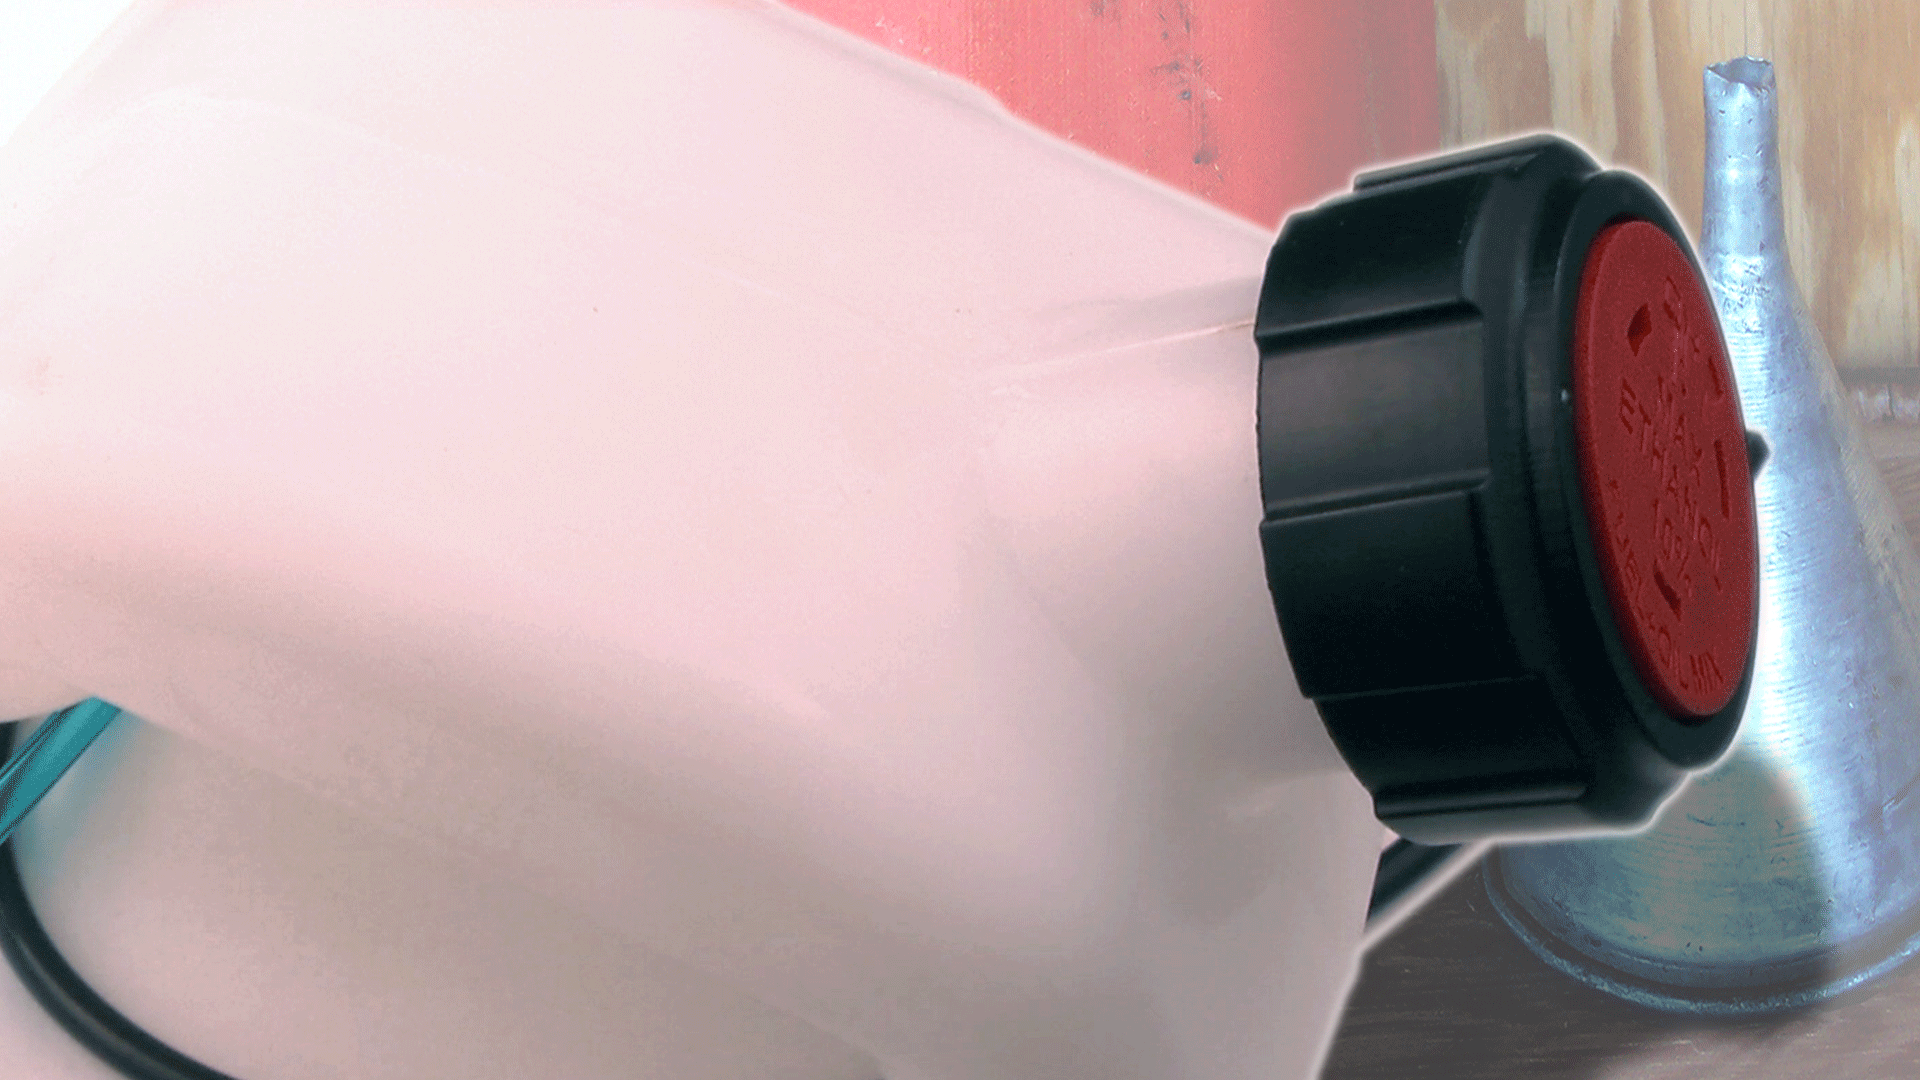
Remove the (2) screws from the carburetor assembly.
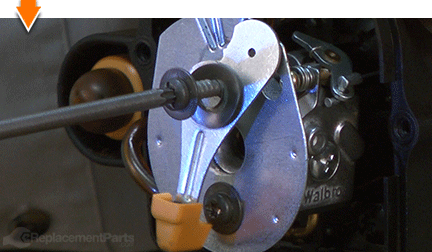
Remove the choke plate and choke assembly from the carburetor.
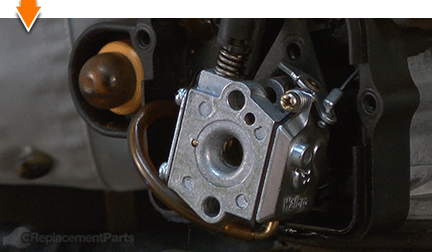
Disconnect the throttle cable from the carburetor (this is accomplished using a lift-and-twist motion).
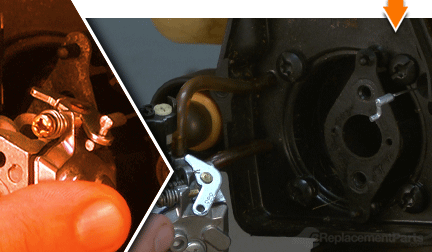
Remove the (2) fuel lines from the carburetor. These lines should pull away from the carburetor inlets relatively easily (by hand); however, small pliers may be used as necessary to disconnect the fuel lines from the carburetor.
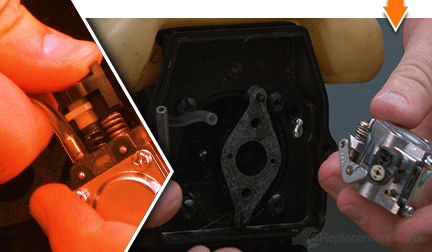
Remove the carburetor from the engine.
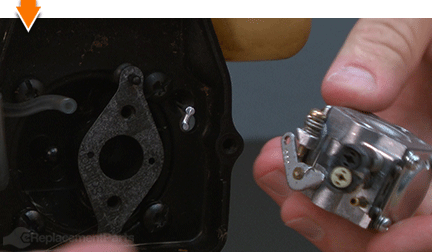
3. Disconnect the clutch housing and upper shaft from the engine.
Remove the (4) screws from the clutch housing.
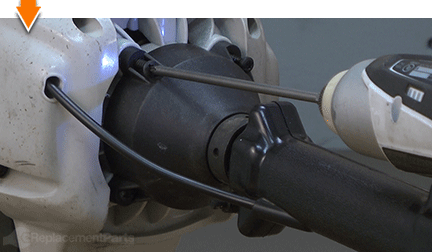
Remove the clutch housing and upper shaft from the engine. (The throttle cable will also slide freely from the opening in the engine housing.)
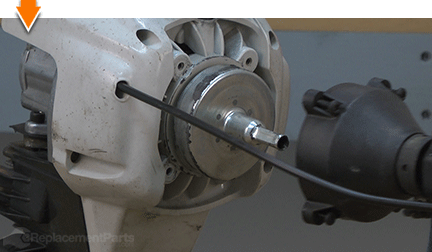
4. Bind the piston.
This step effectively binds the engine, which facilitates the removal of key components (described in subsequent steps).
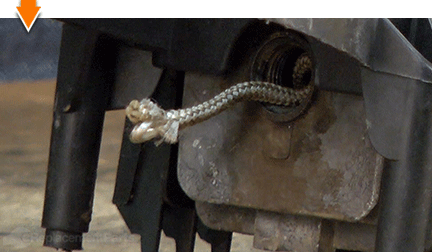
Disconnect the spark plug boot from the spark plug.
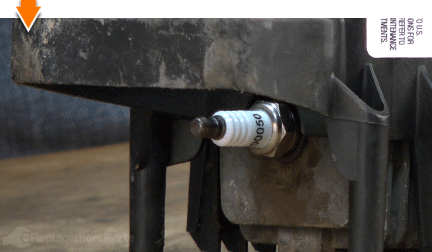
Use a spark plug wrench (or socket) to loosen the spark plug.
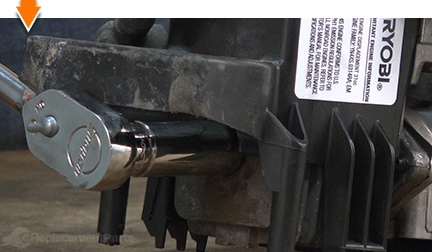
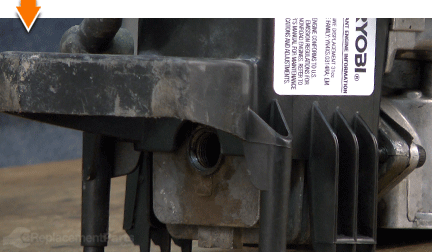
Remove the spark plug from the engine.
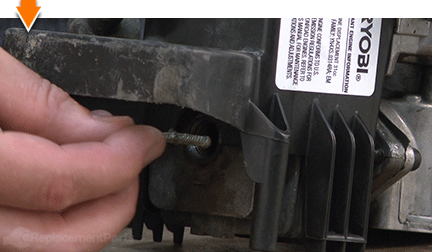
Insert the end of an old starter rope (or similar rope) into the engine cylinder (through the spark plug hole). Continue feeding the rope into the cylinder until the piston is unable to move.
5. Remove the clutch drum.
Loosen the internal screw on the clutch drum using a Phillip's screwdriver (loosen the screw until the clutch drum disengages the spindle; it is not necessary to remove the screw entirely).
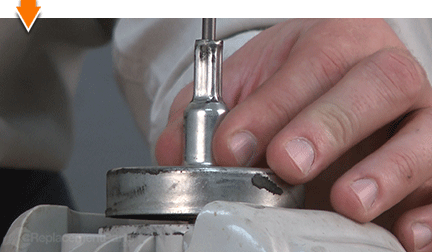
Remove the clutch drum from the spindle.
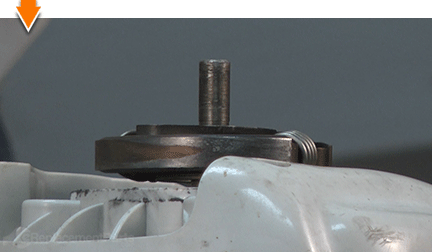
6. Remove the clutch.
Cover the clutch assembly with a shop rag to prevent damage during removal.
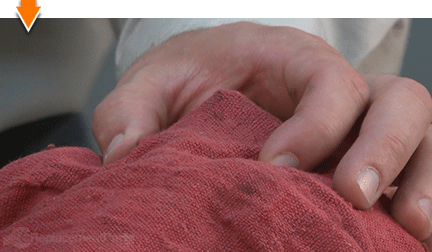
Use adjustable pliers to loosen the clutch assembly.
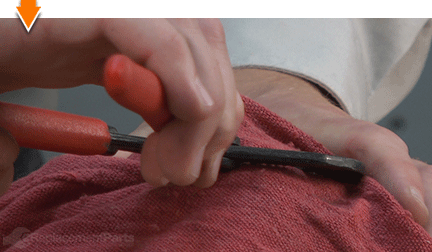
Remove the clutch assembly and the washer from the spindle.
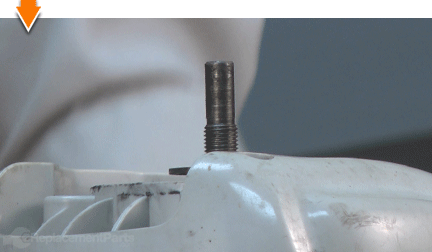
7. Remove the starter assembly.
Remove the (5) screws from the starter assembly. Four of the screws secure the starter to the engine; one screw secures the plastic base.
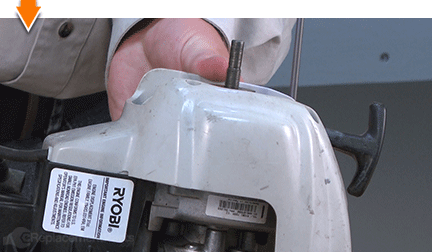
Gently lift the starter assembly away from the engine. (At this point, the assembly will remain tethered to the engine via the primary ignition wire.)
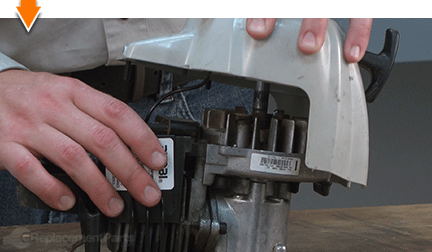
Use long-nosed pliers to disconnect the ignition wire from the ignition.
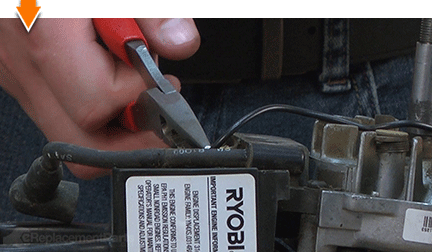
Remove the starter assembly from the engine.
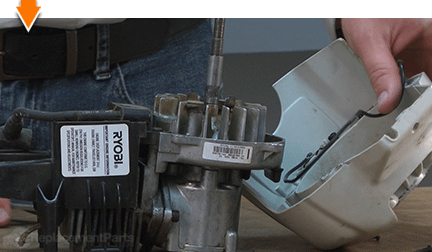
8. Remove starter handle.
Pull the starter handle (and rope) away from starter housing (approximately 8-10 inches).
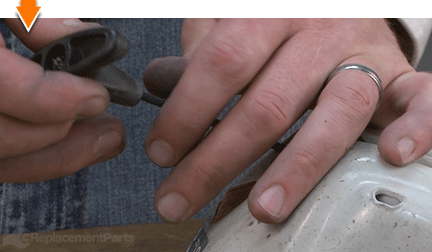
Maintain tension on the starter rope (to prevent it from recoiling back into the housing), and slide the starter handle away from the knot at the end of the rope.
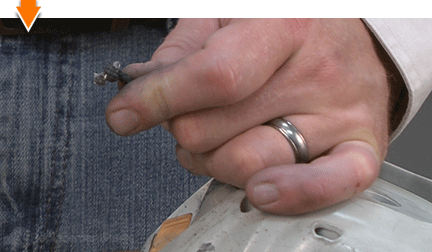
Untie (or cut) the knot in the end of the starter rope.
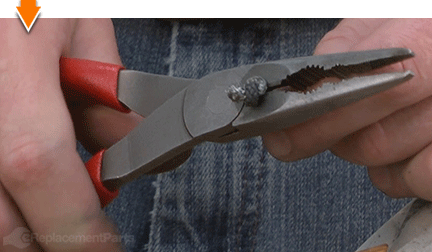
Remove the starter handle from the starter rope.
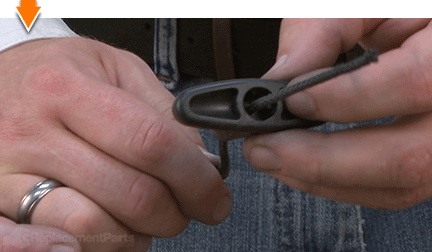
Release the starter rope into the starter housing (the spring should recoil, and the rope should vanish into the starter housing assembly).
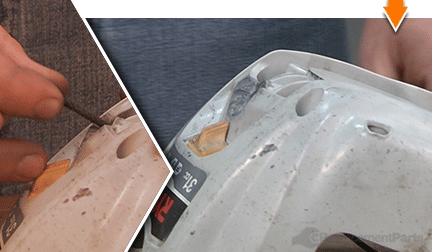
9. Remove the recoil pulley.
Safety Reminder: Do not complete this step until the tension in the spring has been released (as described in the previous step).
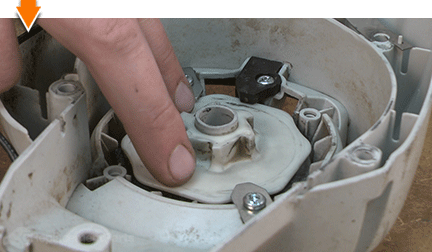
Remove the (3) screws from the pulley retaining clips.
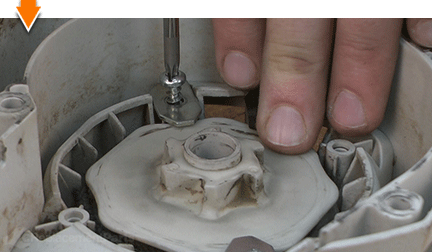
Remove the pulley retaining clips.
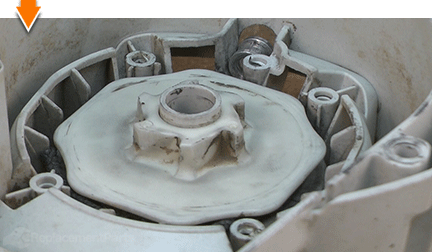
Use a screwdriver to pry the retaining clip from the pulley spindle. The clip is non-reusable.
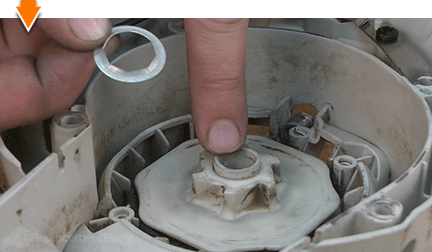
Carefully lift the recoil pulley out of the starter housing. Be careful not to remove the coiled spring from the housing, or the spring will uncoil.
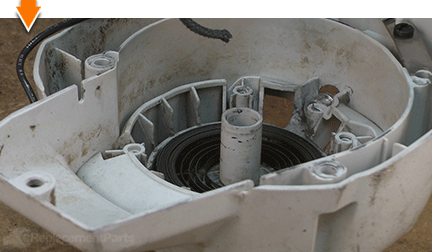
10. Remove the starter rope.
Completely unwind the rope from the recoil pulley.
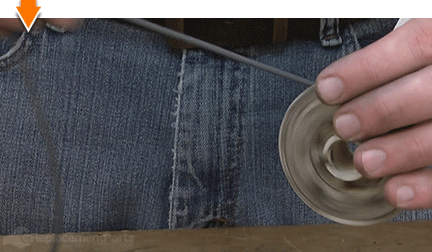
Use long-nosed pliers to retrieve the knotted portion of the rope from the center of the recoil pulley.
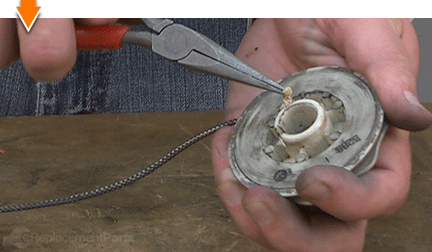
Remove the starter rope from the recoil pulley.
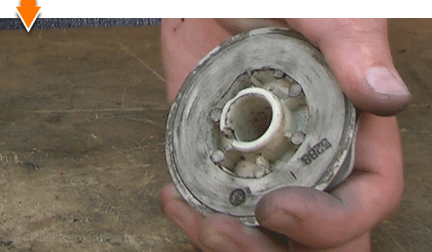
INSTALLING THE NEW STARTER ROPE [top] 11. Install the new starter rope onto the pulley.
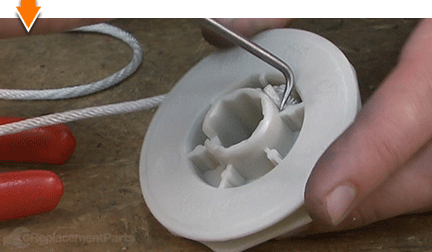
Thread one end of the new starter rope through the opening in the center of the pulley.
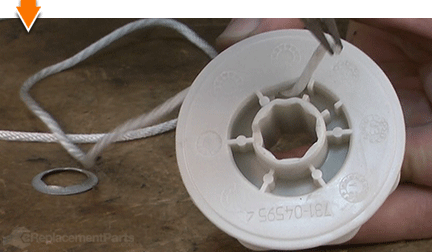
Tie a small knot in the end of the new starter rope.
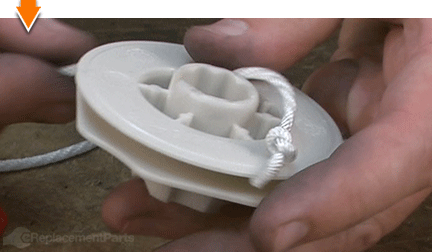
Use pliers or a small screwdriver to tuck the knot into the channel on the pulley.
REASSEMBLING THE UNIT [top] 12. Reinstall the recoil pulley.
Install the recoil pulley into the starter housing, aligning the slot on the pulley with the tab on the spring.
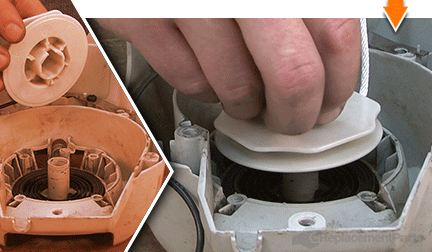
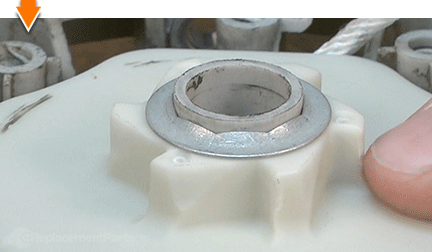
Install the pulley retainer over the pulley. Use an over-sized socket to firmly press (seat) the retainer onto the spindle.
Maintain a firm grip on the recoil pulley while rotating it in a clockwise direction. The starter rope must follow the rotation of the pulley (i.e. do not allow the rope to wrap around the pulley as you coil the spring).
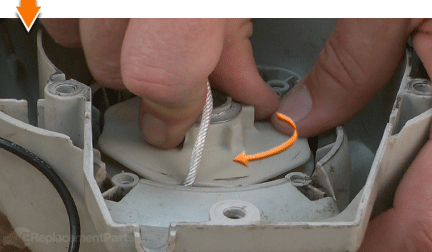
Continue winding the recoil pulley in a clockwise direction until it cannot be rotated any further. Be careful not to release the pulley during this step: doing so can result in injuries to your fingertips.
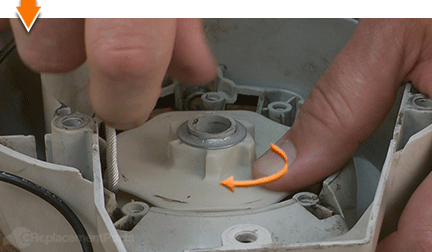
Once the spring is fully tensioned; rotate the pulley in a counter-clockwise direction until the starter rope aligns with the eyelet in the housing.
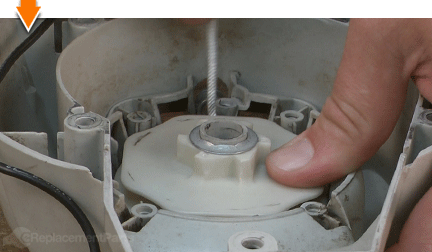
Keep pressure on the recoil pulley (to prevent it from uncoiling), and thread the end of the starter rope through the eyelet in the housing.
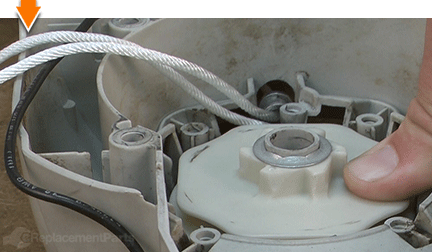
Take up the slack in the rope (from the outside of the housing). Do not release the pulley yet.
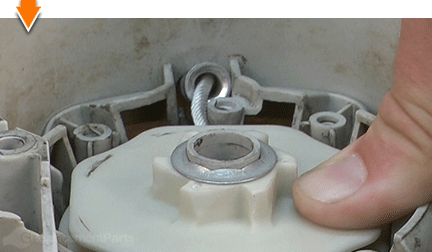
Install the two metal pulley retaining clips and secure them with the screws.
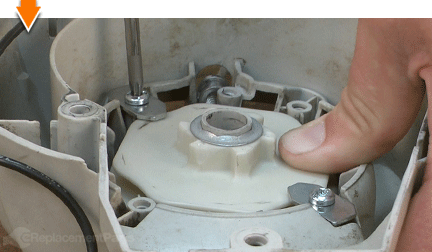
Install and secure the plastic pulley retaining clip onto the pulley. (Note that one side of the plastic clip is designed to fit smoothly over the eyelet.).
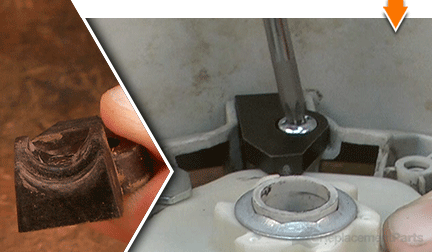
Tie a temporary knot in the starter rope to prevent it from recoiling into the starter housing.
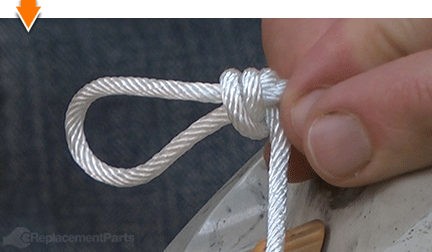
13. Install the starter handle.
Thread the end of the starter rope through the starter handle.
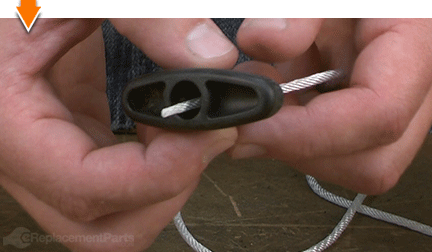
Tie a small knot in the end of the starter rope.
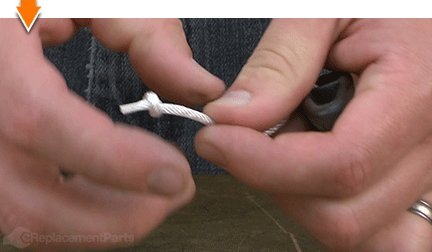
Pull on the starter rope to seat the knot in the handle recess.
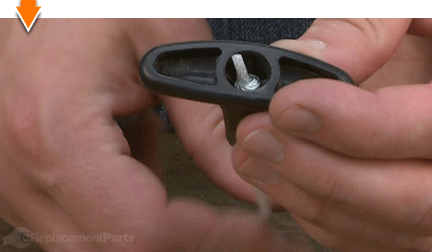
Untie the temporary knot in the starter rope.
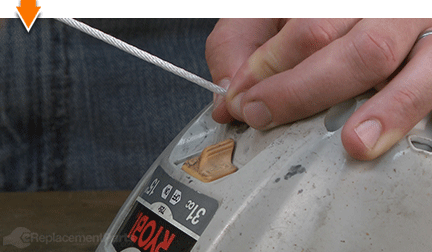
Slowly allow the starter rope to recoil into the starter housing.
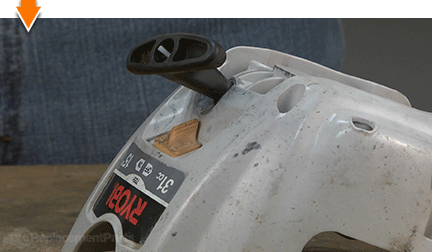
14. Reinstall the starter assembly.
Slide the spacer onto the crankshaft.
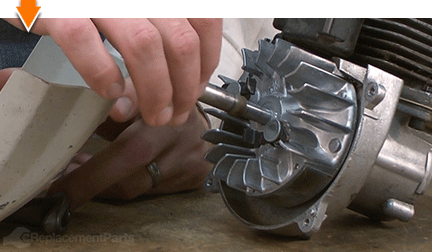
Connect the ignition wire to the ignition coil.
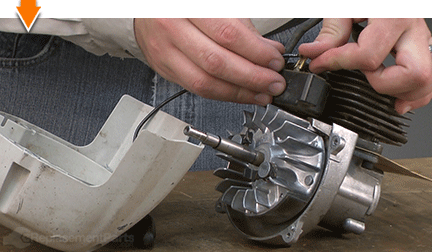
Install the starter assembly onto the crankshaft; tuck the ignition wires into the channel on the starter housing as you perform this step.
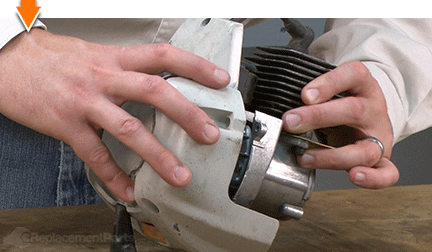
Align the starter assembly with the mounting holes on the engine.
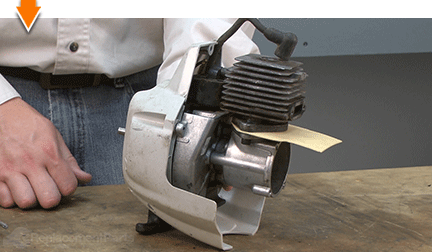
Hold the starter assembly in place while pulling gently on the starter rope. This will engage the starter pawls and ensure proper alignment.
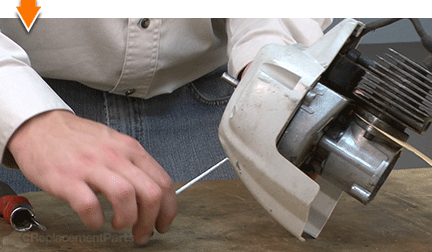
Secure the starter assembly to the engine with the (4) screws.
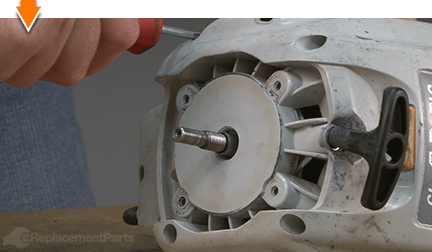
Install the plastic base.
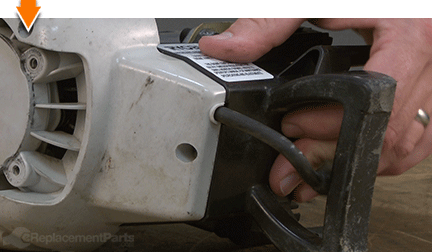
Secure the plastic base with the (1) screw.
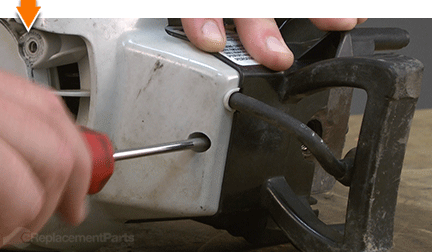 15. Reinstall the clutch.
Install the clutch washer.
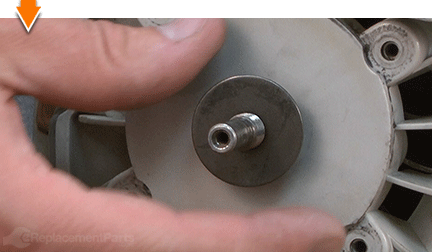
Thread the clutch onto the spindle until it is hand-tight.
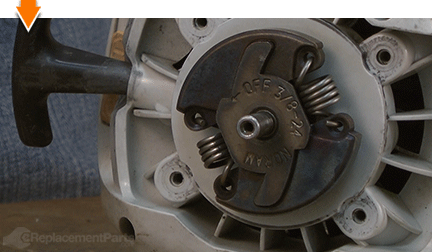
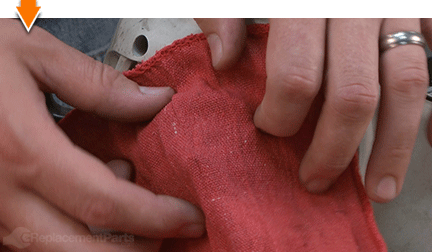
Place a shop rag over the clutch assembly to prevent damage during installation.
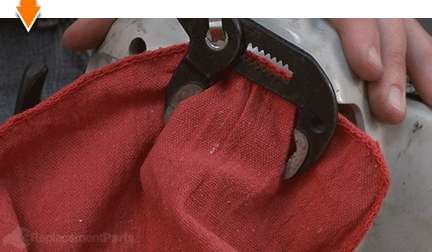
Use adjustable pliers to secure the clutch to the engine.
16. Reinstall the clutch drum.
Install the small spacer washer onto the spindle.
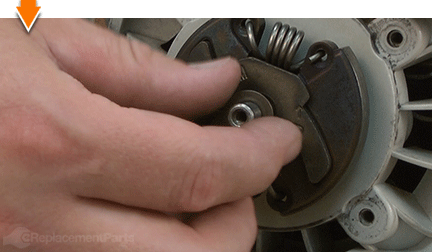
Install the clutch drum onto the clutch.
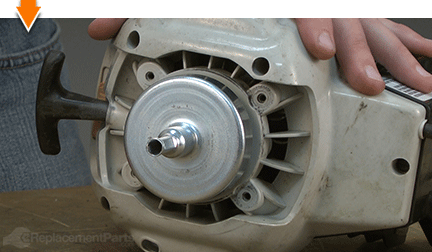
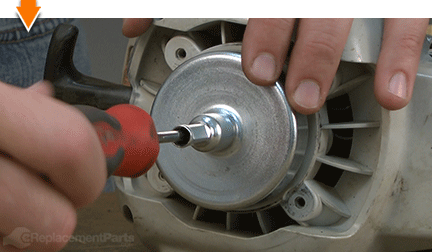
Secure the clutch drum to the spindle with the internal screw.
17. Reinstall the spark plug.
Remove the binding (starter rope) from the cylinder.
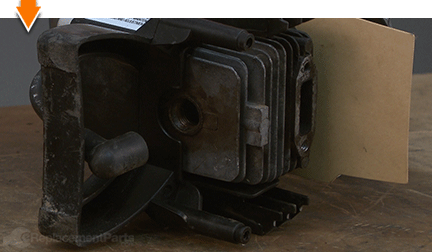
Install the spark plug into the cylinder.
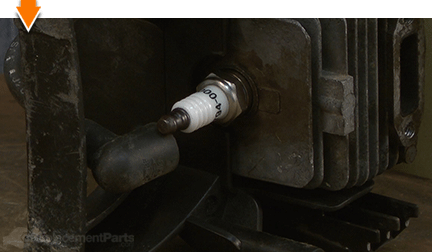
Use a spark plug wrench (or socket) to secure the spark plug.
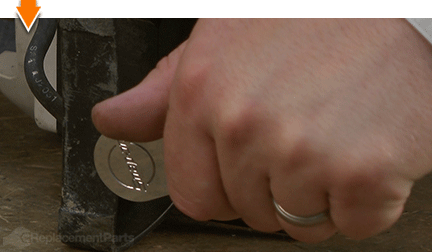
Replace the spark plug boot.
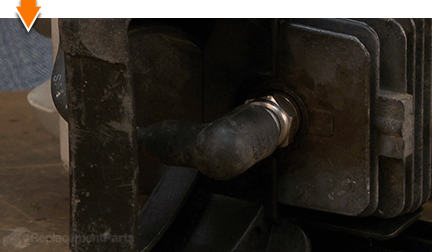
18. Reconnect the clutch housing and the upper shaft to the engine.
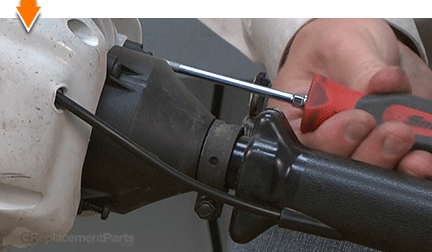
Thread the throttle cable through the engine housing and through the opening on the carburetor mounting assembly.
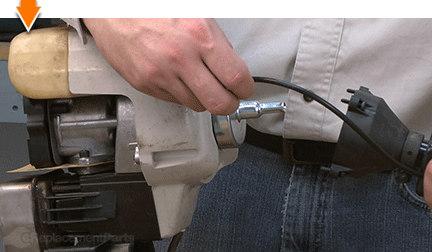
Reconnect the upper shaft and clutch drum housing to the engine.
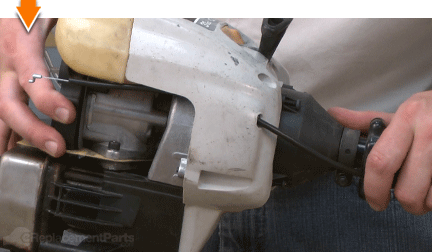
Secure the upper shaft and clutch drum housing with the (4) screws.
19. Reinstall the carburetor.
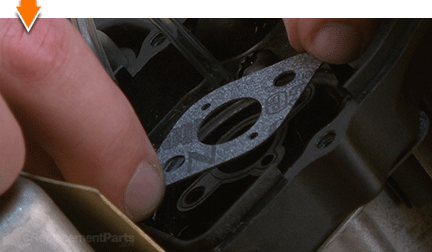
Install the carburetor gasket.
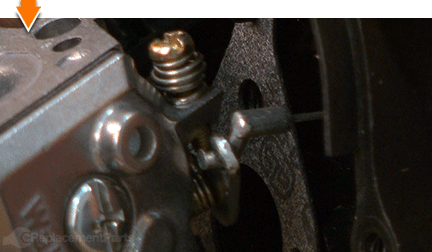
Install the throttle cable onto the throttle linkage of the carburetor.
Install the incoming fuel line to the lower carburetor inlet.
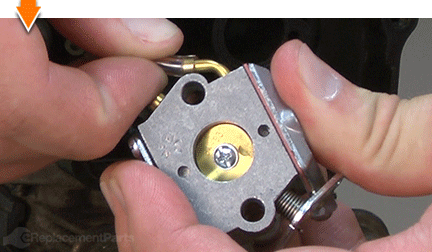
Install the (primer) fuel line to the upper carburetor inlet.
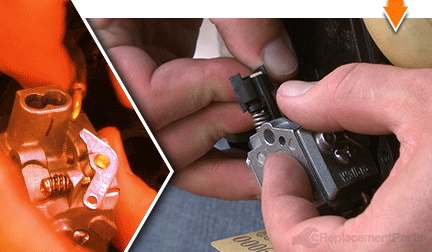
Install the carburetor mounting screws onto the choke plate and lever.
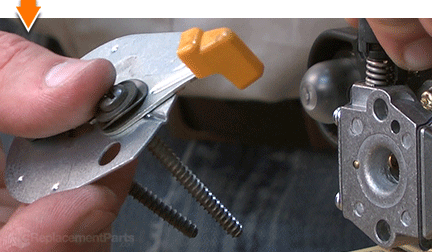
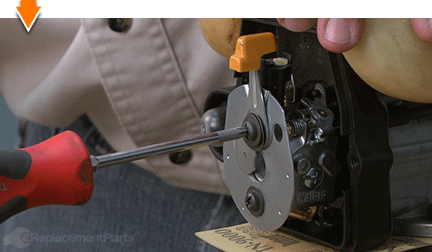
Secure the carburetor (and choke plate) to the engine with the (2) screws. Note that the choke lever and the wavy washer must be properly aligned before tightening the upper screw.
20. Reinstall the rear cover.
Reinstall the rear cover onto the engine.
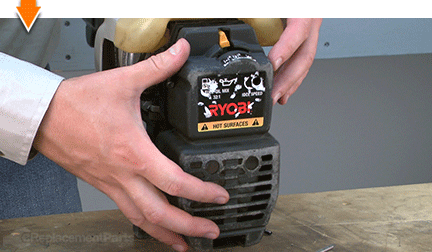
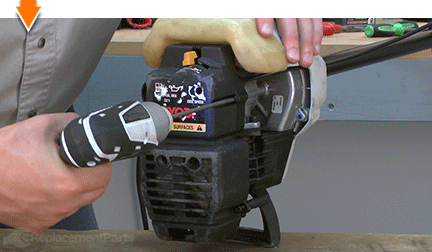
Secure the rear cover with the (4) screws.

You don't have to leverage your savings to level your lawns. As you just learned, repairing your own equipment is easy when you follow our step-by-step guides. Not only did you restore trimmer functionality at a fraction of the cost of replacement; you have taken the edge off of future repairs, wherever you may find them.


