


Why Read This Article?
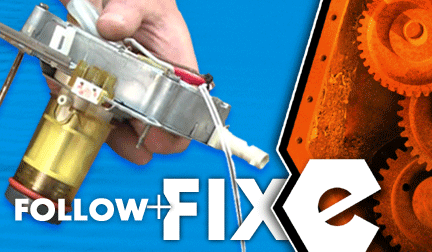
Finish Nailer Repair - Replacing the Driver Guide (Ridgid Part # 79004001022)
Article Breakdown
Finish Nailer Repair - Replacing the Driver Guide (Ridgid Part # 79004001022)
Video

Tools & Materials
 THE FACTS | THE FIX | THE FINISH
Steaming and frothing over a broken espresso machine? It's time to face the fix. Whether you are an impassioned espresso enthusiast or a bona fide barista, eReplacementparts.com provides the parts, procedures and facts you need to fearlessly fix what fails you.
In the late nineteenth century, espresso was created by "pulling" heated water through ground coffee using a series of hand-operated levers. Today, that "pulling" action is accomplished by an electric pump. More specifically; a generator. Unlike their 200-year-old counterparts, however, most electric generators were not built to stand the test of time.
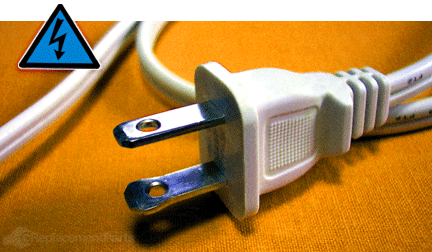
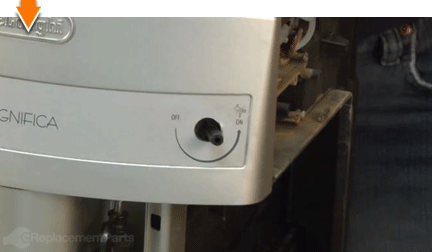
Symptoms of an aging generator may include water loss during brewing, visible leakage, inconsistent cup portioning, or total loss of brew functionality. This article will show you how to remove and replace the generator in a DeLonghi Magnifica Superautomatic espresso machine. THE FACTS | THE FIX | THE FINISH REMOVING THE GENERATOR [top] ! Unplug the machine.
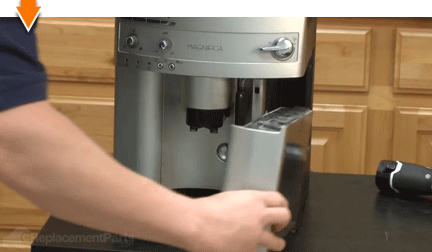
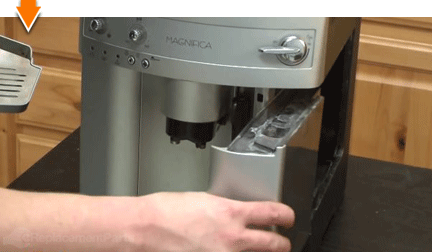
 1. Remove the drip tray.
Open the front door of the machine.
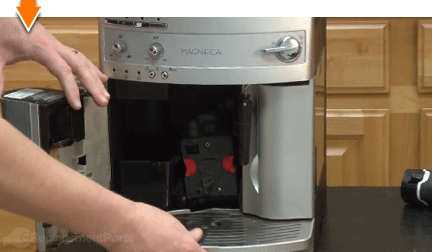
Slide the drip tray out of the machine.
 2. Remove the water tank.
Close the front door assembly.
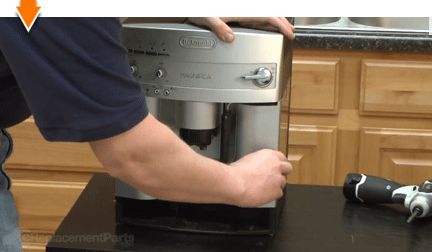
Slide the water tank out of the machine.
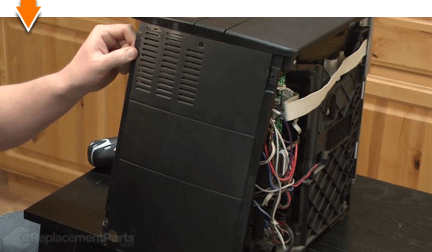
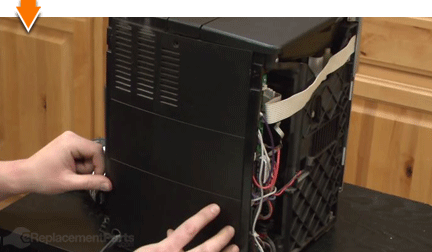
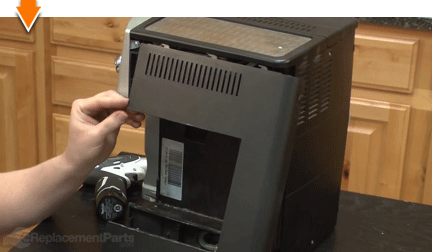
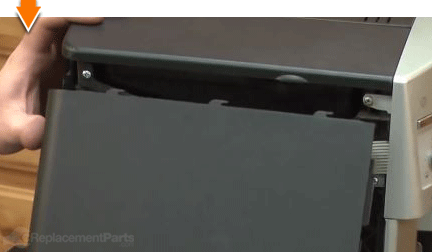
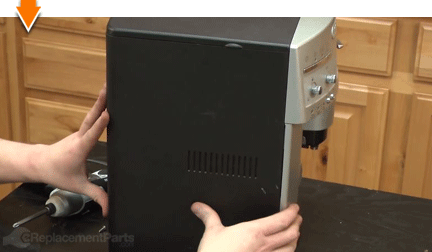
 3. Remove the side panels.
Remove the retaining screws (located on the back of the machine).
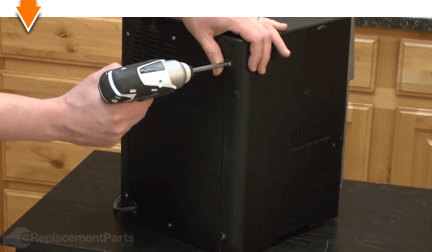
Slide the side panel toward the rear of the machine to disengage it from the housing.
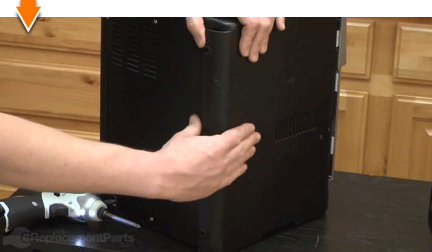
Remove the side panel.
Repeat to remove the opposite panel.
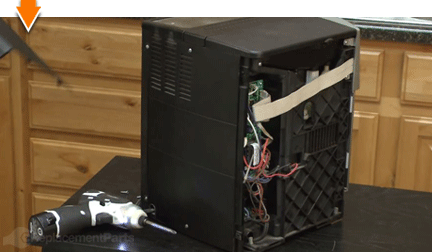
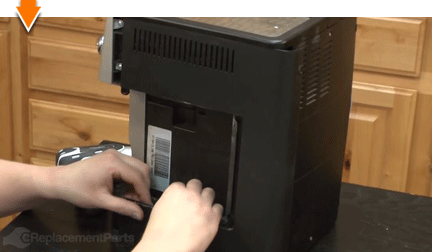
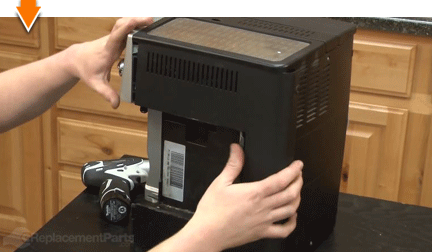
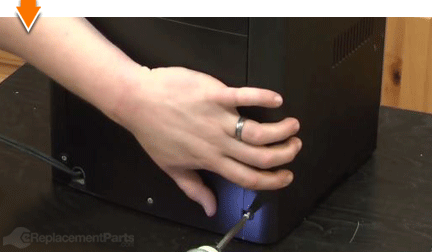
 4. Remove the rear panel from the unit.
Remove the retaining screws.
Remove the rear panel.
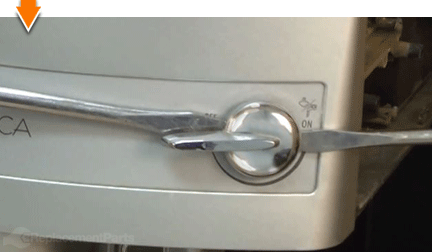
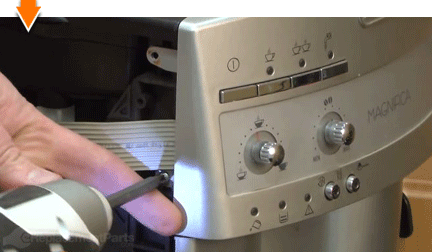
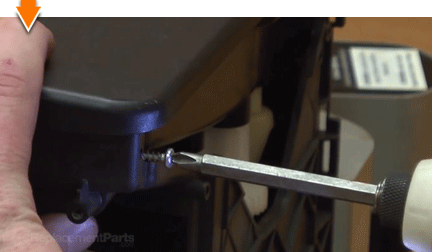
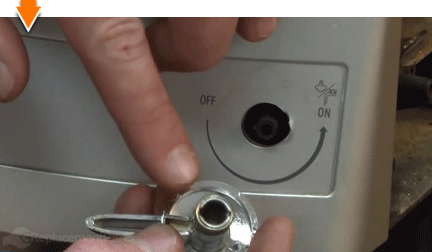
 5. Remove the knob.
Use two screwdrivers to evenly pry the knob from the mounting stud.
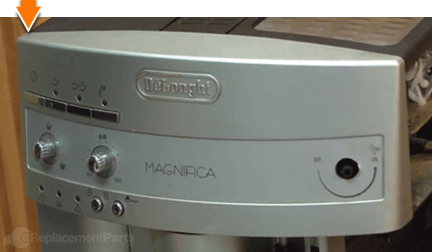
 6. Remove the control panel assembly.
Remove the retaining screws.

Pull control panel assembly away from the machine.
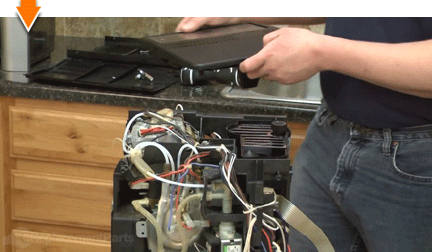
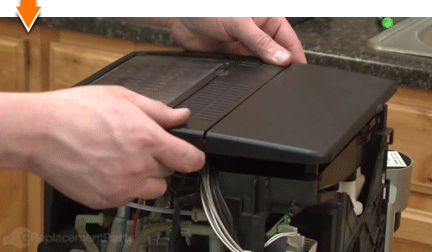
 7. Remove the top panel.
Remove the retaining screws.
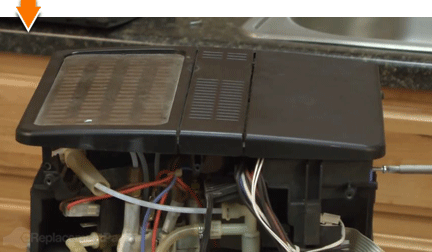
Remove the top from the machine.
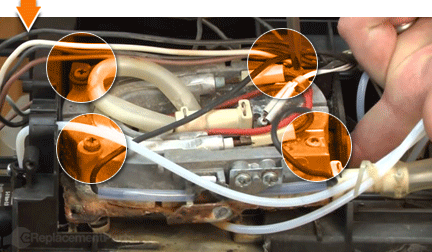
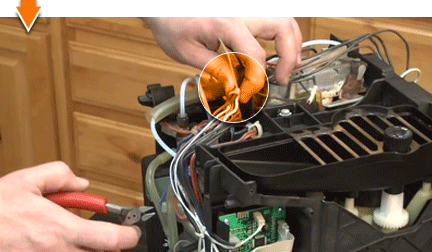
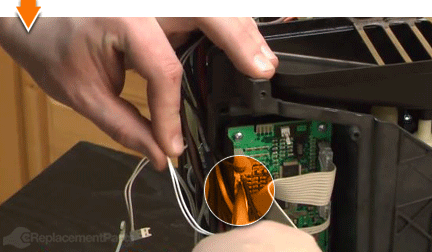
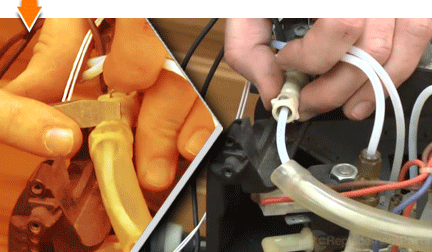
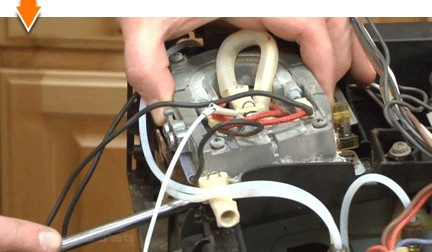
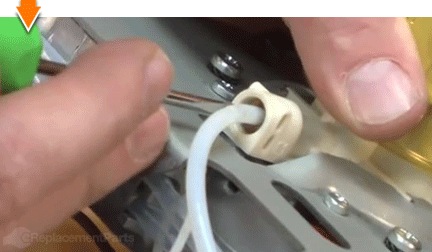
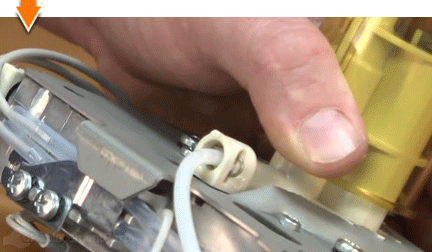
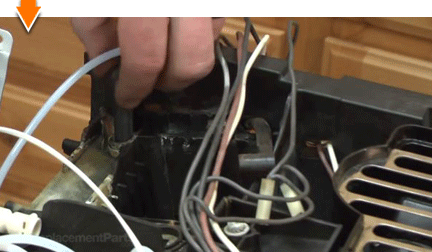
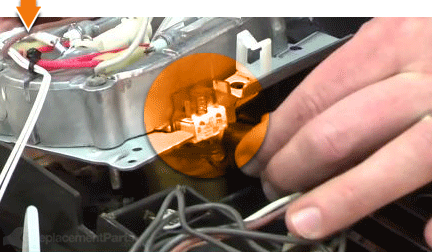
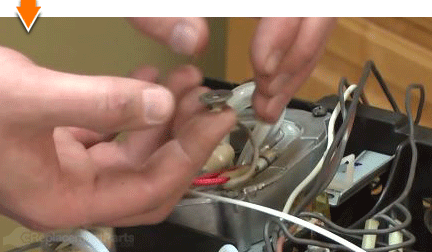
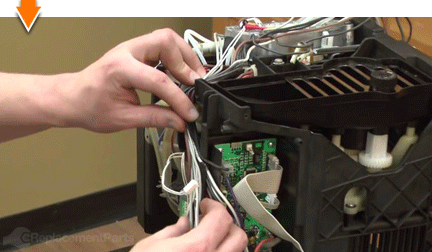
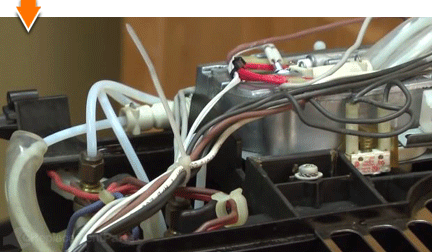
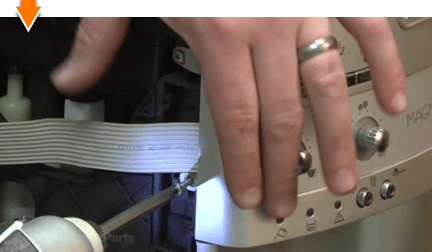
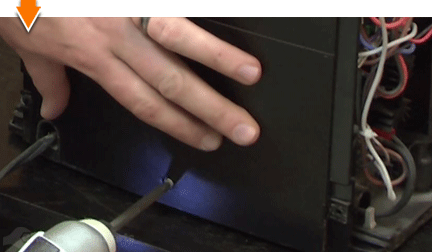
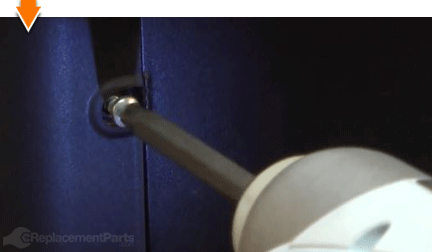
 8. Remove the wires from the switch terminal.
SPECIFIX: Note the small bundle of wires originating on the front of the machine (near the knob) and passing through a plastic channel on the housing. To make room for the generator to be lifted out of the unit, remove these wires from the channel and push them to the side.
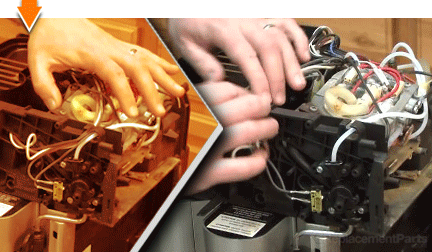
Use long-nosed pliers to disconnect the two black wires (originating at the knob on the front of the machine) from the switch terminal on the generator. (The connection point is highlighted in the photo below).
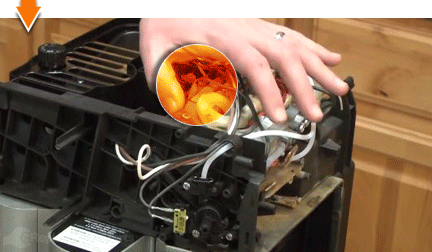
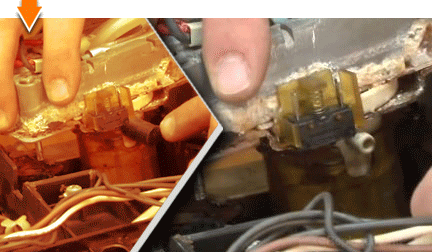
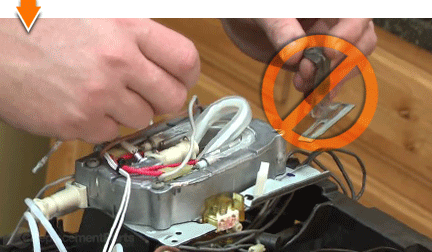
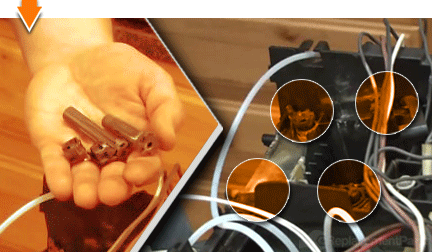
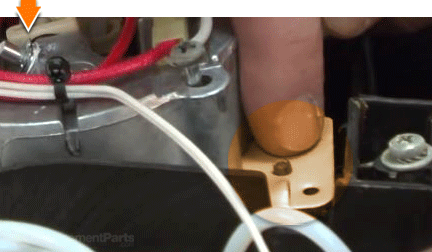
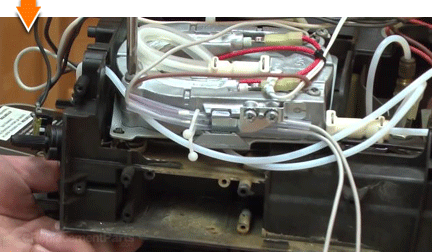
9. Remove the generator hardware.
SPECIFIX: The generator is secured by four long screws. These screws attach to nuts on the bottom of the assembly. It is usually not necessary to hold the nuts with a wrench during removal (finger pressure is generally sufficient). However, care should be taken to ensure that the nuts do not fall into the machine once the screws have been removed.
Remove the three accessible screws and nuts from the generator assembly.
Open the front door of the espresso machine to access the final nut and remove the screw.
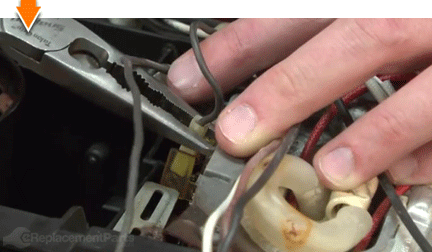
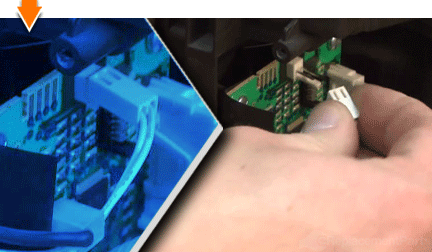
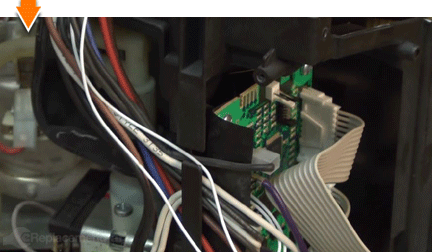
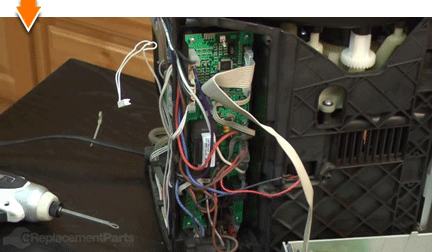
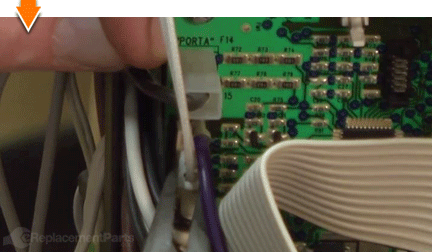
 10. Remove the wires from the control board.
SPECIFIX: There are three wiring harnesses that must be removed from the control board. The new generator includes new harnesses, but care should still be taken when removing the connectors from the control board to avoid damaging the terminals.
Cut the cable tie at the top (generator-side) of the wire bundle.
Notice that the lower portion of the wire bundle is secured by one of the wire sets (which wraps around the bundle).
Disconnect the (wrapped) wire from the control board.
Unwrap the wire from the bundle.
To remove the smaller pair of (white) wires, use long-nosed pliers to gently pull the connector away from the control board terminal.
Trace each of the heavy gauge (black or brown) switch wires from the generator to locate their respective attachment points and disconnect them from the control board. (You may have to remove an additional cable tie at the lower portion of the wire bundle.) Note that these wires utilize different connectors to attach to the control board, which will ensure that they are reattached correctly in later steps.
Carefully remove the wires from the remaining wire bundle.
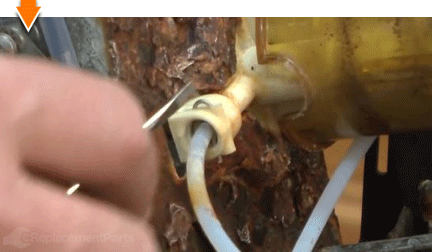
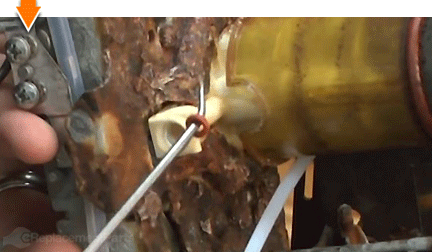
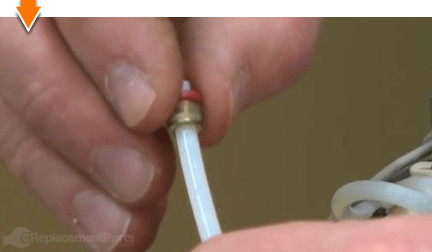
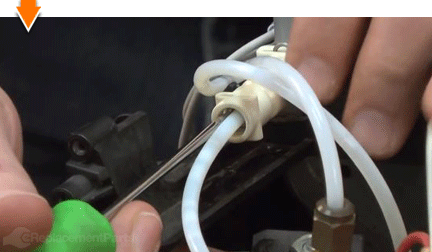
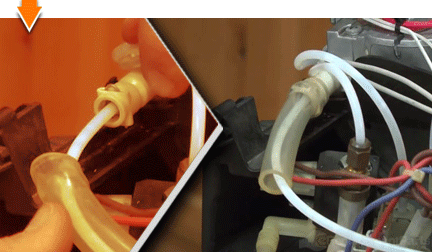
 11. Remove the upper tube from the generator.
Cut the cable tie connecting the tube bundle.
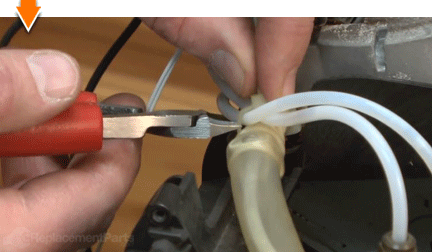
Use a screwdriver to pry the clear protector sleeve loose and slide the sleeve off of the connection.
Use a small screwdriver to remove the metal retaining spring.
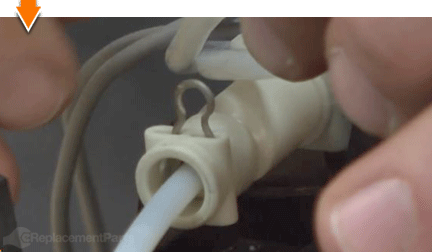
Pull gently to disconnect the tube from the generator.
Note: This fitting requires an O-ring. If the O-ring is not visible on the fitting (when removed), you will need to remove it from the housing with a small pick.
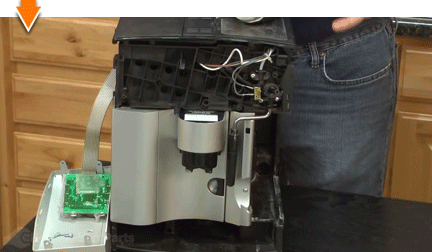
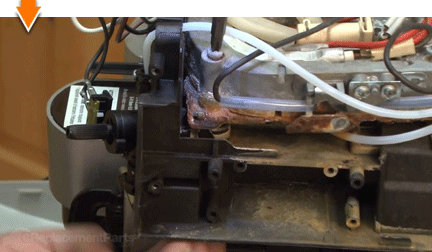
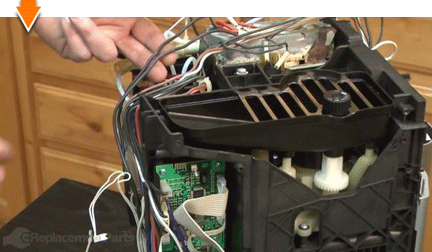
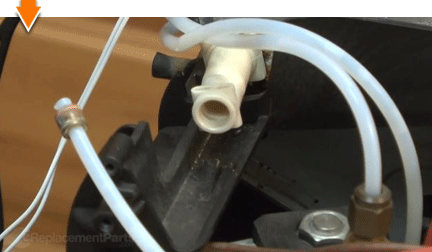
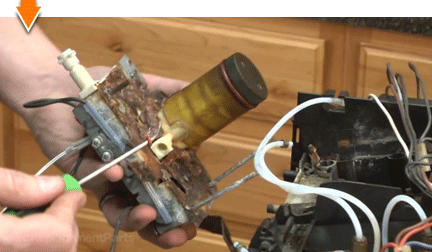
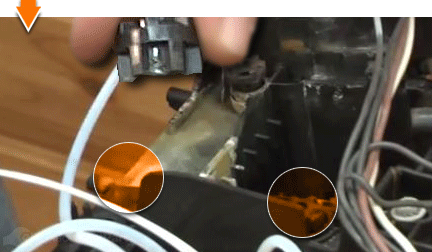
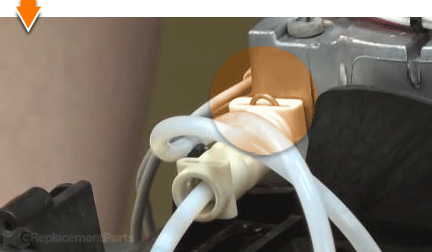
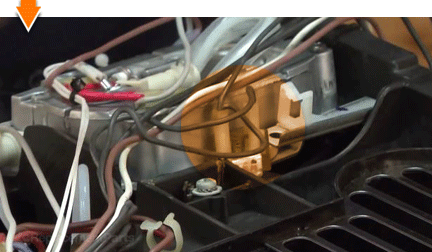
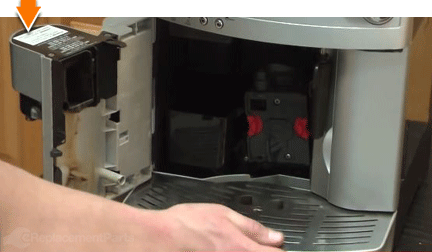
 12. Partially remove the generator assembly.
Use a screwdriver to gently pry the generator away from the plastic housing. Be careful not to damage any of the components.
Gently push the remaining tubes and wires aside while slowly lifting the generator assembly out of the housing.
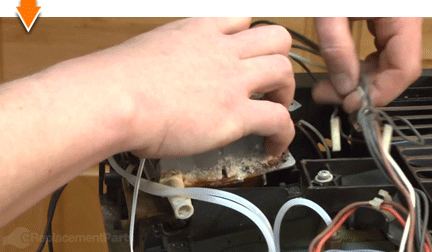
Pull the black rubber tube to remove it from the side of the generator.
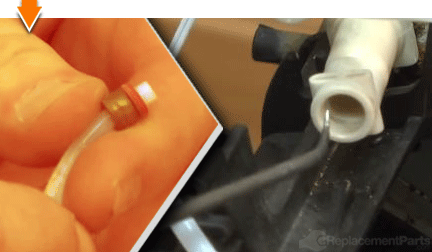
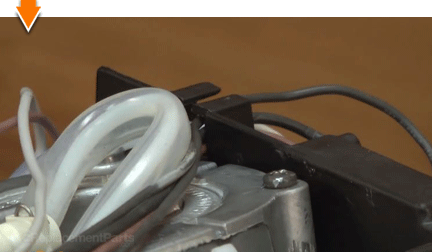
 13. Remove the bottom tube from the generator.
Use a small screwdriver to remove the retaining spring from the tube inlet.
Pull gently to remove the tube from the generator.

Use a pick to retrieve the O-ring from the connector housing (if it did not come out with the tube).
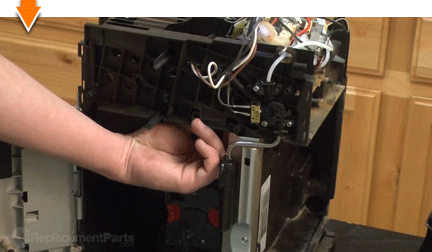
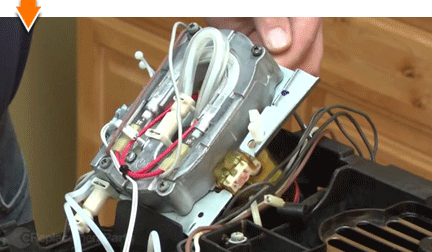
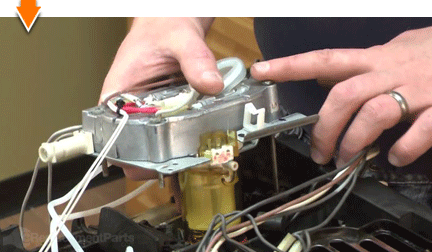
 14. Remove the generator.
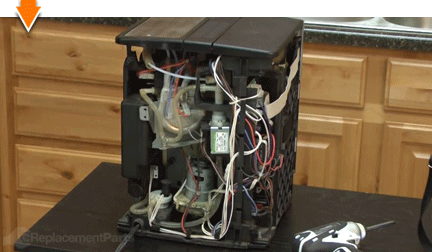
With all necessary tubes and wires disconnected, remove the generator assembly from the machine.
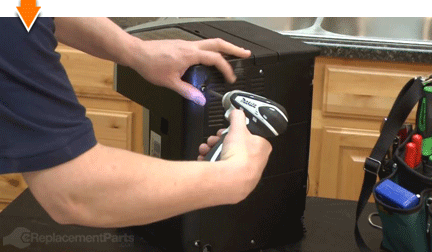
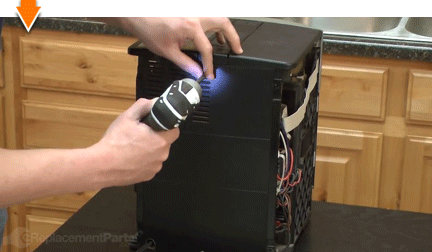
Use a shop vacuum to remove debris or corrosion that may have accumulated on the housing.
 INSTALLING THE NEW GENERATOR [top]
15. Install the bottom tube.
INSTALLING THE NEW GENERATOR [top]
15. Install the bottom tube.
Replace the O-ring and insert the small tube into the bottom of the generator.
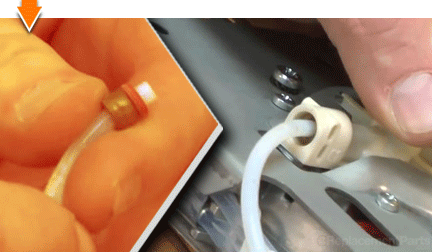
Use a small screwdriver to firmly seat the brass fitting into the tube inlet.
Secure the tube with the metal retaining spring.
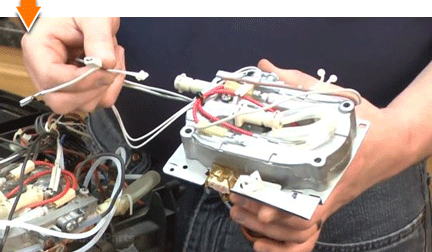
 16. Transfer the generator screws.
Transfer the four screws from the old generator assembly to the new one.
The new generator assembly includes a built-in mounting bracket, which replaces the original bracket. As such, you may discard the mounting bracket removed from the original assembly.
 17. Install the generator bushing feet.
SPECIFIX: The generator rests upon four small bush feet, which reside in depressions in the housing. These bush feet may already be in their correct positions. More likely; the feet moved or fell into the unit during removal of the original generator assembly.
As necessary, install the two longer feet into the holes toward the front of the machine.
Install the two shorter feet over the screw-hole openings toward the rear of the housing.
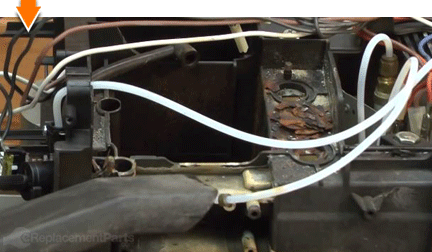
 18. Install the generator in the housing.
Partially install the generator assembly into the housing, ensuring that no tubes or wires are pinched or obstructed during installation.
Reconnect the black rubber tube to the side of the generator.
Align the plastic tabs on the housing with the holes on the generator assembly brackets.
 19. Install the top tube.
Replace the O-ring on the tube.
Reinstall the top tube into the generator assembly.
Use a small screwdriver to firmly seat the brass fitting into the tube inlet.
Secure the tube with the metal clip.
 20. Install the mounting nuts.
FIX TRIX: Apply a small amount of grease (such as Vaseline) to the washers and nuts to help them stick together and remain in position during assembly.
Install the four nuts to the bottom of the generator assembly and secure the screws (from the top).
 REASSEMBLING THE UNIT [top]
21. Reconnect the wires to the control board.
REASSEMBLING THE UNIT [top]
21. Reconnect the wires to the control board.
Route the wires from the generator assembly through the channels in the housing and along the path of the existing wire bundle (working toward the control board).
Use needle-nosed pliers to reattach the wire connections to the terminals on the control board.
Wrap the final wire around the entire bundle once or twice before attaching it to the control board.
 22. Reconnect the primary wires to the generator.
Install the two primary wires to the connection terminals on the generator.
Route the two primary wires through the channels in the top of the plastic housing and along the path of the existing wire bundle.
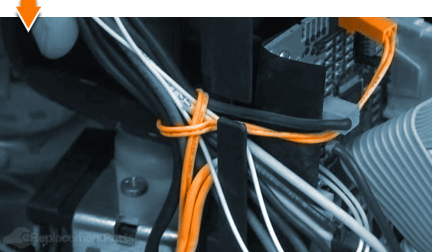
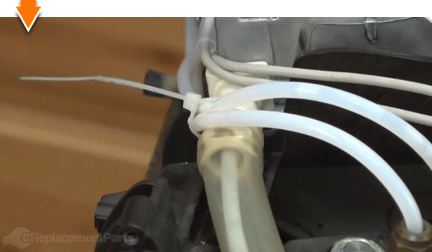
 23. Secure the wire bundles.
Use new cable ties (available at home improvement stores) to secure the upper and lower sections of the wire bundles.
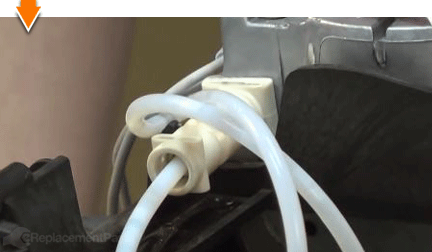
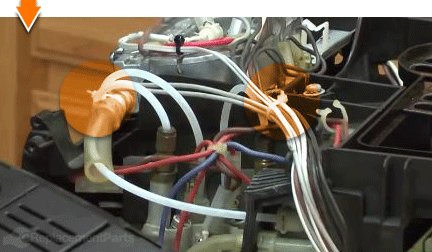
 24. Reinstall the protective tubing sleeve.
Slide the clear plastic sleeve over the fitting on the upper tube.
Secure the remaining tubes to the fitting with a cable tie.
Clip and remove all exposed ends of the cable ties.
 25. Reinstall the top of the unit.
Reinstall the top panel.
Secure the panel with the screws.
 26. Reinstall the front control panel.
Install the front control panel on the unit, ensuring alignment of the mounting tabs and knob cutouts.
Secure the front control panel with the screws.
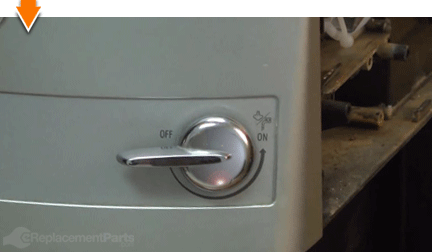
 27. Reinstall the knob.
Align the grooves on the knob with the tabs on the mounting stud.
Press firmly to secure the knob to the mounting stud.
 28. Reinstall the rear cover.
Align the upper tab on the rear cover with the recess in the top panel.
Press and snap the rear panel into position.
Secure the rear cover with the screws.
 29. Reinstall the right panel.
Insert the top edge of the right panel into the top panel.
Snap the lower portion of the panel into position against the housing.
Slide the entire panel toward the front of the machine, ensuring that the mounting tabs align with the housing.
Secure the right panel with the screws.
 30. Reinstall the left panel.
Insert the top edge of the left panel into the top panel.
Slide the entire panel toward the front of the machine, ensuring that the mounting tabs align with the housing.
Secure the left side panel with the screws.
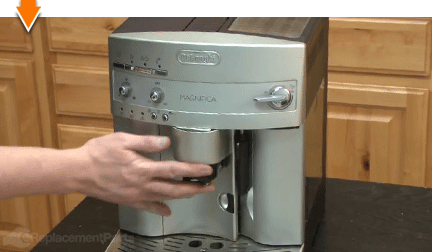
 31. Reinstall the water tank.
Slide the water tank securely into position.
 32. Reinstall the drip tray.
Open the front door assembly of the machine.

Slide the drip tray securely into position.
Close the front door assembly.
 THE FACTS | THE FIX | THE FINISH
Cappuccino. Americano. Espresso. Macchiato: the possibilities are as priceless as the machines that prepare them. But you don't have to empty your pockets to keep your cup full. As you just learned, repairing your own gourmet gadgets and modern machines is easier than you think, especially when you follow our step-by-step guides. Not only did you restore balance to your morning routine; you awakened your potential for facing and fixing whatever the future brews up for you.
Find your next fix here.
[top]
THE FACTS | THE FIX | THE FINISH
Cappuccino. Americano. Espresso. Macchiato: the possibilities are as priceless as the machines that prepare them. But you don't have to empty your pockets to keep your cup full. As you just learned, repairing your own gourmet gadgets and modern machines is easier than you think, especially when you follow our step-by-step guides. Not only did you restore balance to your morning routine; you awakened your potential for facing and fixing whatever the future brews up for you.
Find your next fix here.
[top]
