Gasket-intake 27355S - OEM Briggs and Stratton - eReplacementParts.com
eReplacementParts.com
877-346-4814
Briggs and Stratton Parts

Gasket-intake 27355S

OEM part for: Briggs and Stratton, Toro

Part Number: 27355S


Install
Videos!
Gasket-intake - 27355S:Briggs and Stratton 360 View
Gasket-intake - 27355S:Briggs and StrattonGasket-intake - 27355S:Briggs and StrattonGasket-intake - 27355S:Briggs and Stratton 360 View
In Stock
Ships within 1 business day
Medium 1-2 hours (18 rated repairs)?
OEM: Original Equipment Manufacturer ?
Briggs and StrattonToro
Does this fit my product?

Product Description ?

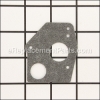
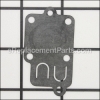
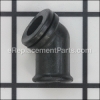
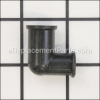
This is an authentic manufacturer sourced replacement part designed for use with a variety of lawn and garden equipment. This carburetor intake gasket which provides an air tight seal for the carburetor. Over time gaskets tend to deteriorate and would need to be replaced. It is made out of compound material and it is sold individually.

You would need a screwdriver to replace this item.

  • Part Type: Carburetor
  • Classification: Part
  • Weight: 0.01 lbs.
  • Shipping: Ships Worldwide

Frequently Purchased Together ?

Compatibility

This Gasket-intake will fit the following 12079 machines. Confirm this part works with your model, and view the detailed model diagrams and repair help we have to offer.

Briggs and Stratton

Toro

Show More Compatible Models
Don't see yours? Try searching our site for :

This item works with the following types of products:

  • Engine Parts
  • Generator Parts
  • Blower Parts
  • Vacuum Parts
  • Lawn Mower Parts
  • Lawn Tractor Parts

This part replaces obsolete part #: 27355

Customer Part Reviews ?

4.5
Average Rating (out of 5):
2 Reviews
Click to filter by ratings:
5 stars
1
4 stars
1
3 stars
0
2 stars
0
1 stars
0
  • Highest Rating
  • Most Recent
< PREV
  • 1
NEXT >
  • Great item thanks
    Fast shipping good product and price
    Randall schmitt - March 22, 2023 Verified Purchase
    Post Office folded gasket
    As usual, good service but the Post Office was able to fold the package for my box and the head gasket evidenced folding.
    Guest - April 28, 2019 Verified Purchase

    Questions & Answers ?

    Our customer Service team is at the ready daily to answer your part and product questions.

    photo of team member
    Ask our Team

    We have a dedicated staff with decades of collective experience in helping customers just like you purchase parts to repair their products.

    Does this fit my product?

    Questions & Answers for Gasket-intake


    No questions have been asked yet

    Customer Repair Instructions ?

    All our customer repair instructions are solicited directly from other customers just like you who have purchased and replaced this exact part.

    Medium 1-2 hours (18 rated repairs)?

    The engine would start with difficulty but wouldn't keep running

    John - May 4, 2016
    👍 1 of 1 people found this instruction helpful
    Tool Type

    Engine

    Difficulty

    Easy

    Time

    15-30 minutes

    Tools Used

    Screwdriver, Wrench Set

    I soaked the carb in cleaner, ringed it off and blew out the ports and installed the new parts. The diaphragm was the main culprit but a new spark plug helped too.
    Did you find this story helpful?
    Thanks for voting and helping fellow customers!

    Edger motor tune up, some one locked tighted the points & condenser screws.

    Harry - June 9, 2021
    Tool Type

    Engine

    Difficulty

    Hard

    Time

    More than 2 hours

    Tools Used

    Screwdriver, Pliers, Power Drill, Socket set, Nutdriver, Adjustable Wrench, 8/32 tap, no.29 drill bit

    1.removed the carb, replaced the fuel foot valve, removed the fast fuel jet, replaced. replaced the carb. intake gasget ,replaced governor spring, replace air cleaner element.
    Removed old oil, place new oil in crank case,
    Replace points that were locked tighted inplace, had to heat screws to remove, and the condenser screw had to be drilled out and retaped. Cleaned flywheel and coil to get a good spark.
    replaced plunger and fly wheel key. Timed an set points .020
    replaced spark plug and set to .o30. adjusted fast idle jet, edger now runs well and edges nicely. I'm out of room so have a nice day!
    Did you find this story helpful?
    Thanks for voting and helping fellow customers!

    Chipper was left with ethanol fuel and rotted the bottom of the fuel tank out and left the carb full of yellow “sand”. The rewind spring was broken, the engine would not turn over, as it turned ou

    Steve - July 10, 2020
    Tool Type

    Engine

    Difficulty

    Medium

    Time

    More than 2 hours

    Tools Used

    Screwdriver, Power Drill, Socket set, Wrench Set, Scaler, welder, die grinder with a cutoff wheel, hammer

    Removed the fuel tank and carb cleaned the carb and installed the rebuild kit. I cut the damaged metal out of the fuel tank, cleaned the rust out of the rest of the tank with a needle scaler and welded a new bottom onto the tank. Next I pulled the blower housing off and replaced the rewind spring. After that I pulled the housing off the chipper, took the flails apart and freed them up, cleaned the mouse nest out, gave everything a coat of paint.
    Now I have a good chipper that starts on the second pull that I saved from going to the dump for very little money.
    Did you find this story helpful?
    Thanks for voting and helping fellow customers!

    Leaking gaskets

    Burt - July 12, 2018
    Tool Type

    Lawn Mower

    Difficulty

    Medium

    Time

    30-60 minutes

    Tools Used

    Screwdriver, Wrench Set

    Removed Air cleaner, removed gas tank, removed exhaust and removed carburetor. Replaced intake gasket for carburetor, replaced fuel tank gasket, replaced exhaust gasket replaced air filter.
    Tightened all bolts, adjusted throttle linkage and fuel valve. Started right up and no additional problems.
    Did you find this story helpful?
    Thanks for voting and helping fellow customers!

    Gas tank was full of rust.

    Delbert - November 1, 2017
    Tool Type

    Engine

    Difficulty

    Medium

    Time

    More than 2 hours

    Tools Used

    Screwdriver, Pliers, Socket set, Wrench Set, Adjustable Wrench

    Cleaned out the gas tank.
    Did you find this story helpful?
    Thanks for voting and helping fellow customers!

    Governor and carburetor linkage not attached

    Nicholas - July 14, 2017
    Tool Type

    Engine

    Difficulty

    Easy

    Time

    30-60 minutes

    Tools Used

    Screwdriver, Pliers, Wrench Set

    Reattached the governor and throttle linkage including the stabilizer springs. Replaced diaphragm in the carburetor and air filter element. This 1978 5 hp John Deere log slitter runs and splits logs the way it use designed to do.
    Did you find this story helpful?
    Thanks for voting and helping fellow customers!

    Would not run off choke

    steve - July 5, 2017
    Tool Type

    Blower

    Difficulty

    Hard

    Time

    1-2 hours

    Tools Used

    Screwdriver, Socket set, Wrench Set, Nutdriver, None

    Take off carb and tank hardest thing is the governor linkage take a photo first I didn't and had to do a lot of thinking to get it all back the right way it started in 2 pulls and runs great
    Did you find this story helpful?
    Thanks for voting and helping fellow customers!

    Rototiller sat for years, caramelized gasoline throughout, muffler rusted out.

    Adam - June 21, 2017
    Tool Type

    Engine

    Difficulty

    Medium

    Time

    1-2 hours

    Tools Used

    Screwdriver, Power Drill, Socket set, Wrench Set, Adjustable Wrench, Gasket scraper, Easy-outs, 1/4-20 tap

    1. Remove carburetor/tank assembly.
    a.disconnect throttle cable.
    b.disconnect governor spring
    2. Separate carburetor from tank, remove diaphragm and clean all thoroughly.
    3. Make sure no old gasket material is remaining and all ports are clear/open.
    4. Re-assemble diaphragm, carburetor and tank using new parts and gaskets.
    5. Re-install carburetor/tank assembly on engine in reverse order as dis-assembly.
    Muffler installation:
    1. Flatten retaining tabs with a cold chisel or screwdriver and unbolt old muffler.
    Note: In my case one of the bolts snapped off in the block so that was another can of worms, I filed the bolt flat as best that I could, center punched it (emphasis on center!) and drilled for an easy-out. Easy-outs didn't work, too much outward force so I drilled a little bigger and tapped it out. Use the proper size drill bits and make sure drilling is straight with the block!
    2. Install new muffler and gasket then curl the retaining tabs to secure the bolt heads.
    Did you find this story helpful?
    Thanks for voting and helping fellow customers!

    Gaskets were leaking

    Mike - June 1, 2017
    Tool Type

    Engine

    Difficulty

    Easy

    Time

    15-30 minutes

    Tools Used

    Screwdriver, Socket set

    Cleaned all parts and replaced bad gaskets and diagram. With new fuel and 3 pulls ran great. 1971 model rototiller
    Did you find this story helpful?
    Thanks for voting and helping fellow customers!

    Engine not used in over 15 years

    Richard - May 1, 2017
    Tool Type

    Engine

    Difficulty

    Easy

    Time

    15-30 minutes

    Tools Used

    Socket set, Carburetor Cleaning Solution

    Removed & dissembled Carb. Soaked in cleaner for 30 minutes. Washed in clear water. Reassembled with new gaskets. Replaced on engine. Primed carburetor, Started on first pull.
    Did you find this story helpful?
    Thanks for voting and helping fellow customers!

    OEM stands for Original Equipment Manufacturer and means the part you’re buying is sourced directly from the manufacturer who made your product. At eReplacementParts, we sell only genuine OEM parts, guaranteeing the part you’re purchasing is of better design and of higher quality than aftermarket parts.

    Our product descriptions are a combination of data sourced directly from the manufacturers who made your product as well as content researched and curated by our content & customer service teams. This content is edited and reviewed internally before being made public to customers.

    Our customer service team are at the ready daily to answer your part and product questions. We have a dedicated staff with decades of collective experience in helping customers just like you purchase parts to repair their products.

    All our part reviews are solicited directly from other customers who have purchased this exact part. While we moderate these reviews for profanity, offensive language or personally identifiable information, these reviews are posted exactly as submitted and no alterations are made by our team.

    All our customer repair instructions are solicited directly from other customers just like you who have purchased and replaced this exact part. While we moderate these reviews for profanity, offensive language or personally identifiable information, these reviews are posted exactly as submitted and no alterations are made by our team.

    Based on data from past customer purchasing behaviors, these parts are most commonly purchased together along with the part you are viewing. These parts may be necessary or helpful to replace to complete your current repair.

    All our installation videos are created and produced in collaboration with our in-house repair technician, Mark Sodja, who has helped millions of eReplacementParts customers over the last 13 years repair their products. Mark has years of experience in selling and repairing both commercial and residential products with a specialty in gas-powered equipment.

    This data is collected from customers who submitted a repair instruction after replacing this exact part. Customers can rate how easy the repair was to complete and how long it took. We aggregate this data to provide a repair rating that allows customers to quickly determine the difficulty and time needed to perform their own repair.

    eReplacementParts.com
    7174 South 400 West
    Suite 5
    Midvale, UT 84047
    visa mastercard discover american express PayPal