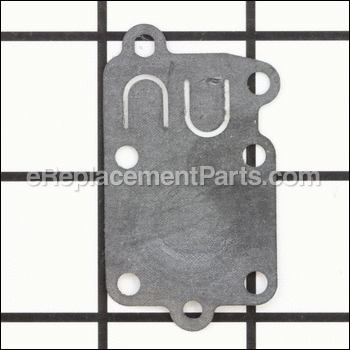
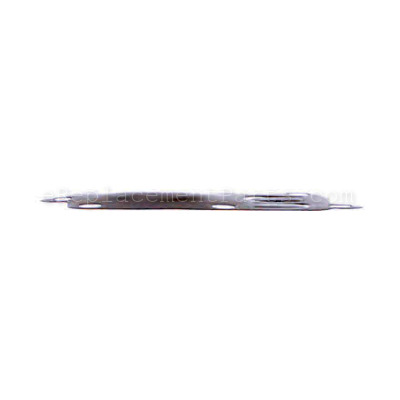
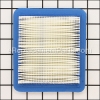
Genuine Manufacturer Approved replacement part, fits 3-5 gross HP Horizontal crankshaft engines (Pulsa-Jet Carburetors). This part is sold individually. Diaphragms are an essential part of an engine because they provide an air tight seal where it is needed to ensure proper operation of an engine at it maximum potential.
Diaphragm-carburetor 272538S
OEM part for: Briggs and Stratton, Toro, Craftsman
Part Number: 272538S
Jump To:
Frequently Purchased Together ?
Compatibility
This part will fit the following 1558 machines
Briggs and Stratton
Toro
Craftsman
This item works with the following types of products:
- Engine Parts
- Generator Parts
- Blower Parts
- Vacuum Parts
This part replaces obsolete part #: 272538
Customer Part Reviews ?
- 1
- 2
Questions & Answers ?
Our customer Service team is at the ready daily to answer your part and product questions.

Ask our Team
We have a dedicated staff with decades of collective experience in helping customers just like you purchase parts to repair their products.
Does this fit my product?Questions & Answers for Diaphragm-carburetor
Customer Repair Instructions ?
All our customer repair instructions are solicited directly from other customers just like you who have purchased and replaced this exact part.
The engine wouldn't turn over and water damage was evident.
Tool Type
Engine
Difficulty
Medium
Time
30-60 minutes
Tools Used
Screwdriver, Pliers, Socket set, Wrench Set, Nutdriver, Hanger wire.
The carburetor diaphragm was old and no longer worked.
Tool Type
Engine
Difficulty
Easy
Time
15-30 minutes
Tools Used
Screwdriver
Parts Used
Remove the cover plate. Notice the orientation of the diaphragm and remove it. At this point spray some carb cleaner through the orifices to remove any debris.
Place the new diaphragm on the carburetor (there is only one way the diaphragm will fit) and attach the cover plate to the carburetor with the four screws.
enigine wouldn't run properly. seemed to be running out of gas
Tool Type
Engine
Difficulty
Easy
Time
Less than 15 minutes
Tools Used
Screwdriver, Socket set
Parts Used
2. removed the muffler heat shield.
3. removed the diaphram cover plate
4. replaced and reinstalled.
Rebuilt carb and replaced fuel tank
Tool Type
Engine
Difficulty
Easy
Time
More than 2 hours
Tools Used
Screwdriver, Pliers, Wrench Set, Adjustable Wrench
Would not start. Could not pull gas up from tank
Tool Type
Engine
Difficulty
Easy
Time
15-30 minutes
Tools Used
Screwdriver, Socket set, Wrench Set
Removed old gaskets and cleaned up carburetor.
Reassembled unit using new gaskets, diaphragm and started engine.
After warm up adjusted air mixture screw.
Chipper was left with ethanol fuel and rotted the bottom of the fuel tank out and left the carb full of yellow “sand”. The rewind spring was broken, the engine would not turn over, as it turned ou
Tool Type
Engine
Difficulty
Medium
Time
More than 2 hours
Tools Used
Screwdriver, Power Drill, Socket set, Wrench Set, Scaler, welder, die grinder with a cutoff wheel, hammer
Now I have a good chipper that starts on the second pull that I saved from going to the dump for very little money.
carburetor set for long time gas turned to varnish
Tool Type
Engine
Difficulty
Easy
Time
15-30 minutes
Tools Used
Screwdriver
Parts Used
Fuel was left in the tank.
Tool Type
Engine
Difficulty
Medium
Time
More than 2 hours
Tools Used
Wrench Set, Nutdriver, Torque bit\\\'s
Engine would run under a load.
Tool Type
Engine
Difficulty
Medium
Time
More than 2 hours
Tools Used
Screwdriver, Pliers, Socket set, Wrench Set, Nutdriver, Air Compressor, Scraper, Carb Cleaner
2. Dissembled carb, cleaned gas tank, replaced carb diaphragm.
3. Reassemble.
4. Replaced pull rope.
the site had parts necessary and shipped them promptly, great company to work with.
Recommend them highly.
Tiller not runing
Tool Type
Engine
Difficulty
Easy
Time
30-60 minutes
Tools Used
Screwdriver, Pliers, Socket set
OEM stands for Original Equipment Manufacturer and means the part you’re buying is sourced directly from the manufacturer who made your product. At eReplacementParts, we sell only genuine OEM parts, guaranteeing the part you’re purchasing is of better design and of higher quality than aftermarket parts.
Our product descriptions are a combination of data sourced directly from the manufacturers who made your product as well as content researched and curated by our content & customer service teams. This content is edited and reviewed internally before being made public to customers.
Our customer service team are at the ready daily to answer your part and product questions. We have a dedicated staff with decades of collective experience in helping customers just like you purchase parts to repair their products.
All our part reviews are solicited directly from other customers who have purchased this exact part. While we moderate these reviews for profanity, offensive language or personally identifiable information, these reviews are posted exactly as submitted and no alterations are made by our team.
All our customer repair instructions are solicited directly from other customers just like you who have purchased and replaced this exact part. While we moderate these reviews for profanity, offensive language or personally identifiable information, these reviews are posted exactly as submitted and no alterations are made by our team.
Based on data from past customer purchasing behaviors, these parts are most commonly purchased together along with the part you are viewing. These parts may be necessary or helpful to replace to complete your current repair.
All our installation videos are created and produced in collaboration with our in-house repair technician, Mark Sodja, who has helped millions of eReplacementParts customers over the last 13 years repair their products. Mark has years of experience in selling and repairing both commercial and residential products with a specialty in gas-powered equipment.
This data is collected from customers who submitted a repair instruction after replacing this exact part. Customers can rate how easy the repair was to complete and how long it took. We aggregate this data to provide a repair rating that allows customers to quickly determine the difficulty and time needed to perform their own repair.


