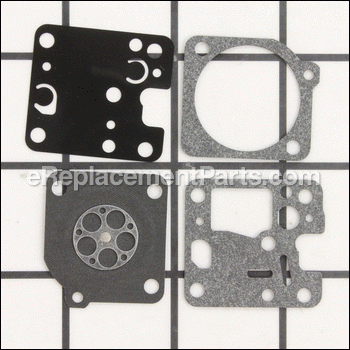


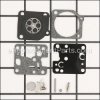
This is a Manufacturer Approved replacement kit used on a variety of Echo Trimmers, Brushcutters and Edgers. This kit includes 4 Gaskets/Diaphragms. Its purpose is to make an air tight seal so that no air/oil leakage occurs. Over time gaskets tend to deteriorate and will need to be replaced.
Gasket And Diaphragm Kit P005000550
OEM part for: Echo
Part Number: P005000550
$7.49
In Stock
Jump To:
Frequently Purchased Together ?
Compatibility
This Gasket And Diaphragm Kit will fit the following 362 machines. Confirm this part works with your model, and view the detailed model diagrams and repair help we have to offer.
This item works with the following types of products:
- Edger Parts
- Grass Trimmer Parts
- Trimmer Parts
Repair Videos ?
Articles:
|
Filthy Filters? This article will show you how to install a filter kit on an Echo SRM-225 trimmer....
May 27, 2015
|

Customer Part Reviews ?
Average Rating (out of 5):
Click to filter by ratings:
5 stars
3
4 stars
1
3 stars
0
2 stars
0
1 stars
0
< PREV
- 1
Echo weed wacker repair
My 15 yo echo wouldn't run for more than a few seconds. I replaced the diaphragm and turned the carb adj screw (under the primer bulb) a 1/2 turn clockwise and it runs like new.
Guest -
July 7, 2021
Verified Purchase
great parts
Took a little longer to get the parts. But the company kept me informed on my order and it arrived in great shape.
Guest -
July 11, 2020
Verified Purchase
easy repair!
perfect fit, my edger is working again!!!
Guest -
November 12, 2019
Verified Purchase
Most parts worked just fine. Weed eater started on first pull.
Echo weed eater parts worked just fine. All except the grommet for fuel tank.
That one had a little different size holes than the original which I had to reuse.
Guest -
July 21, 2022
Verified Purchase
Questions & Answers ?
Our customer Service team is at the ready daily to answer your part and product questions.

Ask our Team
We have a dedicated staff with decades of collective experience in helping customers just like you purchase parts to repair their products.
Does this fit my product?Questions & Answers for Gasket And Diaphragm Kit
No questions have been asked yet
Customer Repair Instructions ?
All our customer repair instructions are solicited directly from other customers just like you who have purchased and replaced this exact part.
Tune up, and leaking gas out of carburetor and fuel tank grommet.
David - May 27, 2017
👍 2 of 2 people found this instruction helpful
Tool Type
Trimmer
Difficulty
Medium
Time
30-60 minutes
Tools Used
Screwdriver, Pliers, Socket set, Allen Wrench set
Parts Used
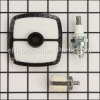
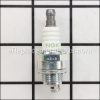
- Intake Gasket - 13001013410
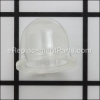
- Purge Bulb - P005003120
- Fuel Return Tube - 13201056330
- Fuel Line Grommet - 13211555931
- Spark Plug - 15901019830
- Gasket-intake - 13001055930
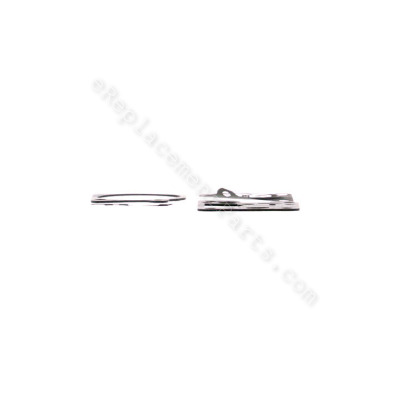
- Gasket And Diaphragm Kit - P005000550
- Pipe Vent - V471000111
- Fuel Pipe - 13201052031
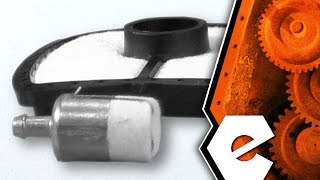
- Fuel Filter Assy. - A369000460
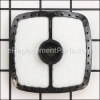
- Air Filter - A226001410
1. Removed the old spark plug, gap new one, and installed.
2. Removed throttle cable from carb., and disconnected both kill wires from the pull-a-part connector.
3. Removed air filter cover, threw out the old air filter, removed two screws holding air filter base.
4. Removed fuel and return lines from the carburetor, and removed the carburetor from the trimmer.
5. Removed 4 screws holding primer bulb, threw the old bulb out. Removed single screw from plastic primer spacer, and discarded gaskets underneath. Removed both screws underneath carburetor the for fuel pump, cleaned and blew out carburetor thoroughly with carb. cleaner, and compressed air. Installed new gaskets from kit, installing everything in reverse order. During cleaning, made sure to clean mini screen of all contaminants. installed new primer bulb.
6. Removed 3 screws holding fuel tank protector, and 2 screws holding fuel tank on. Fully drained fuel tank. Removed rubber grommet, and used it as a template for new fuel lines and grommet. Trimmed fuel lines to original lengths, reinstalled breather to new pipe, installed new fuel filter, and carefully installed new fuel lines in new grommet. Then carefully installing grommet into fuel tank. Installed tank in reverse order, followed by installing carburetor in reverse order, with new air filter installed.
7. Filled fuel tank with fresh fuel, primed carburetor, and started trimmer.
8. Runs excellent, like new, with no more fuel leaks!! Ready to take my Echo SRM-230, and trim up some weeds!! It's been about 5 years or more, and I couldn't be anymore pleased to see it running like new.
Did you find this story helpful?
Thanks for voting and helping fellow customers!
Diaphragm leaking. You could hold it up to the light and see the very tiny holes.
David - November 28, 2015
👍 1 of 1 people found this instruction helpful
Tool Type
Edger
Difficulty
Easy
Time
15-30 minutes
Tools Used
Screwdriver
Parts Used
Remove two screws holding carb to engine.
Release and remove the throttle cable.
Remove the two screws from the bottom of the carb.
Remove the old diaphragm
Clean any dirt in the area using carb cleaner
Install the new diaphragm kit
Reinstall the carb to the engine (if gasket is damaged replace)
Reinstall the throttle cable
Prime the carb and start.
Did you find this story helpful?
Thanks for voting and helping fellow customers!
leaking gas from carburator and top of gas tank
Vaughn - July 26, 2023
Tool Type
Trimmer
Difficulty
Medium
Time
15-30 minutes
Tools Used
Screwdriver, Pliers, Wrench Set
Removed air filter cover
Removed 2 bolts holding air filter cover to carburetor
Removed 4 screws holding air purge and air purge cover
Removed 1 center screw and removed old air purge body assembly.
Removed and replaced old gasket and diaphragm
Attached new air purge body assembly with center screw
Replaced 4 screws with new air purge bubble
Assembled 2 bolts for air filter cover and replaced air filter
Installed air filter cover
Did you find this story helpful?
Thanks for voting and helping fellow customers!
Nipple on purge was broken n needed to replace gasket n diaphram
George - June 2, 2020
Tool Type
Trimmer
Difficulty
Easy
Time
15-30 minutes
Tools Used
Screwdriver, Nutdriver
Removed carb n replace purge n gaskets n fuel hoses Assemble n runs as good as new
Did you find this story helpful?
Thanks for voting and helping fellow customers!
Bogging and was not able to adjust carb settings
Jason - December 25, 2019
Tool Type
Trimmer
Difficulty
Easy
Time
Less than 15 minutes
Tools Used
Screwdriver
Parts Used
1. Removed air filter.
2. Removed fuel, return, and vent line.
3. Removed carburetor.
4. Removed the 4 mounting screws on
the purge bulb and removed the purge body.
5. Removed the 2 screws on the metering diaphragm cover.
6. Removed both gaskets, the diagram and fuel pump membrane.
7. I sprayed the carb out with carb cleaner.
8. Installed the fuel pump membrane against the carb THEN the gasket (important) and
then the purge body and bulb.
9. I installed the metering diaphragm gasket THEN the diaphragm big. metal disk toward
carb(also important) and finally the cover.
10. I installed the carb back on the machine carefully lining up the gasket and tightened it back down.
11. Install the air filter, cover, fuel and return line.
12. The carb may need to be properly adjusted after the repair is made.
Did you find this story helpful?
Thanks for voting and helping fellow customers!
Echo trimmer was running erratic.
Brad - June 26, 2019
Tool Type
Trimmer
Difficulty
Easy
Time
15-30 minutes
Tools Used
Screwdriver
Parts Used
Removed carb and disassembled/cleaned.Replaced diaphragm and reed assy. Reassembled and reinstalled carb.
Did you find this story helpful?
Thanks for voting and helping fellow customers!
overhauled carb
Leroy - June 11, 2019
Tool Type
Trimmer
Difficulty
Medium
Time
15-30 minutes
Tools Used
Screwdriver, Pliers
cleaned carb parts & reassembled using new kit and air purge body assembly
Did you find this story helpful?
Thanks for voting and helping fellow customers!
Trimmer would not start
John - May 16, 2019
Tool Type
Trimmer
Difficulty
Easy
Time
15-30 minutes
Tools Used
Screwdriver
Parts Used
1. Emptied fuel
2. Removed air filter
3. Removed filter housing and carburetor
4. Removed fuel pump cover and replaced pump diaphragm and gasket. Reinstall cover
5. Removed primer housing. Replaced diaphragm and gasket. Reinstalled primer housing
6. Reinstalled carburetor and filter housing
7. Reinstalled air filter
8. Ops checked
Did you find this story helpful?
Thanks for voting and helping fellow customers!
Trimmer stopped running
Rick - January 20, 2019
Tool Type
Trimmer
Difficulty
Easy
Time
15-30 minutes
Tools Used
Screwdriver
Parts Used
Watched the Ereplacementparts video for my model carburetor and repaired my trimmer according to the easy to follow instructions. It was as simple as that. The trimmer runs better than it has in years. The diaphragm and Reed valve were totally dried out. Thanks Ereplacement!
Did you find this story helpful?
Thanks for voting and helping fellow customers!
Would not start
David - October 31, 2018
Tool Type
Trimmer
Difficulty
Easy
Time
15-30 minutes
Tools Used
Screwdriver
Took carburetor apart, cleaned, assembled new parts and started right up//// had considered buying a new weed eater but realized how easy it was to rebuild the old one and saved a lot of money. Also you can you tube it to see exactly how to repair it and what to look for. I have ordered from replacement parts and always got my order quickly and correct. Thanks, David
Did you find this story helpful?
Thanks for voting and helping fellow customers!
Load More Install Stories
OEM stands for Original Equipment Manufacturer and means the part you’re buying is sourced directly from the manufacturer who made your product. At eReplacementParts, we sell only genuine OEM parts, guaranteeing the part you’re purchasing is of better design and of higher quality than aftermarket parts.
Our product descriptions are a combination of data sourced directly from the manufacturers who made your product as well as content researched and curated by our content & customer service teams. This content is edited and reviewed internally before being made public to customers.
Our customer service team are at the ready daily to answer your part and product questions. We have a dedicated staff with decades of collective experience in helping customers just like you purchase parts to repair their products.
All our part reviews are solicited directly from other customers who have purchased this exact part. While we moderate these reviews for profanity, offensive language or personally identifiable information, these reviews are posted exactly as submitted and no alterations are made by our team.
All our customer repair instructions are solicited directly from other customers just like you who have purchased and replaced this exact part. While we moderate these reviews for profanity, offensive language or personally identifiable information, these reviews are posted exactly as submitted and no alterations are made by our team.
Based on data from past customer purchasing behaviors, these parts are most commonly purchased together along with the part you are viewing. These parts may be necessary or helpful to replace to complete your current repair.
All our installation videos are created and produced in collaboration with our in-house repair technician, Mark Sodja, who has helped millions of eReplacementParts customers over the last 13 years repair their products. Mark has years of experience in selling and repairing both commercial and residential products with a specialty in gas-powered equipment.
This data is collected from customers who submitted a repair instruction after replacing this exact part. Customers can rate how easy the repair was to complete and how long it took. We aggregate this data to provide a repair rating that allows customers to quickly determine the difficulty and time needed to perform their own repair.