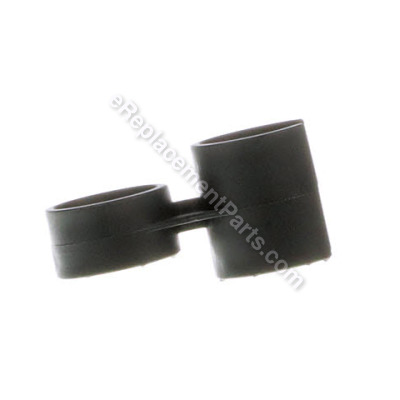
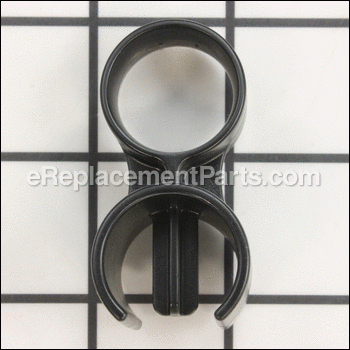
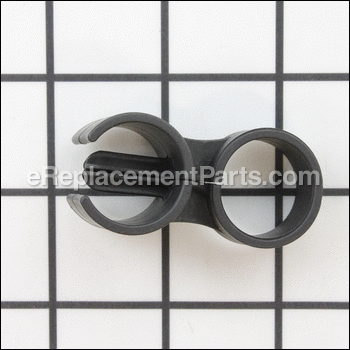
This item is an authentic Toro replacement part that has been OEM sourced to be used with walk-behind lawnmowers. The plastic cable guide attaches to the handle assembly and is used to keep the control cable out of the way by securing it in the middle of the handle. This item is priced as a single part.
Cable Guide 114-7988
OEM part for: Toro
Part Number: 114-7988
Jump To:
Frequently Purchased Together ?
Compatibility
This Cable Guide will fit the following 857 machines. Confirm this part works with your model, and view the detailed model diagrams and repair help we have to offer.
This item works with the following types of products:
- Lawn Mower Parts
This part replaces obsolete part #: 106-6805
Repair Videos ?
Customer Part Reviews ?
- 1
Questions & Answers ?
Our customer Service team is at the ready daily to answer your part and product questions.

Ask our Team
We have a dedicated staff with decades of collective experience in helping customers just like you purchase parts to repair their products.
Does this fit my product?Questions & Answers for Cable Guide
Customer Repair Instructions ?
All our customer repair instructions are solicited directly from other customers just like you who have purchased and replaced this exact part.
Blades slow to engage and bogged in heavy grass. Drive was also slipping.
Tool Type
Lawn Mower
Difficulty
Easy
Time
30-60 minutes
Tools Used
Socket set
Loosened, but did not fully remove, 2 v-belt retainer bars under deck.
Removed v-belt retainer on top of deck (2 bolts).
Removed and replaced blade and drive v-belts.
Retightened v-belt retainer bars under deck.
Replaced v-belt retainer on top of deck.
Removed and replaced tensioning springs.
Replaced belts cover.
Lawn mower assist wore out
Tool Type
Lawn Mower
Difficulty
Medium
Time
30-60 minutes
Tools Used
Screwdriver, Pliers, Socket set, Wrench Set, Nutdriver
2. Replaced belt & Mower assist.
3. Replaced mower blade
4. Adjusted the mower assist.
cable broke after stop-pivot was broken 1st time
Tool Type
Lawn Mower
Difficulty
Easy
Time
Less than 15 minutes
Tools Used
Pliers, Wrench Set
all good and easy
Gas cap and cable guide broken
Tool Type
Lawn Mower
Difficulty
Easy
Time
Less than 15 minutes
Tools Used
, None
Parts Used
Oil was leaking from the Oil Pan Gasket.
Tool Type
Lawn Mower
Difficulty
Medium
Time
1-2 hours
Tools Used
Screwdriver, Socket set, Nutdriver, Torque Wrench
2. I drained the Fuel from the gas tank.
3. I drained the remaining oil from the crankcase
4. I disconnected the cable from the engine
5. I removed the blade and the blade clutch (I used a wheel puller)
6. I removed the engine to bring it to a workspace.
7. I cleaned the shaft so that the pan could be pulled off past it.
8. Using an 8mm socket wrench I removed the 7 bolts holding the pan in place.
9. I pulled the pan off the bottom of the crankshaft.
10. I removed the old seal cleaned all of the mateing surfaces and installed a new gasket using gasket compound.
11. I hand tightened the pan bolts in a cross cross pattern and then torqued them to spec.
12. I oiled the new shaft seal and drove it into place.
13. I reinstalled the engine in the reverse order of removal.
14. I adjusted the cable for the drive belt and installed the new cable guide and training shield.
15. I put oil in the crankcase, fuel in the tank and tried to start the engine.
16. I pulled the starter rope 15 to 20 time and then remembered to put the spark plug cable back on .
17. I mowed my yard and parked the mower over paper towels. There were no leaks evident the next day.
Switch mount broke off handle
Tool Type
Lawn Mower
Difficulty
Medium
Time
Less than 15 minutes
Tools Used
Screwdriver
Parts Used
Traction cable broke
Tool Type
Lawn Mower
Difficulty
Medium
Time
30-60 minutes
Tools Used
Screwdriver, Socket set, Nutdriver
replaced drive belt...removed lower end of traction cable...top end of
same..replaced cable anchor /guide. Adjusted cable..
Speedy service, good price, correct parts...good job you guys. Will surely
use your services again. Thanks.
Traction Cable broke near the handle, and the Cable Guide also was broken
Tool Type
Lawn Mower
Difficulty
Medium
Time
1-2 hours
Tools Used
Screwdriver, Pliers, Socket set
Parts Used
1. Remove trim bag or mulching plug.
2. Remove two screws that hold plastic cover on rear of mower platform.
3. Loosen nut that holds the traction cable clamp near the mower handle.
4. (First, I took a picture so I would recall the direction of the spring hook in the lever mechanism of the drive belt.) Unhook the spring at the end of the cable from the lever mechanism of the drive belt.
5. The Traction Cable is locked-in-place by threading through a guide hole; I used needle-nose pliers to squeeze the tabs in, in order to slide the cable back out of that hole. This looks to be a standard feature to lock-in-place when a cable is threaded through a hole, but this was the first time I had worked on a cable; knowing how to disengage this lock in order to pull the cable back through the hole is very important.
6. I now paused in the Traction Cable removal process, in order to begin the Cable Guide replacement process. I disengaged the S-link at the engine end of the Brake Cable.
7. In order to pull the Brake Cable through the hole in the bracket, I used needle-nose pliers to squeeze the tabs in.
8. I slid the broken Cable Guide off of the two cables.
9. I snapped the post of the new Cable Guide into place on the Lower Tube.
10. I threaded the Brake Cable through the Cable Guide, then through the hole where the tabs will lock, and reattached the S-link.
11. Remove old traction cable.
12. The new Traction Cable needs the spring attached to the drive-belt lever, and the cable lock (with the tabs) needs to be pulled through that hole. (I don't remember which one I did first, or if it matters.)
13. Route new cable through the Cable Guide, by the same path the old one was routed.
14. Attach the cable to the traction lever near the mower handle.
15. Tighten the cable clamp near the mower handle.
Note: Test the engagement of the drive belt and adjust the cable position under the clamp so the the belt does not engage when relaxed and engages well when depressed.
16. Replace the plastic cover and screws.
17. Replace the mulch plug or trim bag.
Purchased an old-but-still-in great-shape Toro recycler from a friend. It had been stored for a long period of time so it didn't want to start.it until it had some work done on it.
Tool Type
Lawn Mower
Difficulty
Medium
Time
30-60 minutes
Tools Used
Screwdriver, Pliers, Wrench Set, Vise grip
2-One of the cable guides was broken. Disconnected the drive cable and slipped on the new cable guide.
3-Torsion spring was broken so I replaced that by watching a Youtube of the repair. Good thing, this repair was not intuitive and the video showed the "trick" of how to get the bar out of the handle. Still required some strength and patience, even knowing how to do it.
4-Old air filter was filthy so replaced that. I had purchased one at Walmart that looked exactly the same but didn't fit. The one from eReplacements was a genuine Toro unit and worked great. Thanks.
Starts first time after priming and runs great.
Backed vehicle over lawn mower
Tool Type
Lawn Mower
Difficulty
Medium
Time
1-2 hours
Tools Used
Screwdriver, Socket set
OEM stands for Original Equipment Manufacturer and means the part you’re buying is sourced directly from the manufacturer who made your product. At eReplacementParts, we sell only genuine OEM parts, guaranteeing the part you’re purchasing is of better design and of higher quality than aftermarket parts.
Our product descriptions are a combination of data sourced directly from the manufacturers who made your product as well as content researched and curated by our content & customer service teams. This content is edited and reviewed internally before being made public to customers.
Our customer service team are at the ready daily to answer your part and product questions. We have a dedicated staff with decades of collective experience in helping customers just like you purchase parts to repair their products.
All our part reviews are solicited directly from other customers who have purchased this exact part. While we moderate these reviews for profanity, offensive language or personally identifiable information, these reviews are posted exactly as submitted and no alterations are made by our team.
All our customer repair instructions are solicited directly from other customers just like you who have purchased and replaced this exact part. While we moderate these reviews for profanity, offensive language or personally identifiable information, these reviews are posted exactly as submitted and no alterations are made by our team.
Based on data from past customer purchasing behaviors, these parts are most commonly purchased together along with the part you are viewing. These parts may be necessary or helpful to replace to complete your current repair.
All our installation videos are created and produced in collaboration with our in-house repair technician, Mark Sodja, who has helped millions of eReplacementParts customers over the last 13 years repair their products. Mark has years of experience in selling and repairing both commercial and residential products with a specialty in gas-powered equipment.
This data is collected from customers who submitted a repair instruction after replacing this exact part. Customers can rate how easy the repair was to complete and how long it took. We aggregate this data to provide a repair rating that allows customers to quickly determine the difficulty and time needed to perform their own repair.


