


Why Read This Article?
Finish Nailer Repair - Replacing the Driver Guide (Ridgid Part # 79004001022)
Article Breakdown
Finish Nailer Repair - Replacing the Driver Guide (Ridgid Part # 79004001022)
Video

Tools & Materials
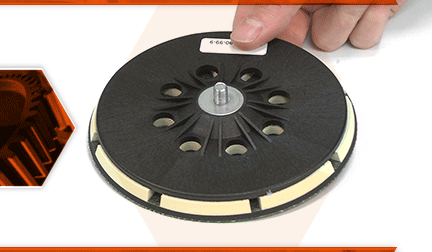
The sanding pad both holds the sandpaper and provides a flat surface for sanding. This pad uses hook-and-loop paper and has holes to work with dust collection. Over time, the pad will wear out. It will become nicked around the edge if it is struck against something while sanding. The hook-and-loop surface will wear away and no longer hold the paper. The hook-and-loop will wear away much faster if pressure is applied to the sander while it is used.
Let's get started.
REMOVING THE SANDING PAD
1. Pull the dust shroud up so you can see the spindle.
2. Rotate the spindle until you locate the hole that will allow you to lock the spindle in place.
3. Lock the spindle using the tool that came with the sander. If you've lost this, you could also use a long hex wrench.
4. Insert the pin into the hole on the spindle.
5. Remove the old pad.
INSTALLING THE NEW SANDING PAD
6. Install the new pad by threading it back into the spindle.
7. Tighten the pad firmly.
