


Why Read This Article?
Finish Nailer Repair - Replacing the Driver Guide (Ridgid Part # 79004001022)
Article Breakdown
Finish Nailer Repair - Replacing the Driver Guide (Ridgid Part # 79004001022)
Video

Tools & Materials
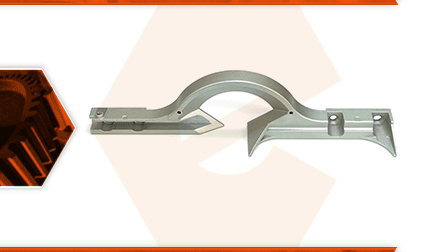
The fence on your miter saw is made up of two components: the lower fence and an adjustable (sliding) upper fence. The lower fence is the foundation of the fence assembly. It is precisely milled so your saw can make accurate cuts. It attaches to the saw's base and is aligned to the blade for accuracy. The fence can become bent or cracked if something is hit against it, or if there is a major kickback. A damaged fence will result in inaccurate cuts.
Let's get started.
REMOVING THE FENCE 1. Unplug the saw.
a. Disconnect the power cord from the power supply.
2. Remove the sliding fence.
a. Loosen and remove the adjustment knob.
b. Extend and remove the sliding fence from the saw.
3. Remove the fence.
a. Remove the (4) bolts securing the fence to the base.
b. Remove the fence from the saw.
INSTALLING THE NEW FENCE
4. Install the fence.
a. Install the new fence onto the base.
b. Align the groove on the fence with the milled edge on the base.
c. Install (but do not fully tighten) the screws to hold the fence in place.
5. Square the fence.
a. Rotate and lock the saw in the forward (zero) position.
b. Lower the blade.
c. Place one edge of the square against the side of the blade and the other edge of the square against the fence.
d. Adjust the fence (if necessary) to achieve a perfect 90-degree angle (between the fence and the blade).
e. Tighten the (4) screws to secure the fence.
REASSEMBLING THE UNIT
6. Reinstall the sliding fence.
a. Install the sliding fence onto the new lower fence.
b. Install and tighten the adjustment knob.
